Netframe Manager allows administrators to create users, assign them to groups, and configure fine-grained permissions and access control for both groups and individual users.
- Note: accessing and modifying IAM and Permissions settings requires an account with the
manager.readandmanager.configprivileges (or the Full Access system role) to be added as a permission to the Netframe Manager object. See Permissions and Roles below for more info.- The default
administratoraccount configured during the Netframe Manager installation has the Full Access system role, and can access and modify everything in Netframe
- The default
¶ Identity and Access Management
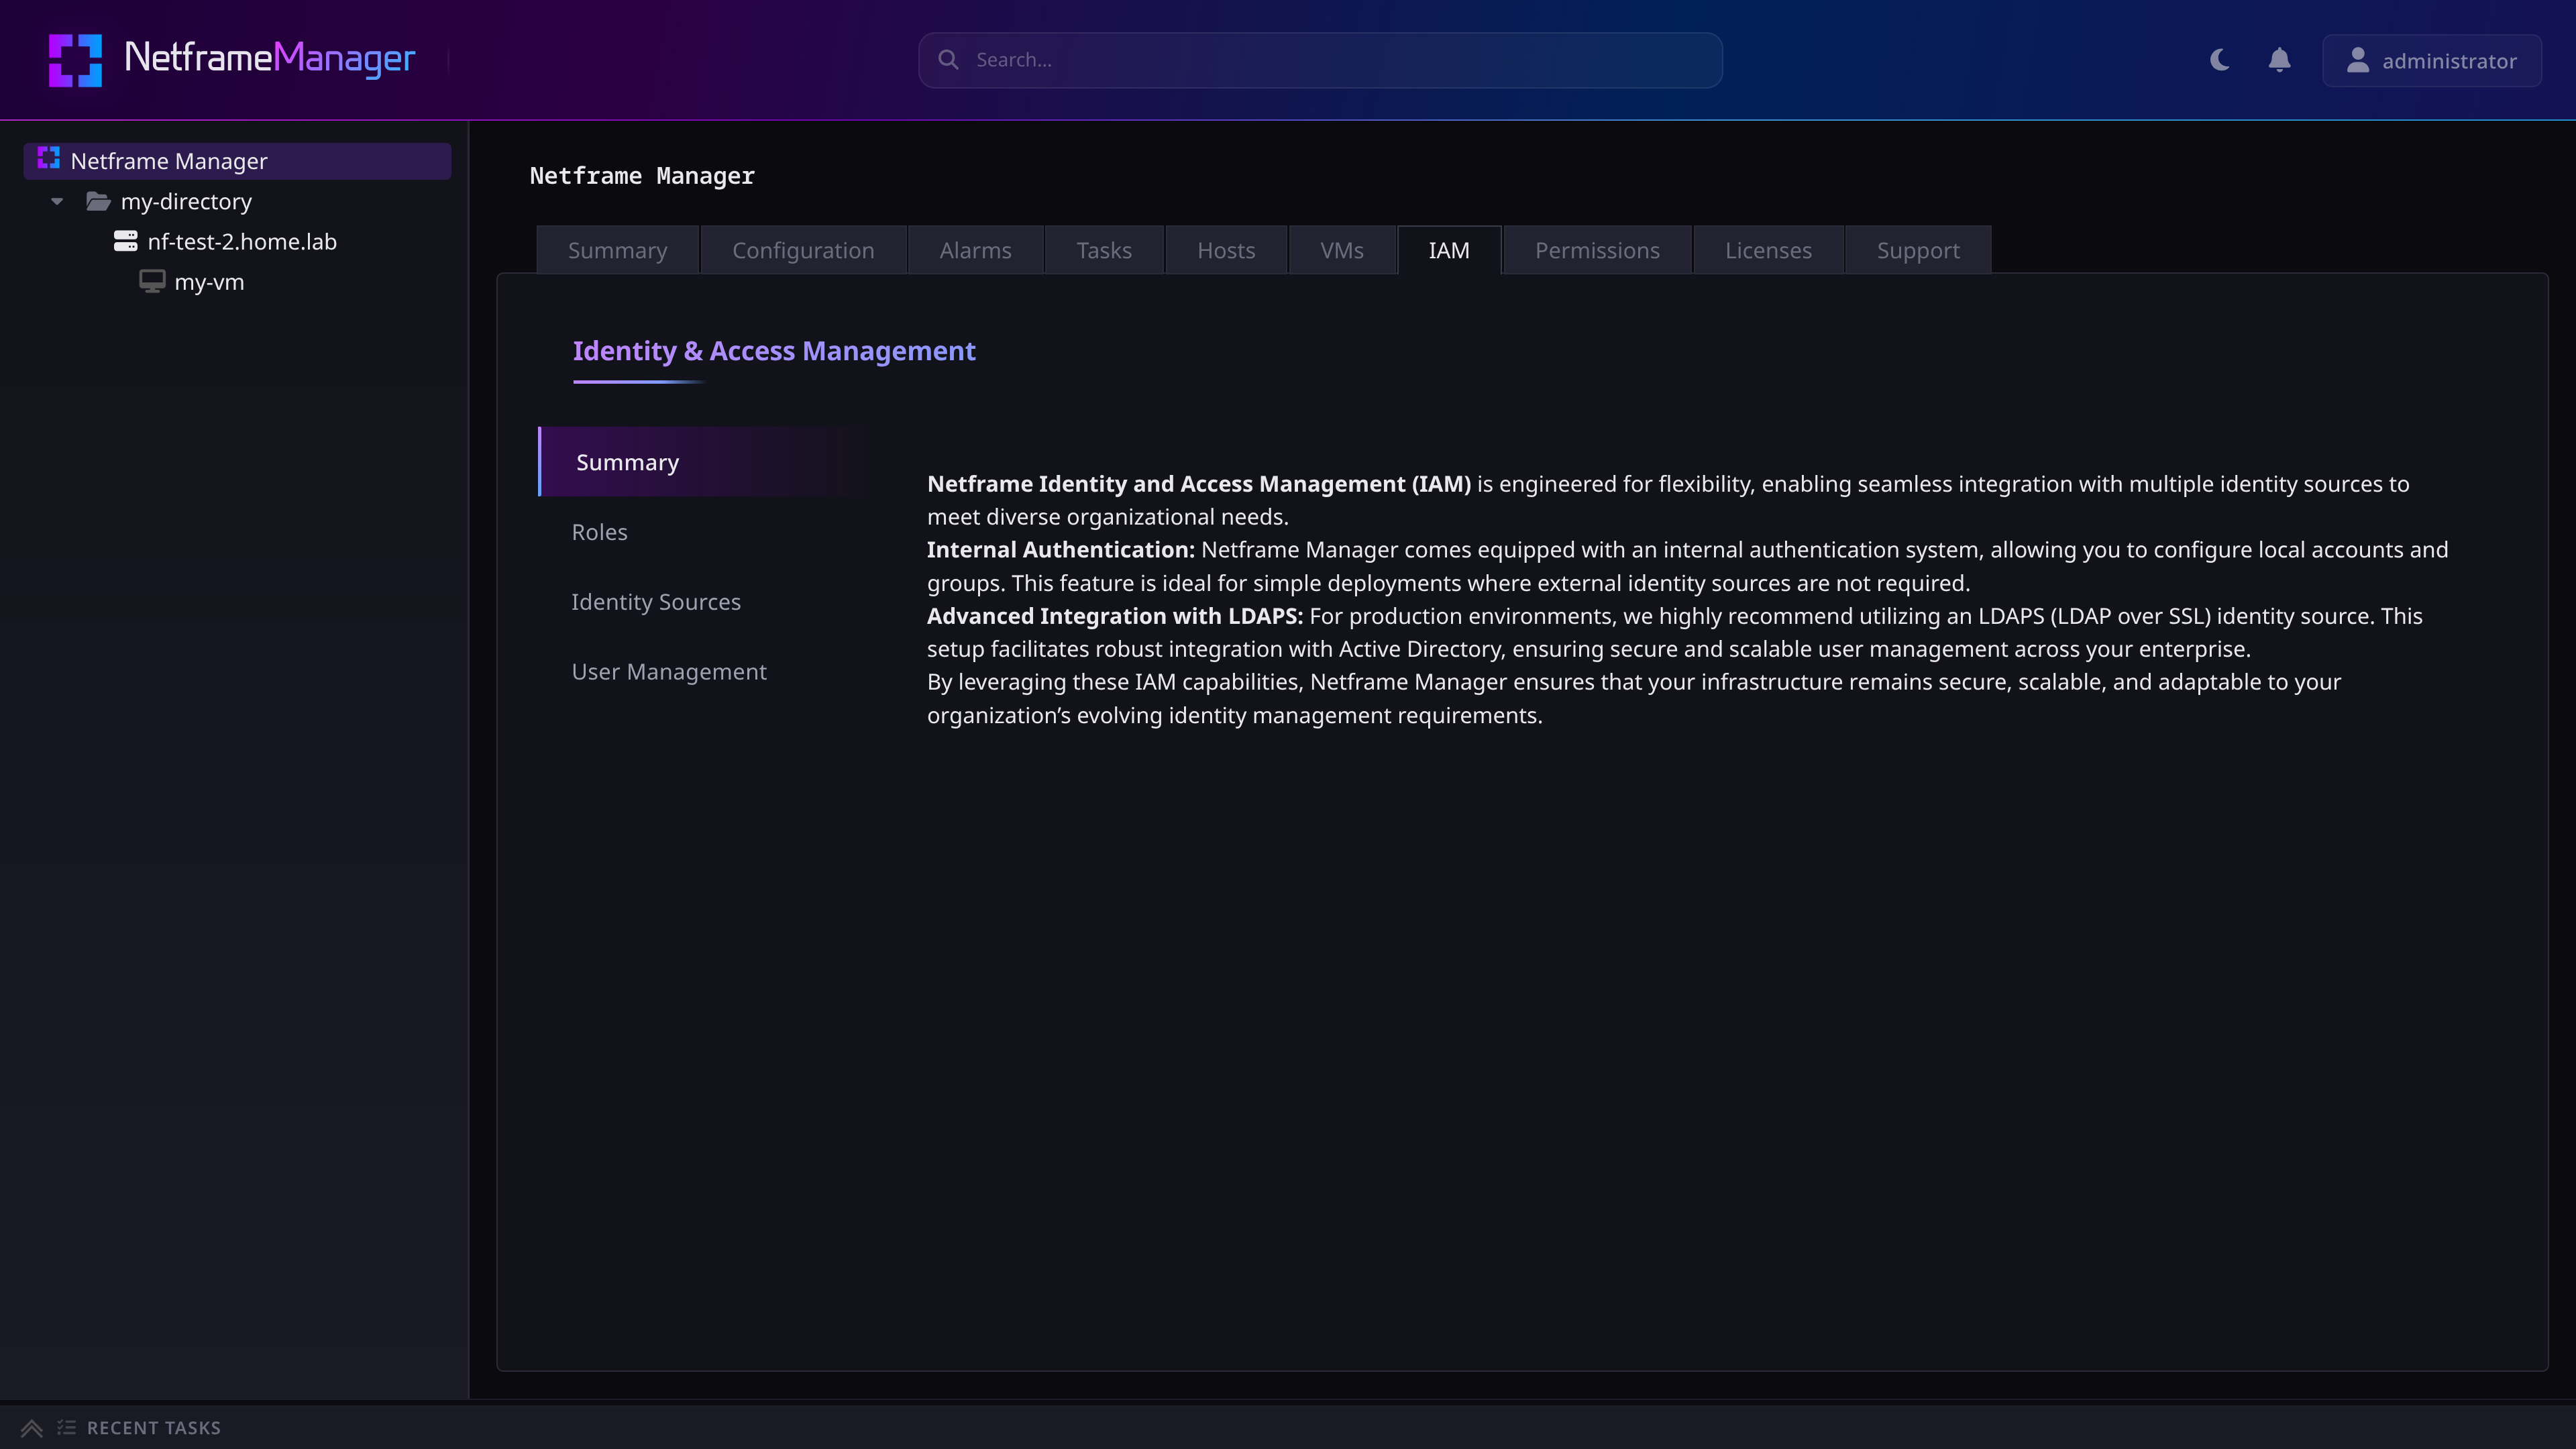
Users, groups, and roles can be viewed and managed in the Netframe Manger object's IAM tab.
¶ Users
To manage users, go to the IAM tab's User Management subtab. User accounts will be listed at the top of the tab.
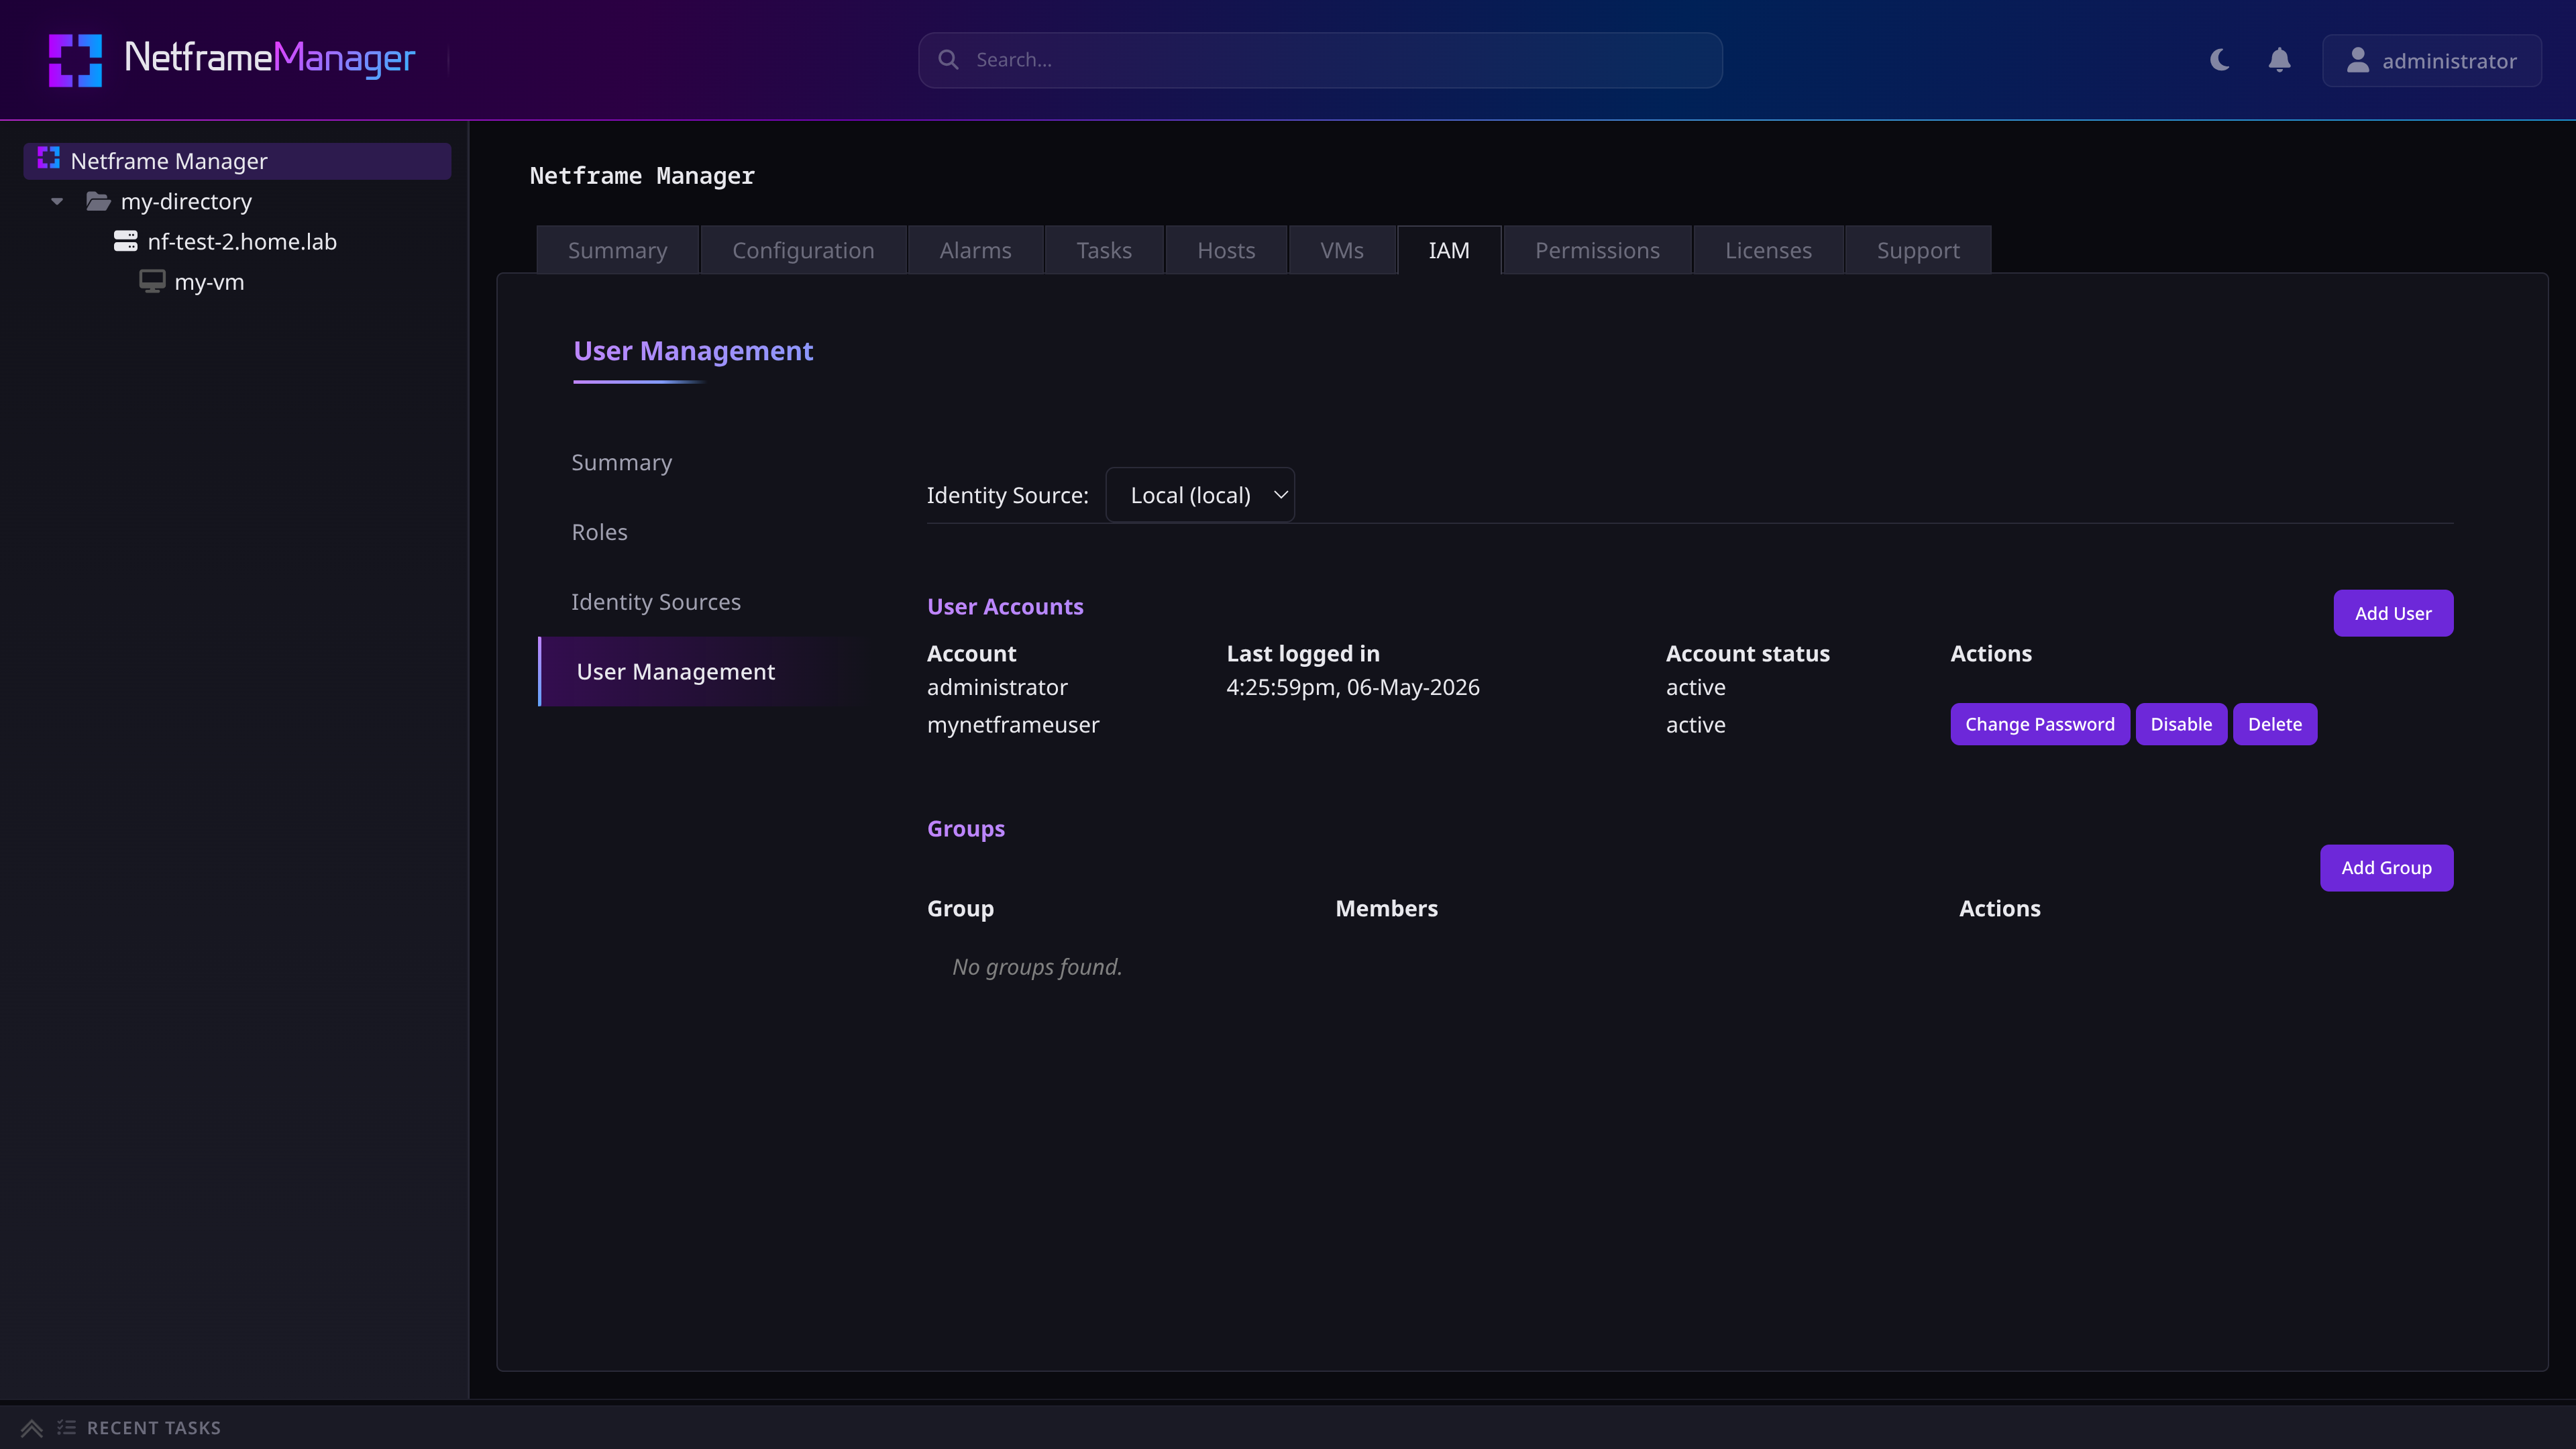
Here, you can:
- Create a new user
- Disable or delete existing users
- Change a user's password
¶ Creating new users
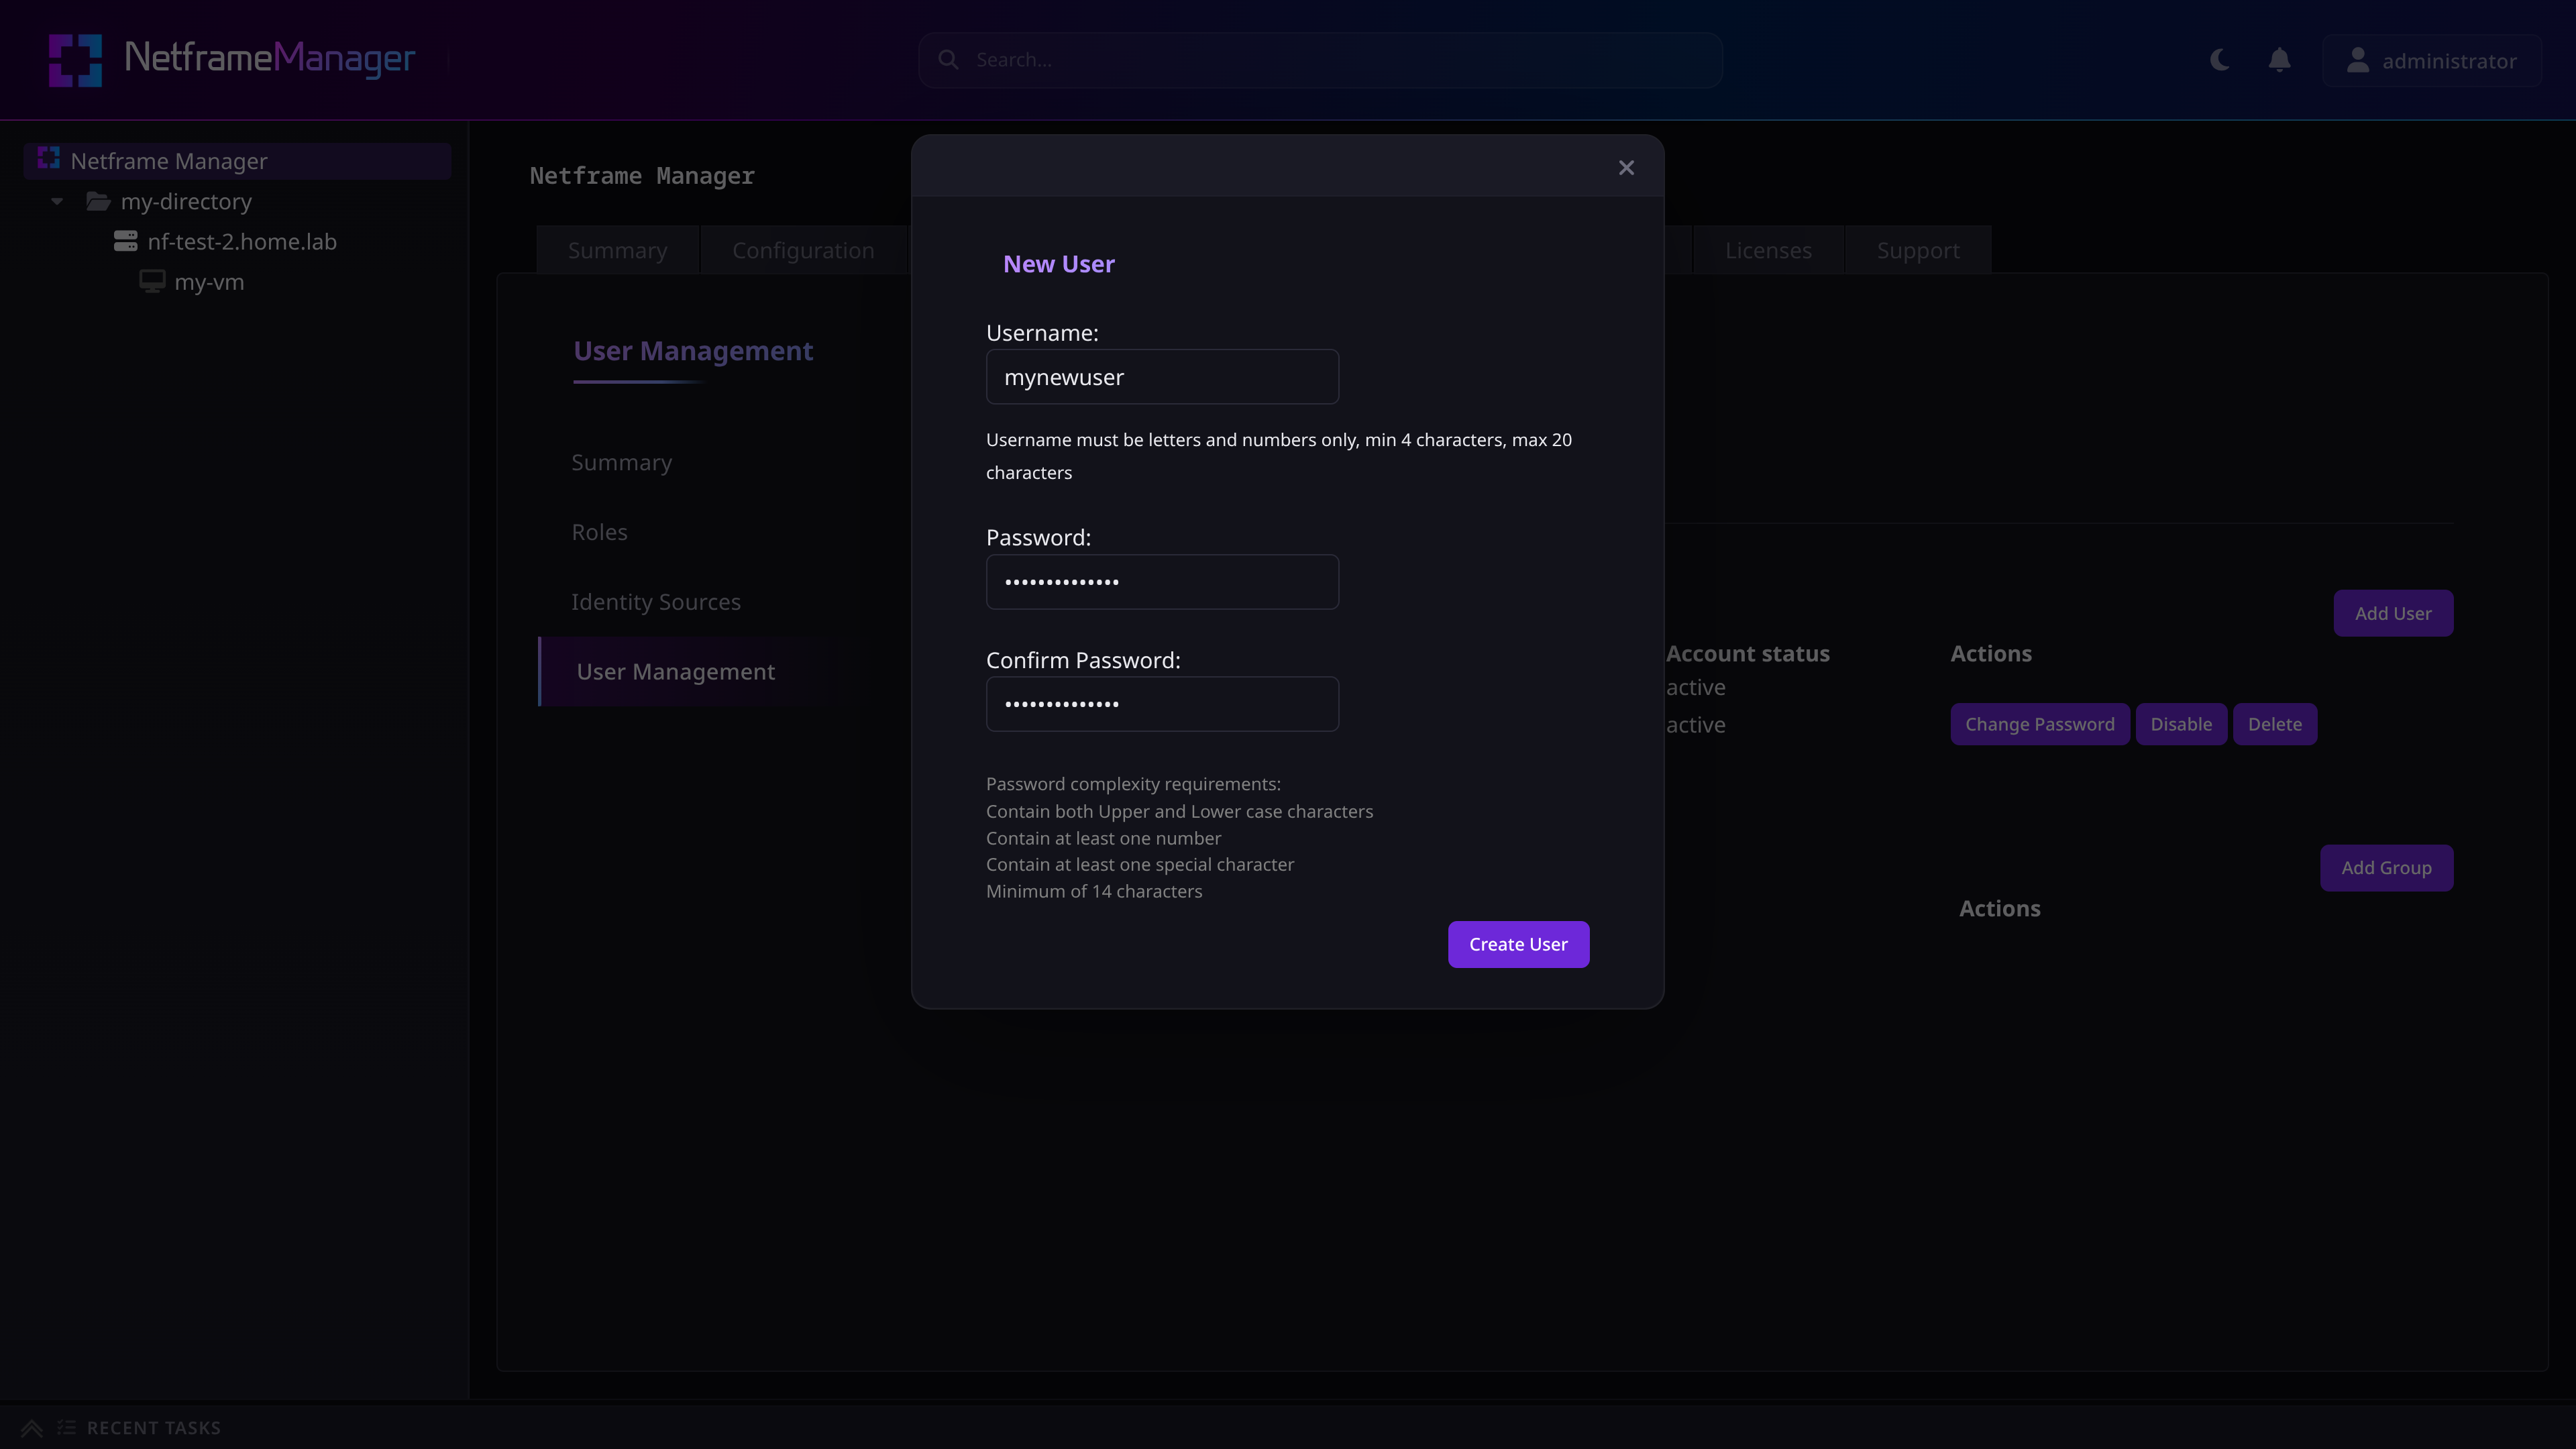
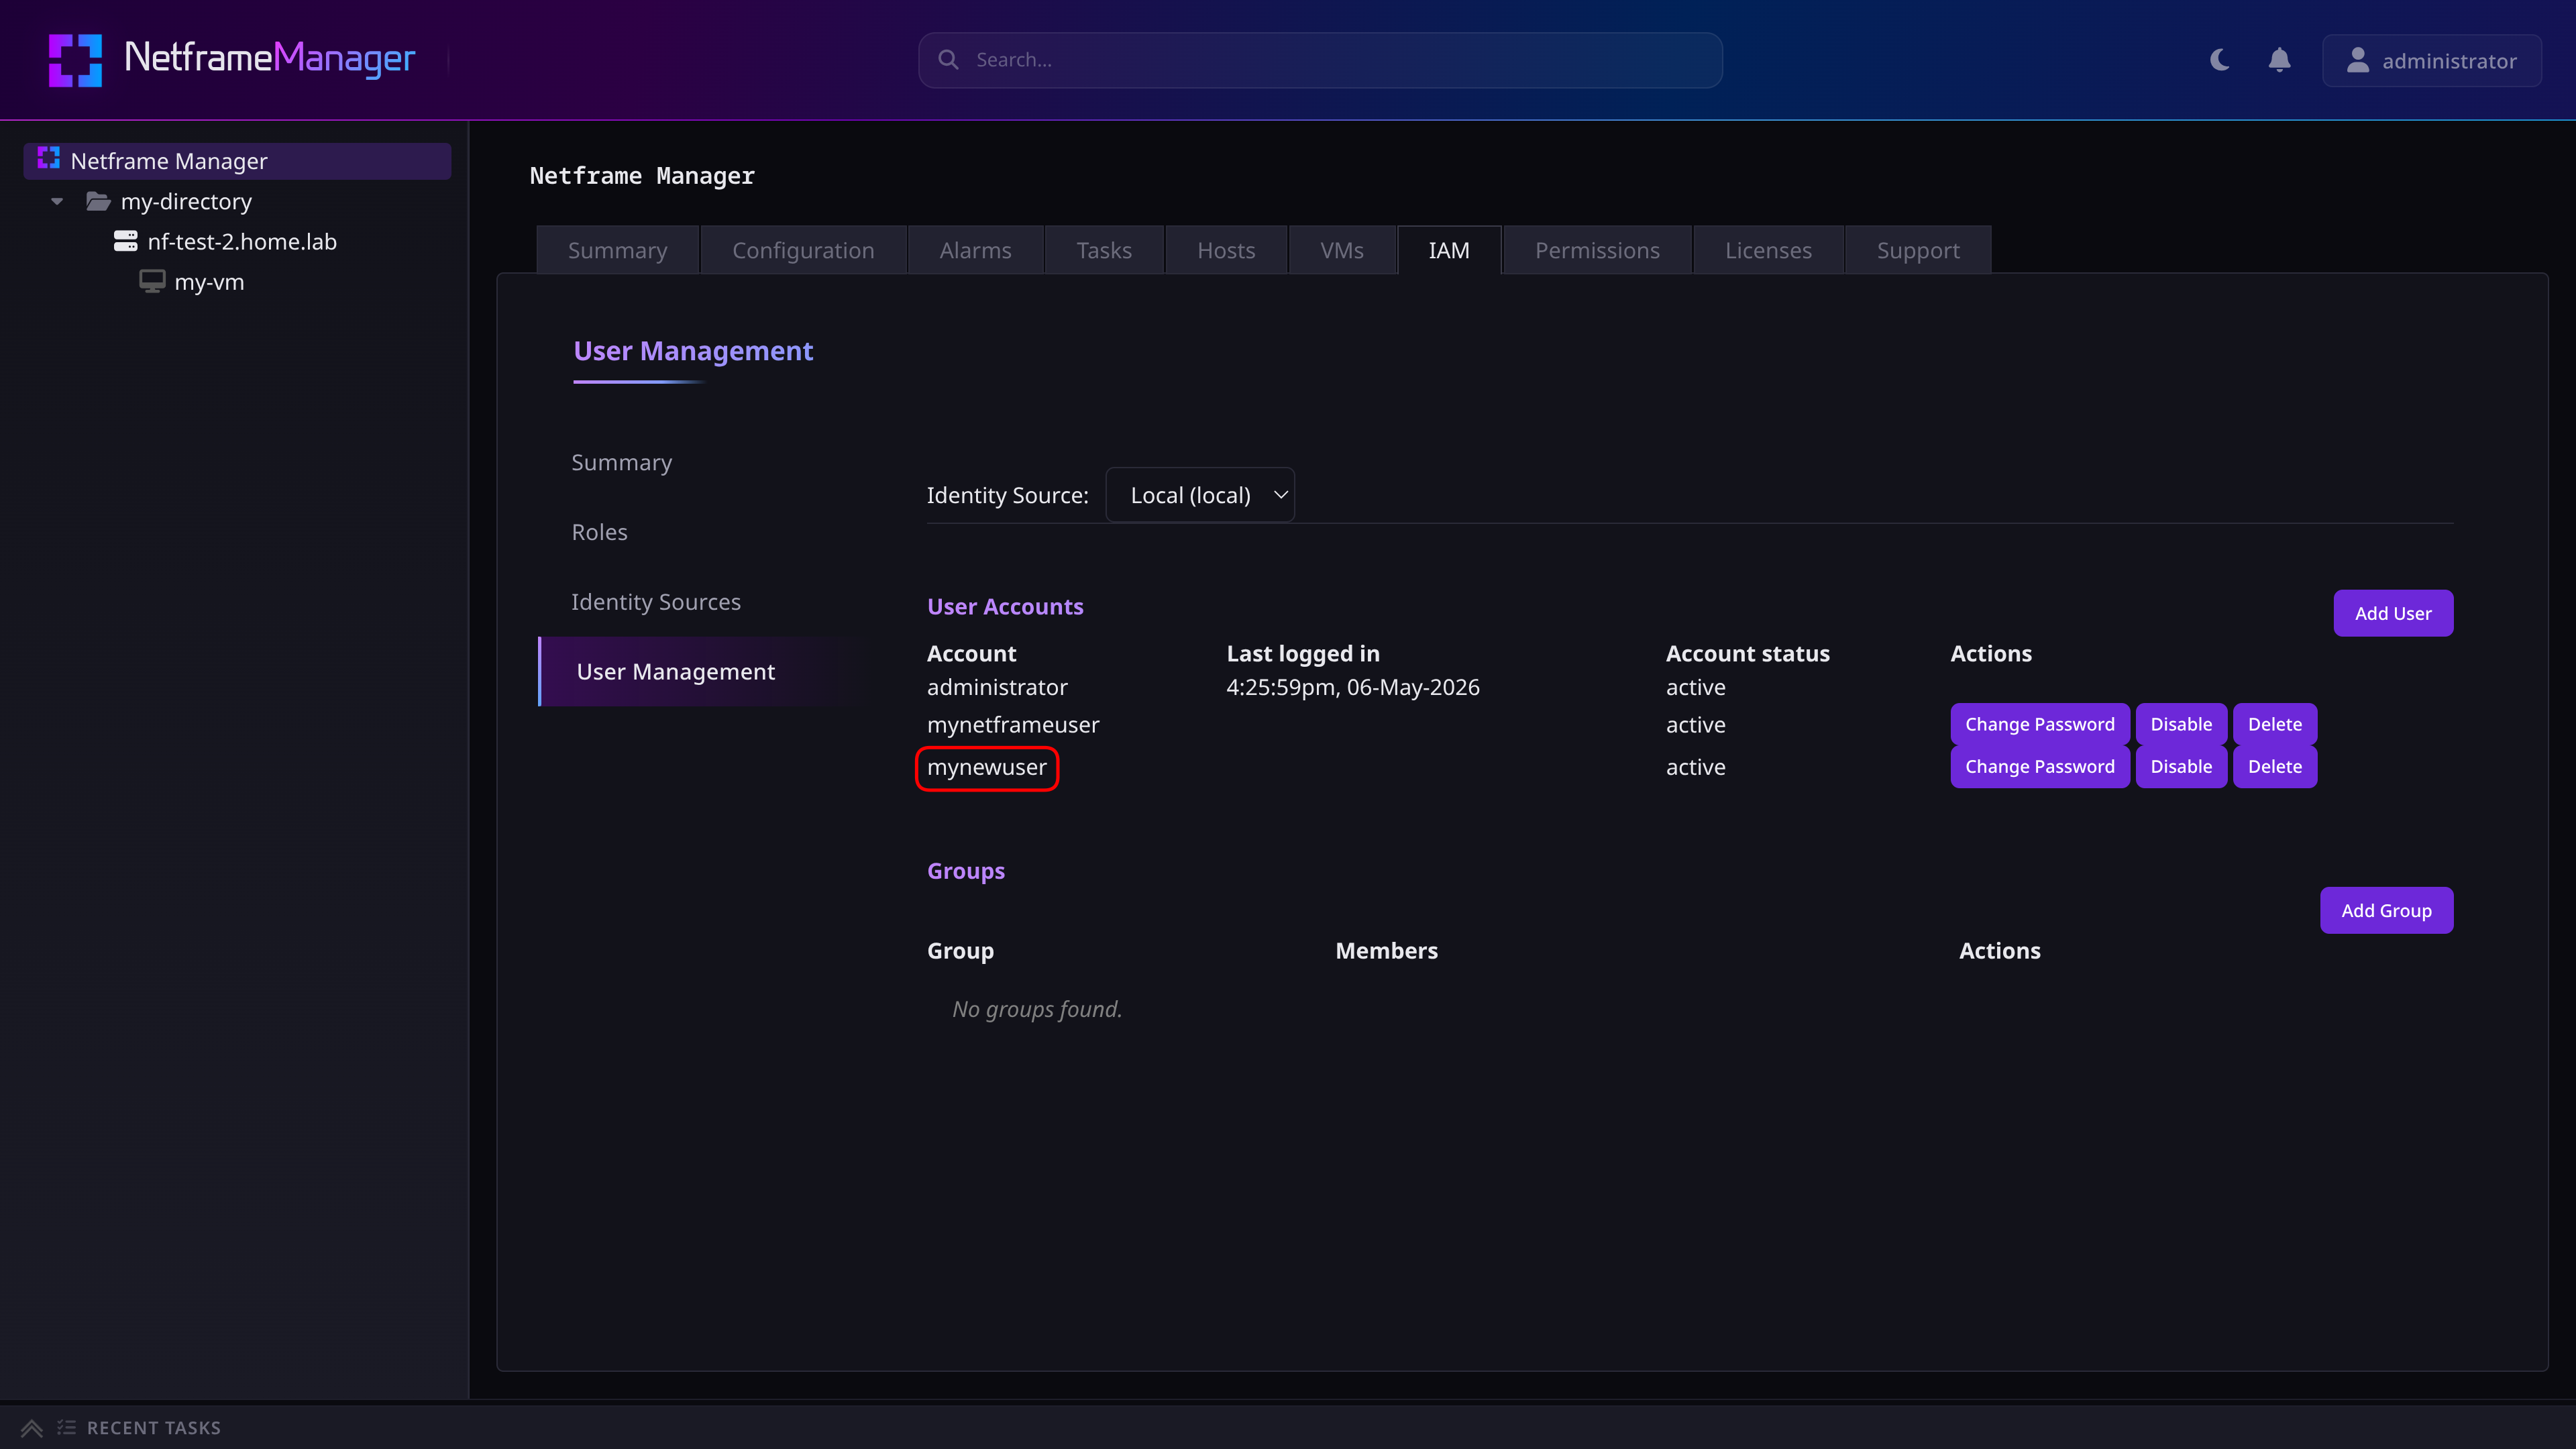
To create a new user, press the Add User button. You will then be prompted to enter a username and password for the new user.
- The username must be between 4 and 20 characters (inclusive), and must contain only letters and numbers
¶ Password Requirements
When creating a new user or changing an existing user's password, the password complexity requirements are:
- Contains upper and lower case characters
- Contains at least one number
- Contains at least one special character
- Minimum length of 10 characters
¶ Groups
To avoid manually setting permissions for each individual user, users can be assigned to groups, which in turn extend their permissions to all users in the group.
To manage groups, go to the IAM tab's User Management subtab. Groups will be listed at the bottom of the tab.
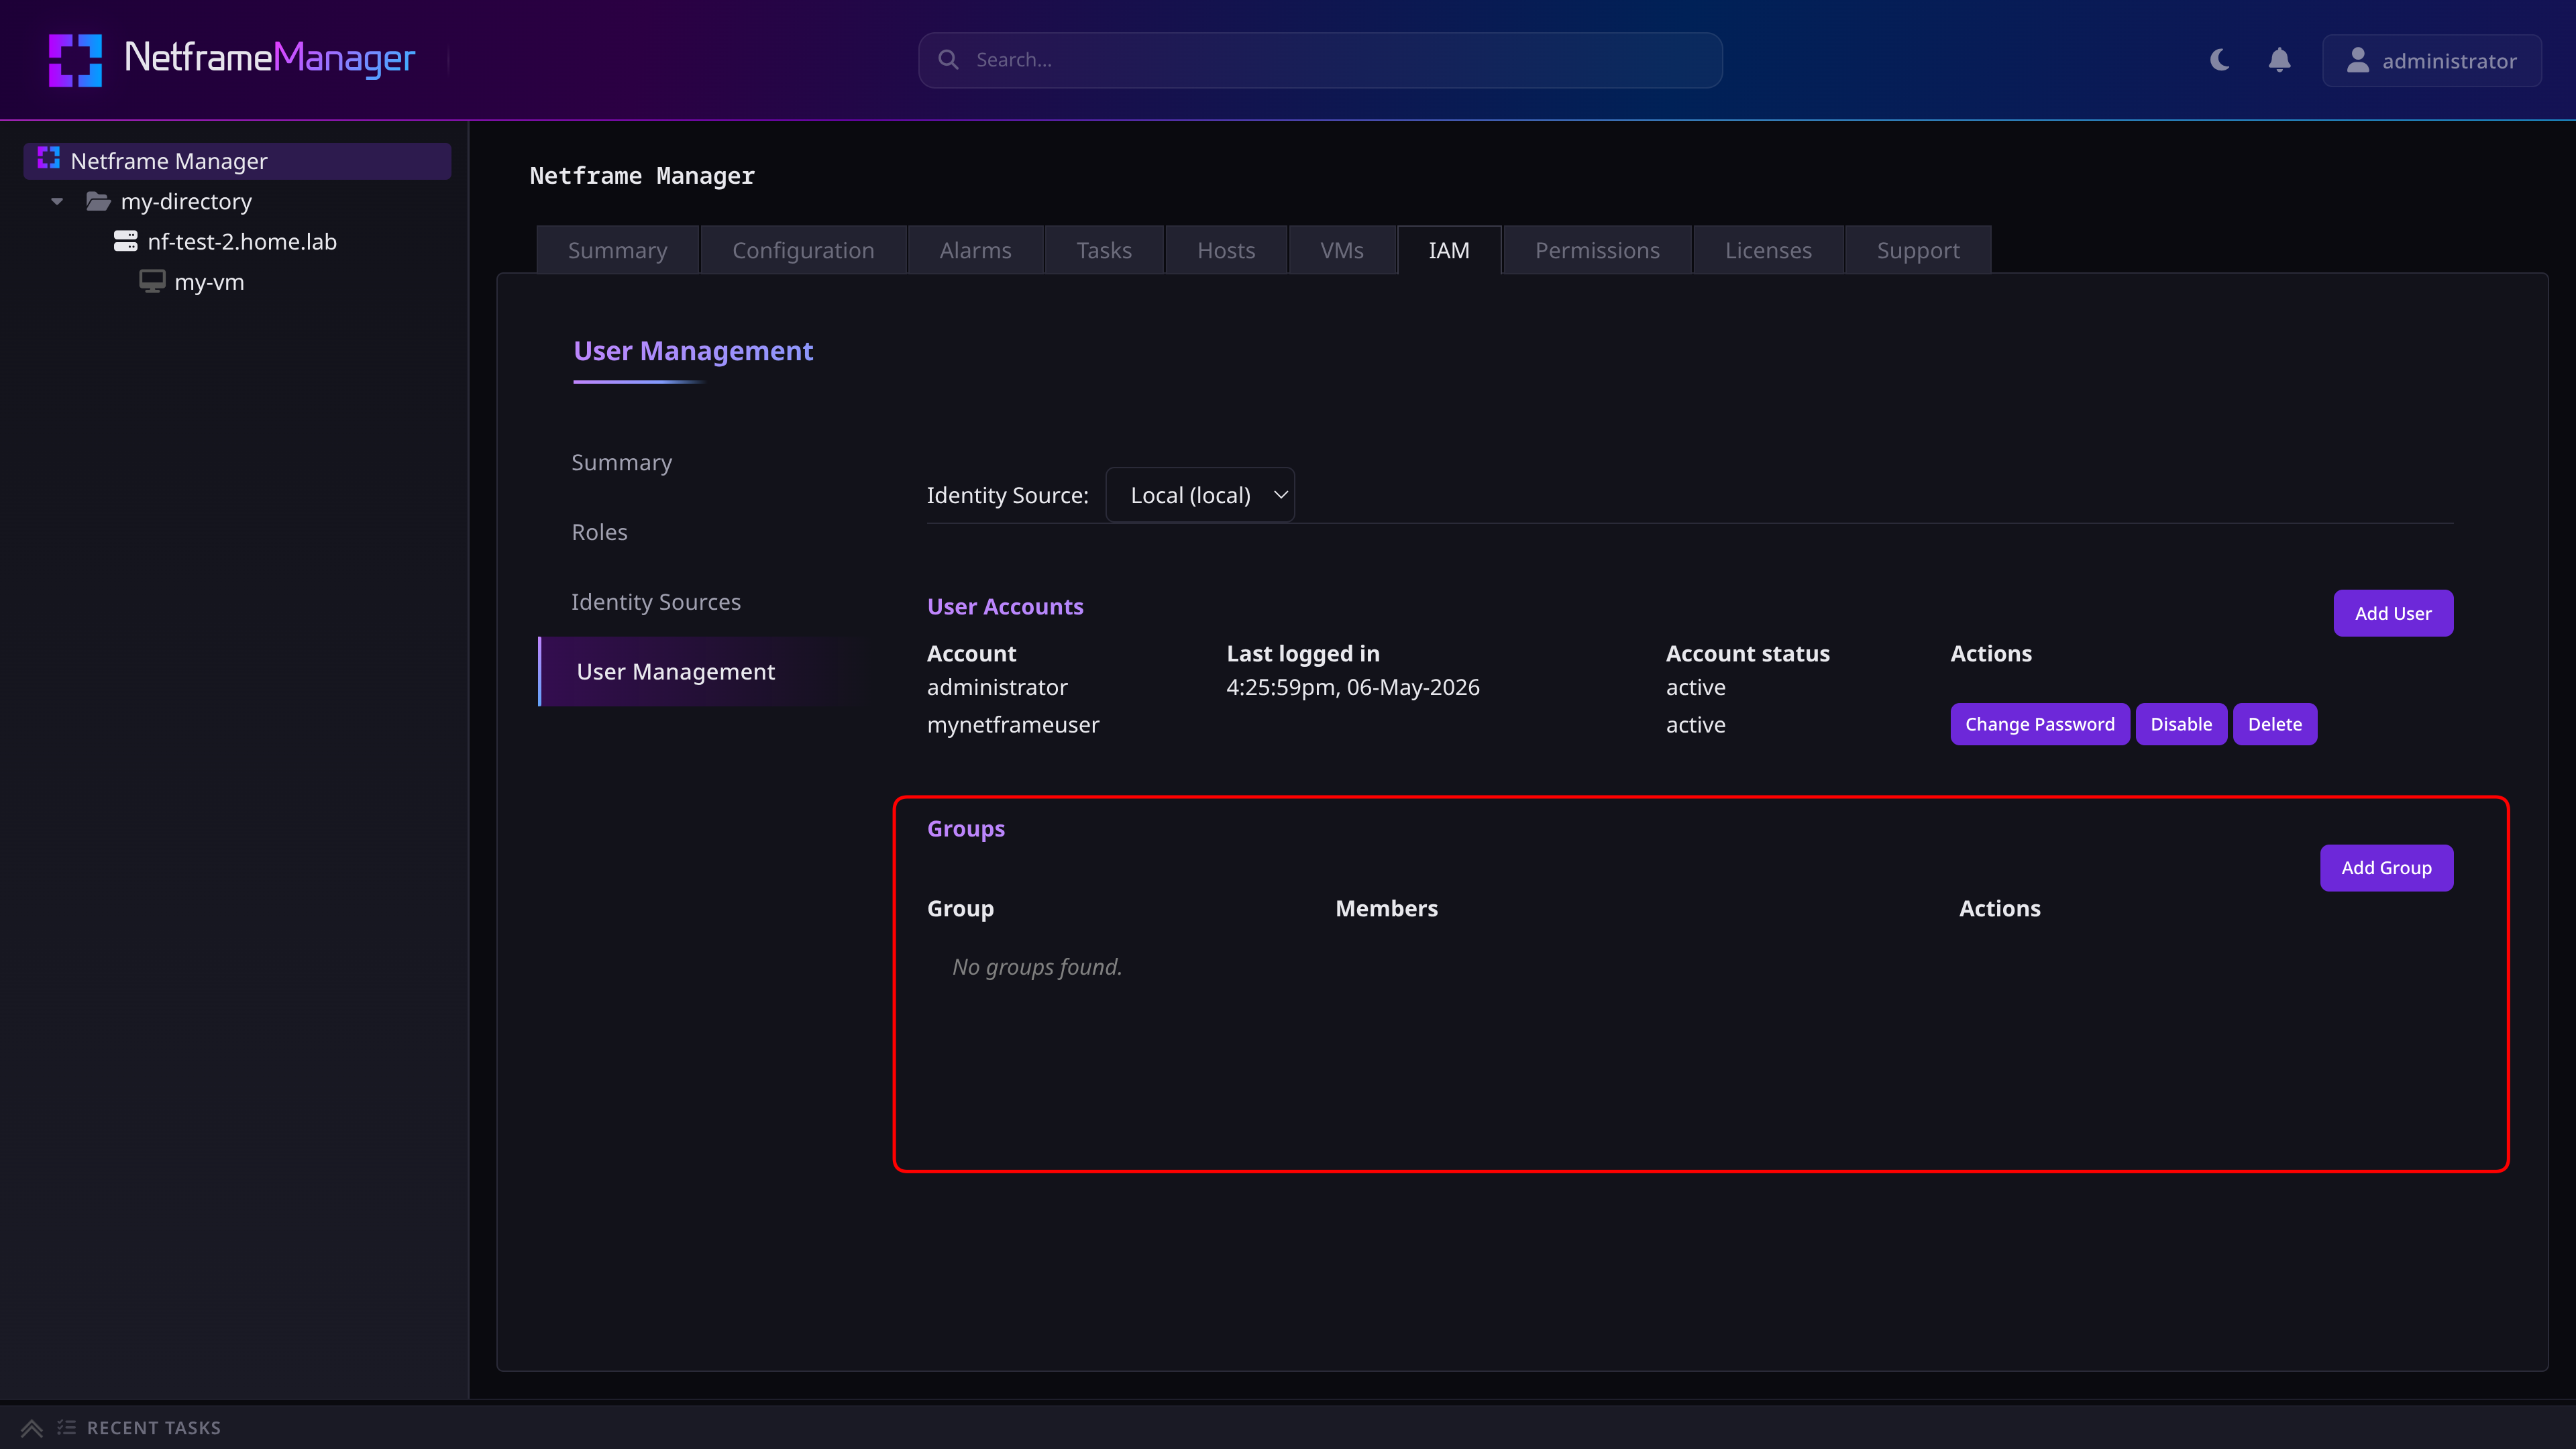
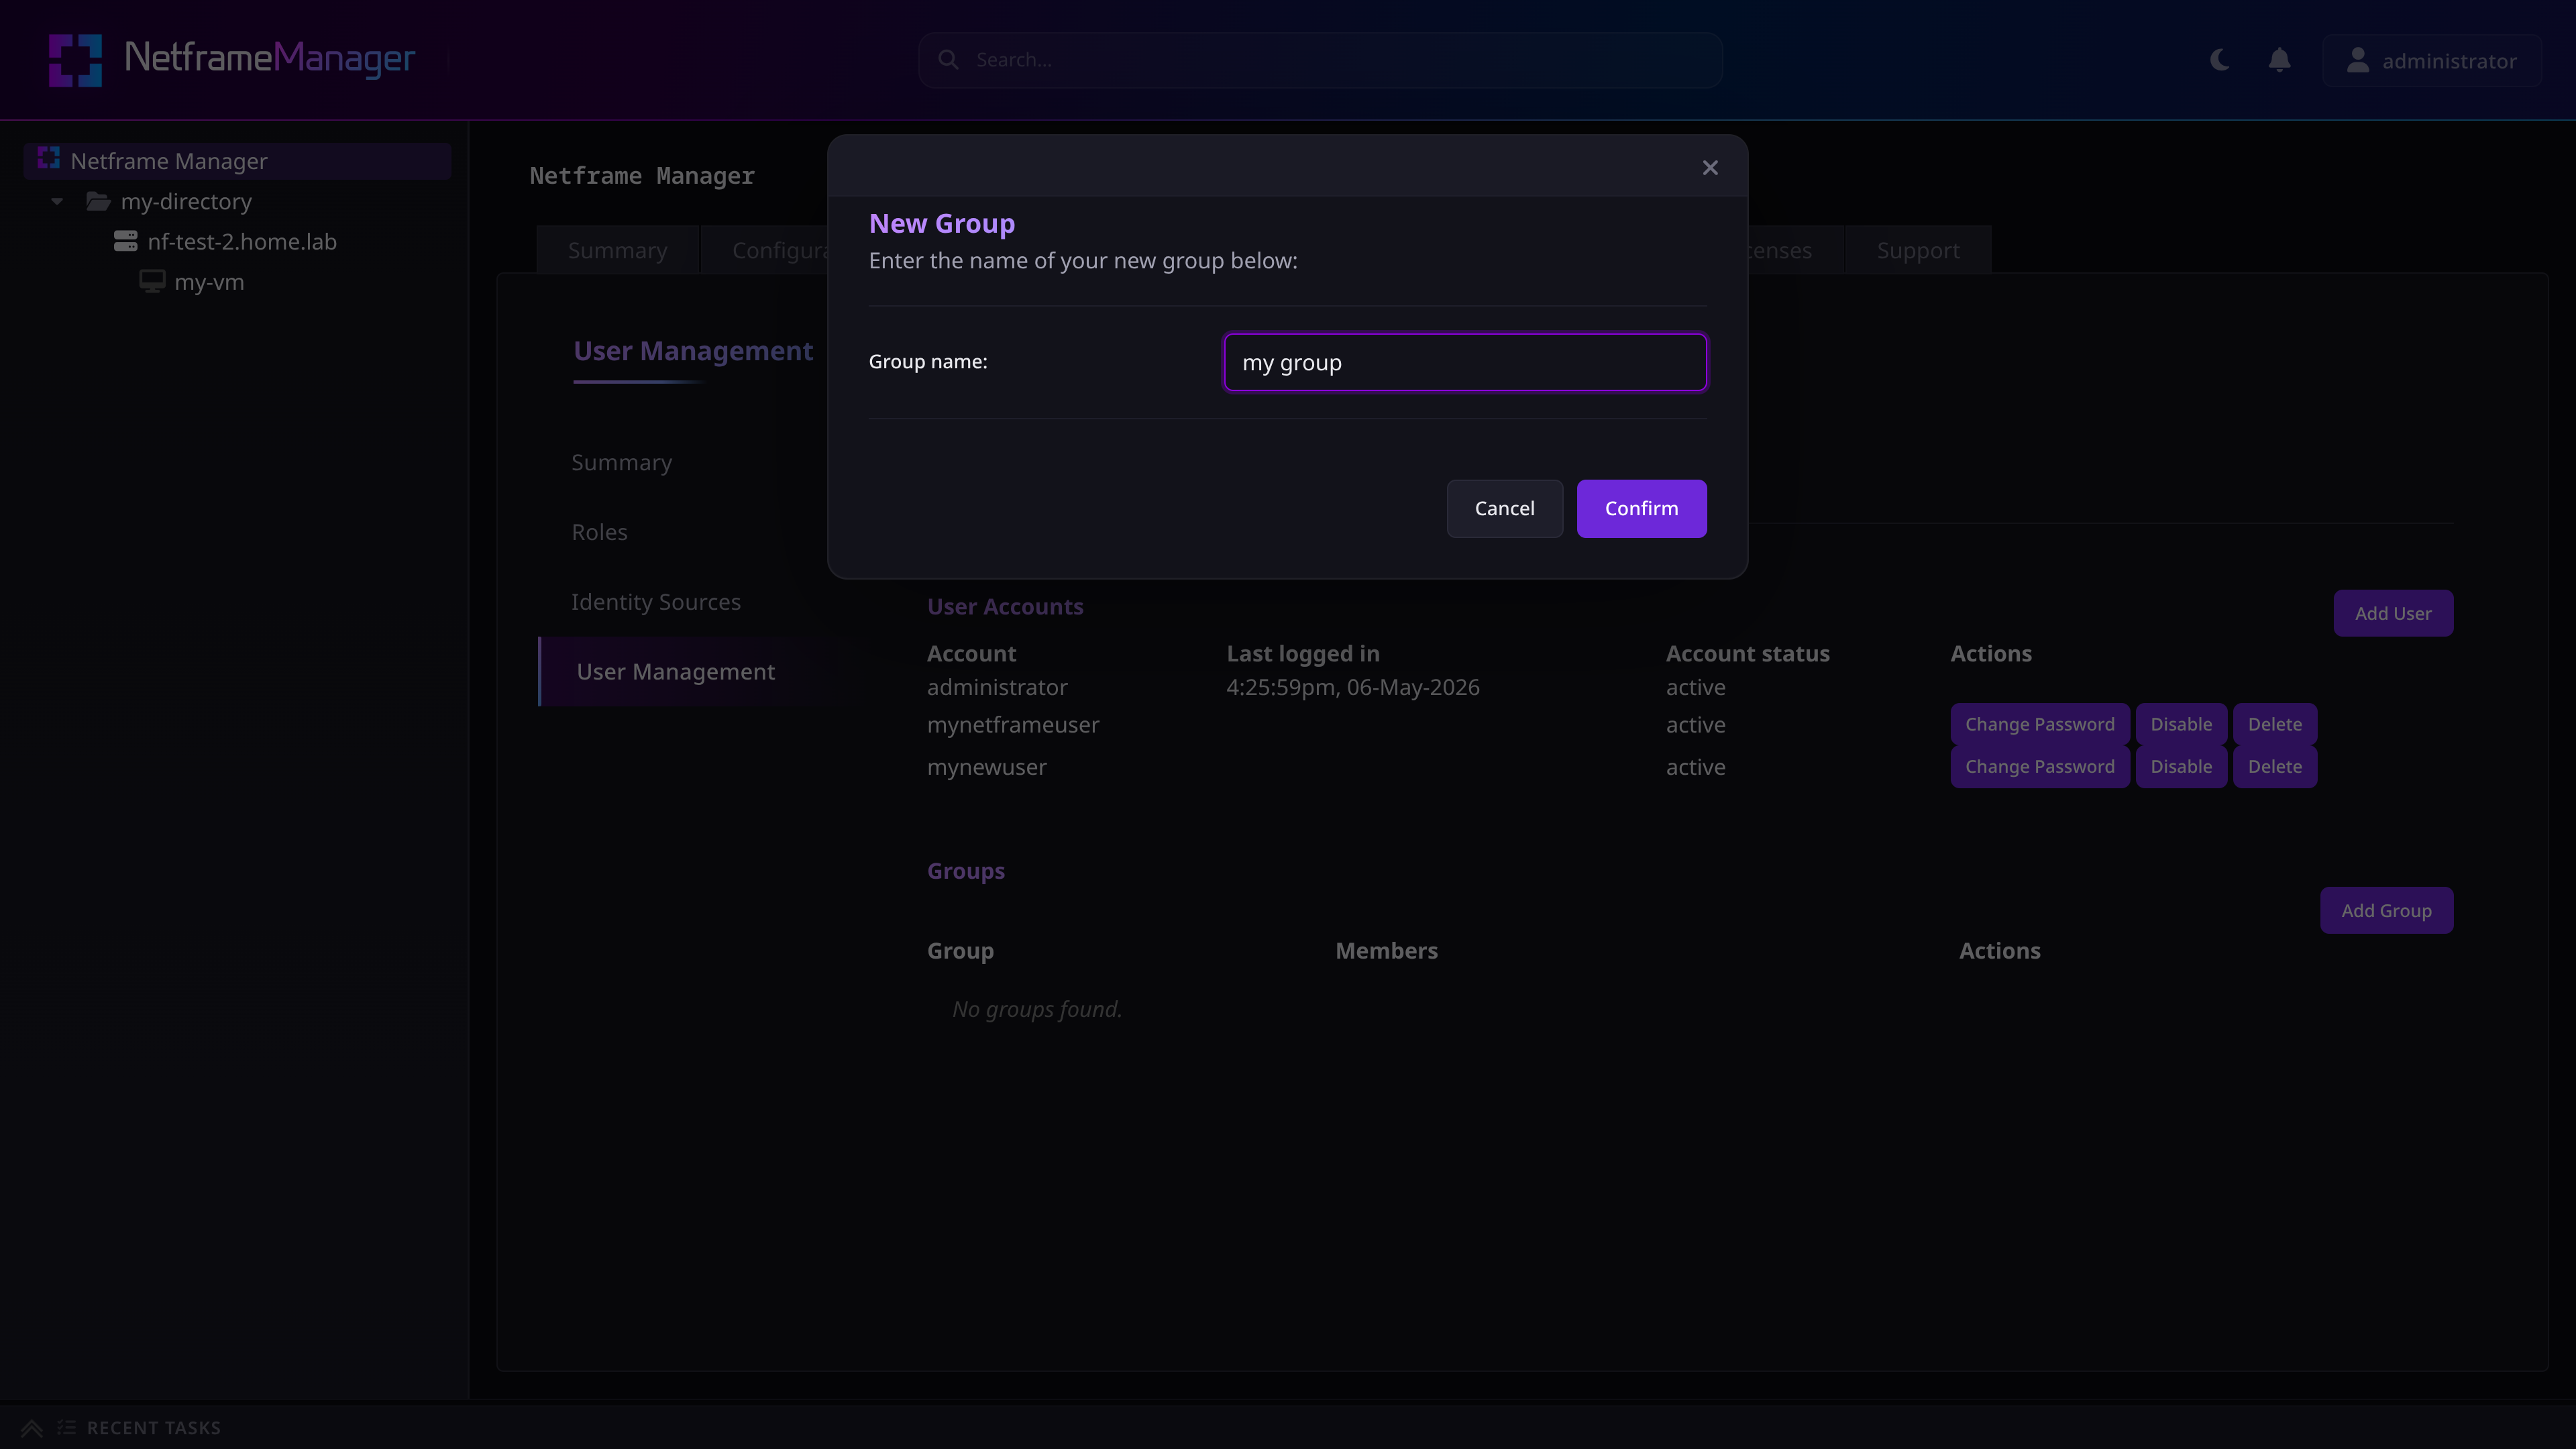
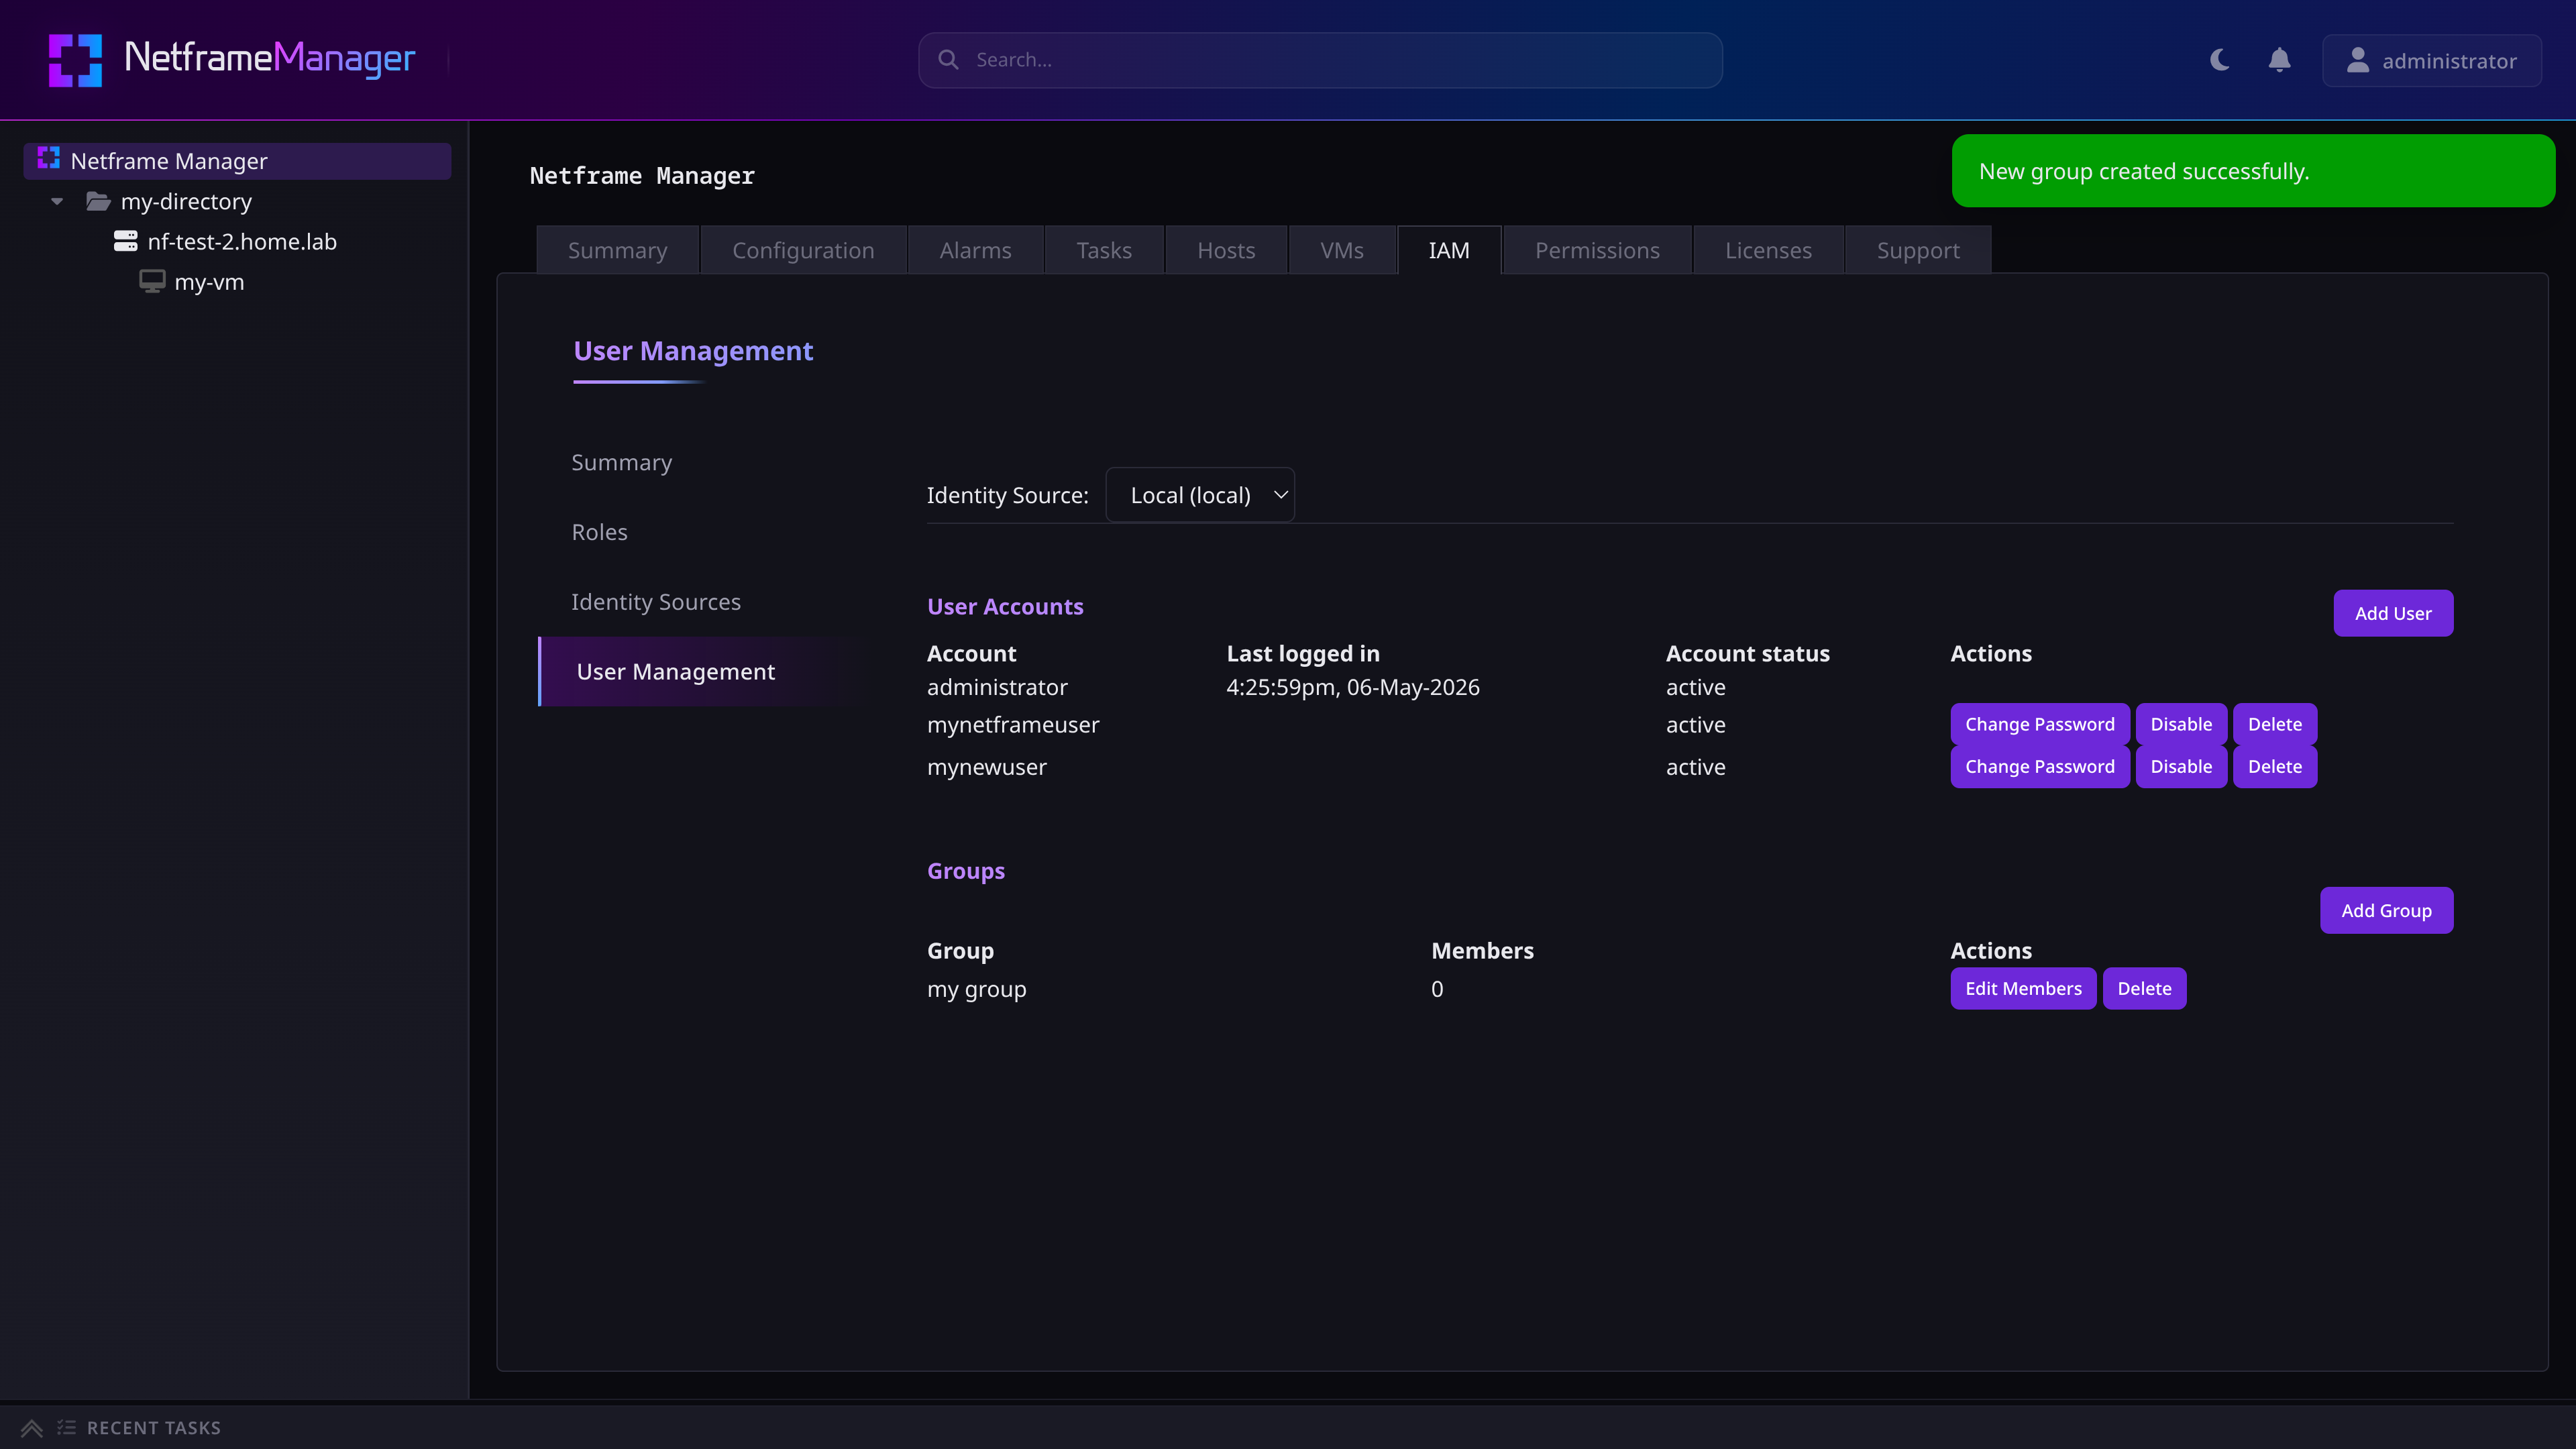
To create a new group, press the Add Group button. You will then be prompted to enter a name for the group.
- Note: Unlike usernames, there are no restrictions on a group's name
¶ Managing group members
To manage a group's members, press the Edit Members button.
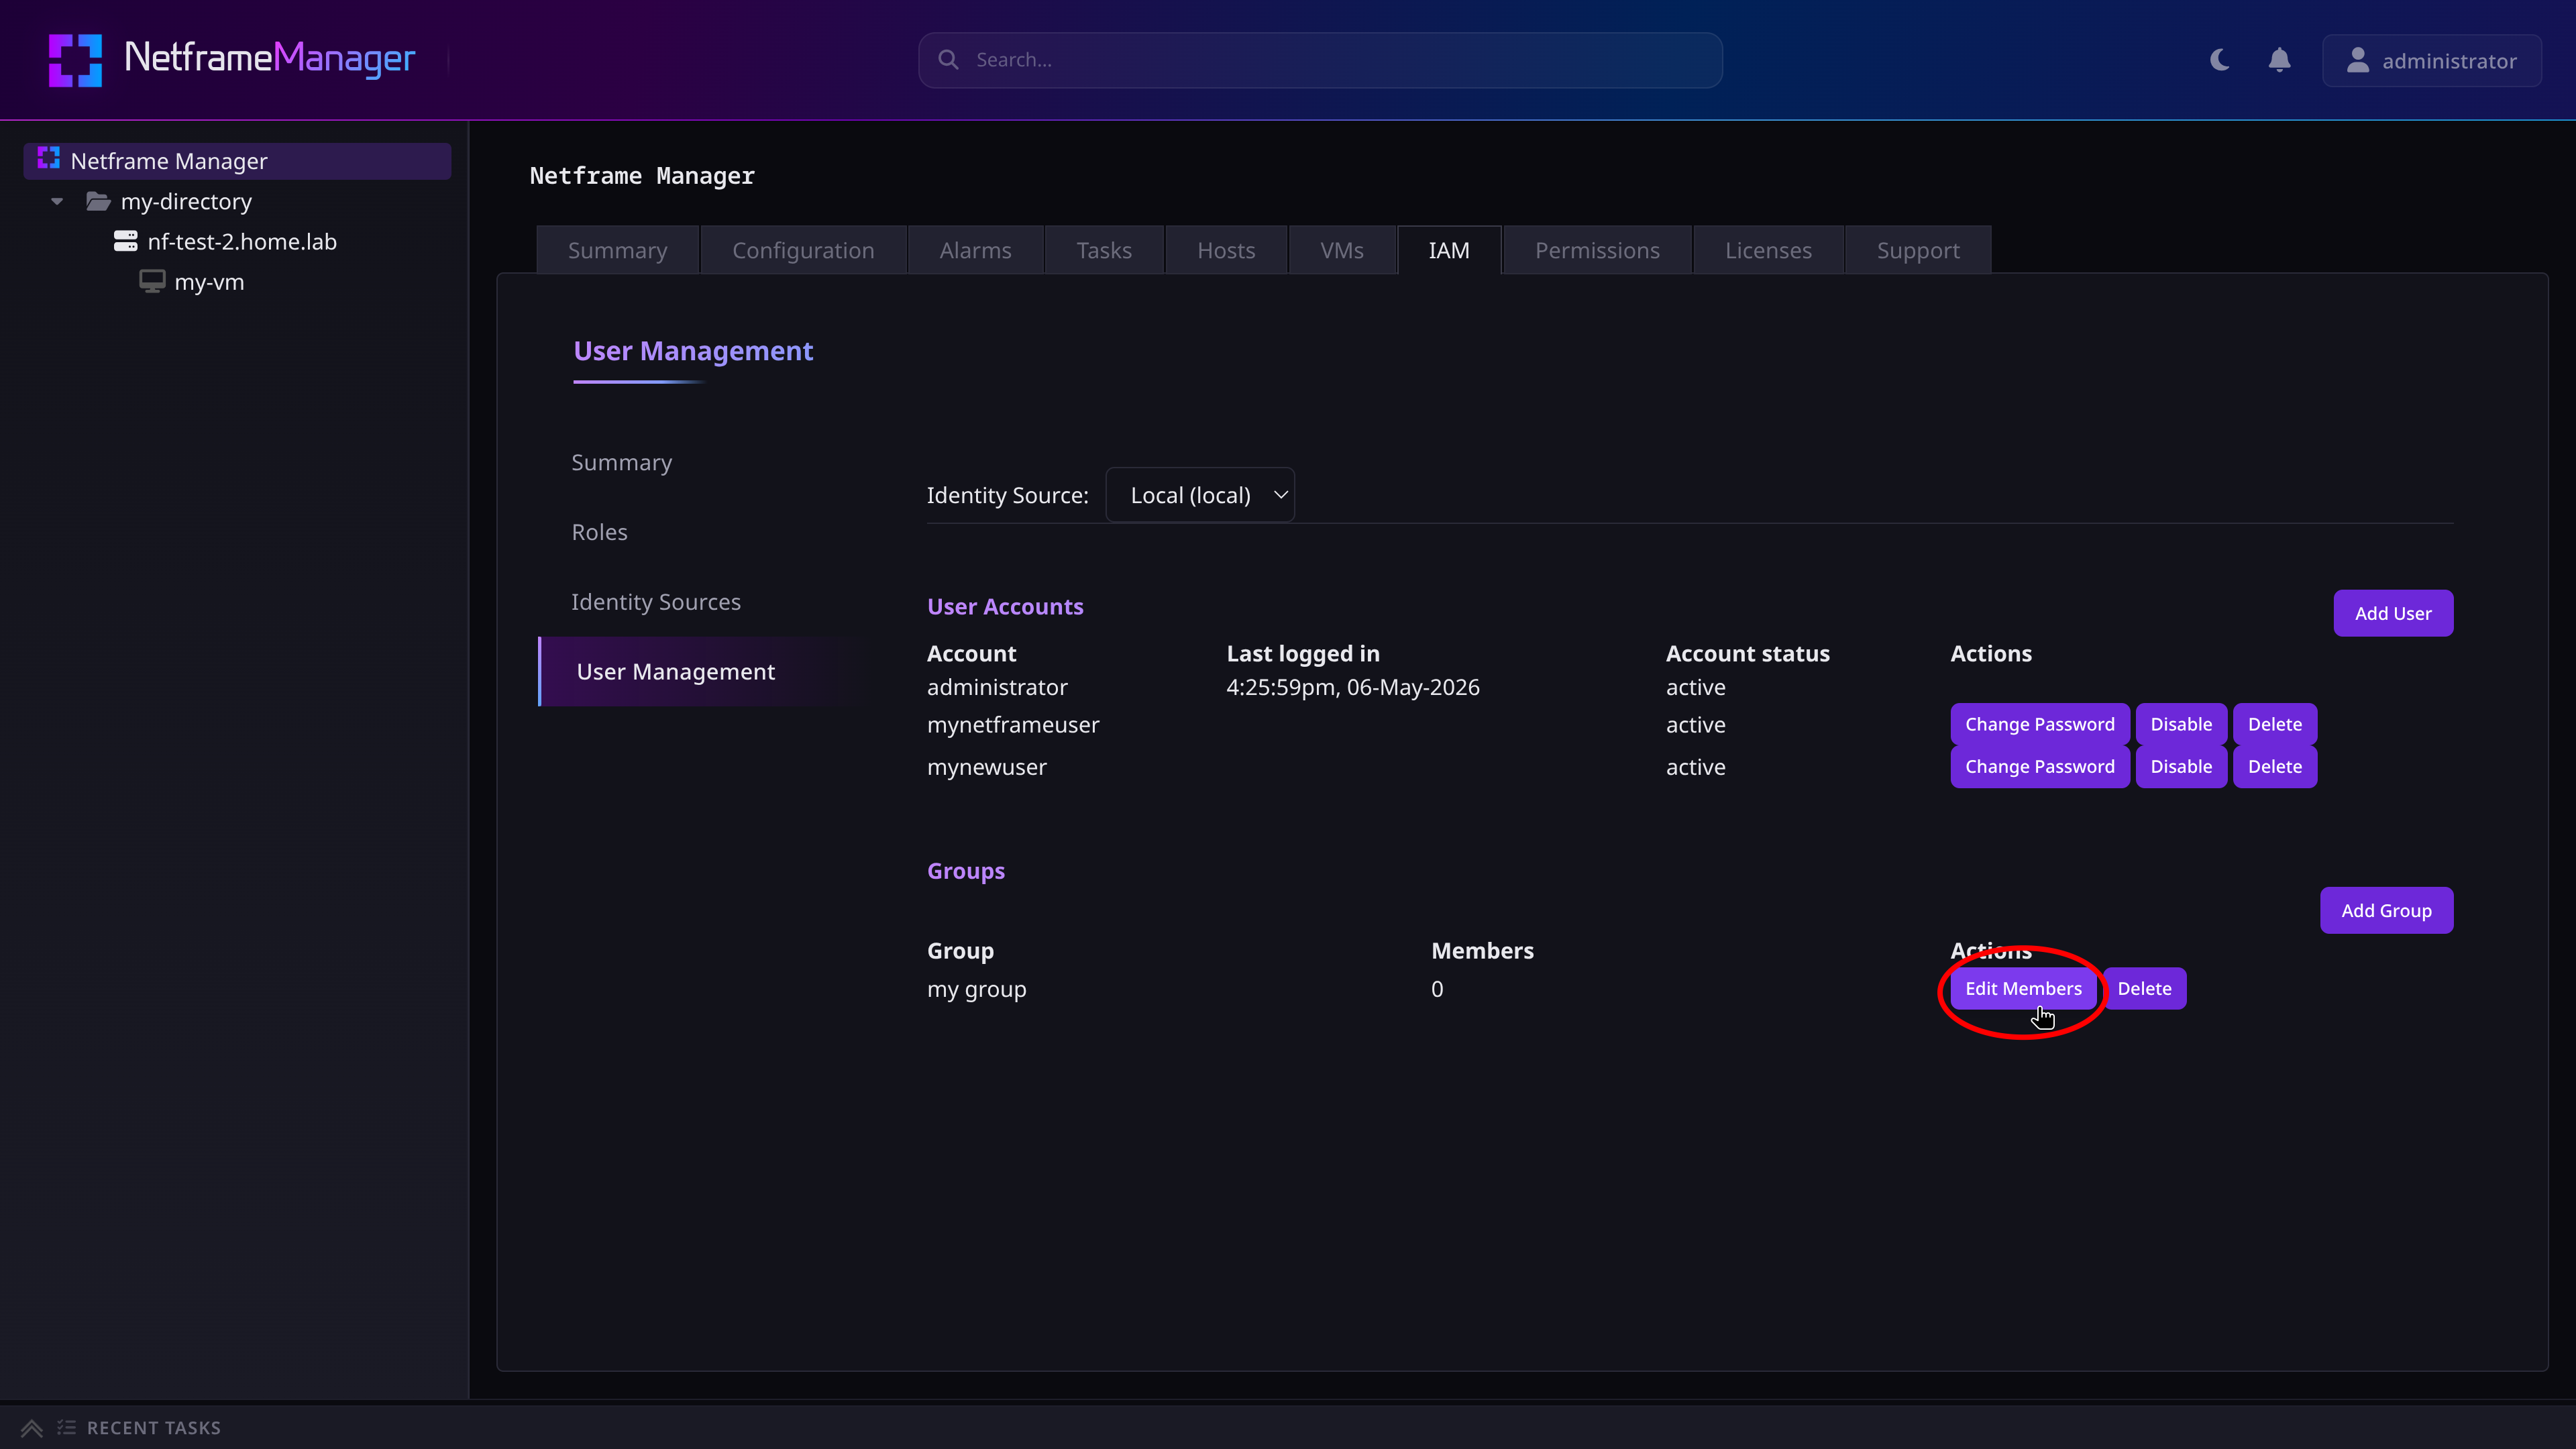
Here you will be able to view all users available to the group. Pressing the arrows next to a users name in the Available Users column will add them from the group's pool.
- Users can belong to multiple groups simultaneously
- Users can only be assigned to groups from the same identity source as them
- A group's members will not update until the Save Changes button is pressed. Clicking off the modal will lose your changes
- After saving your changes, it may take a few seconds before they are reflected properly in Netframe
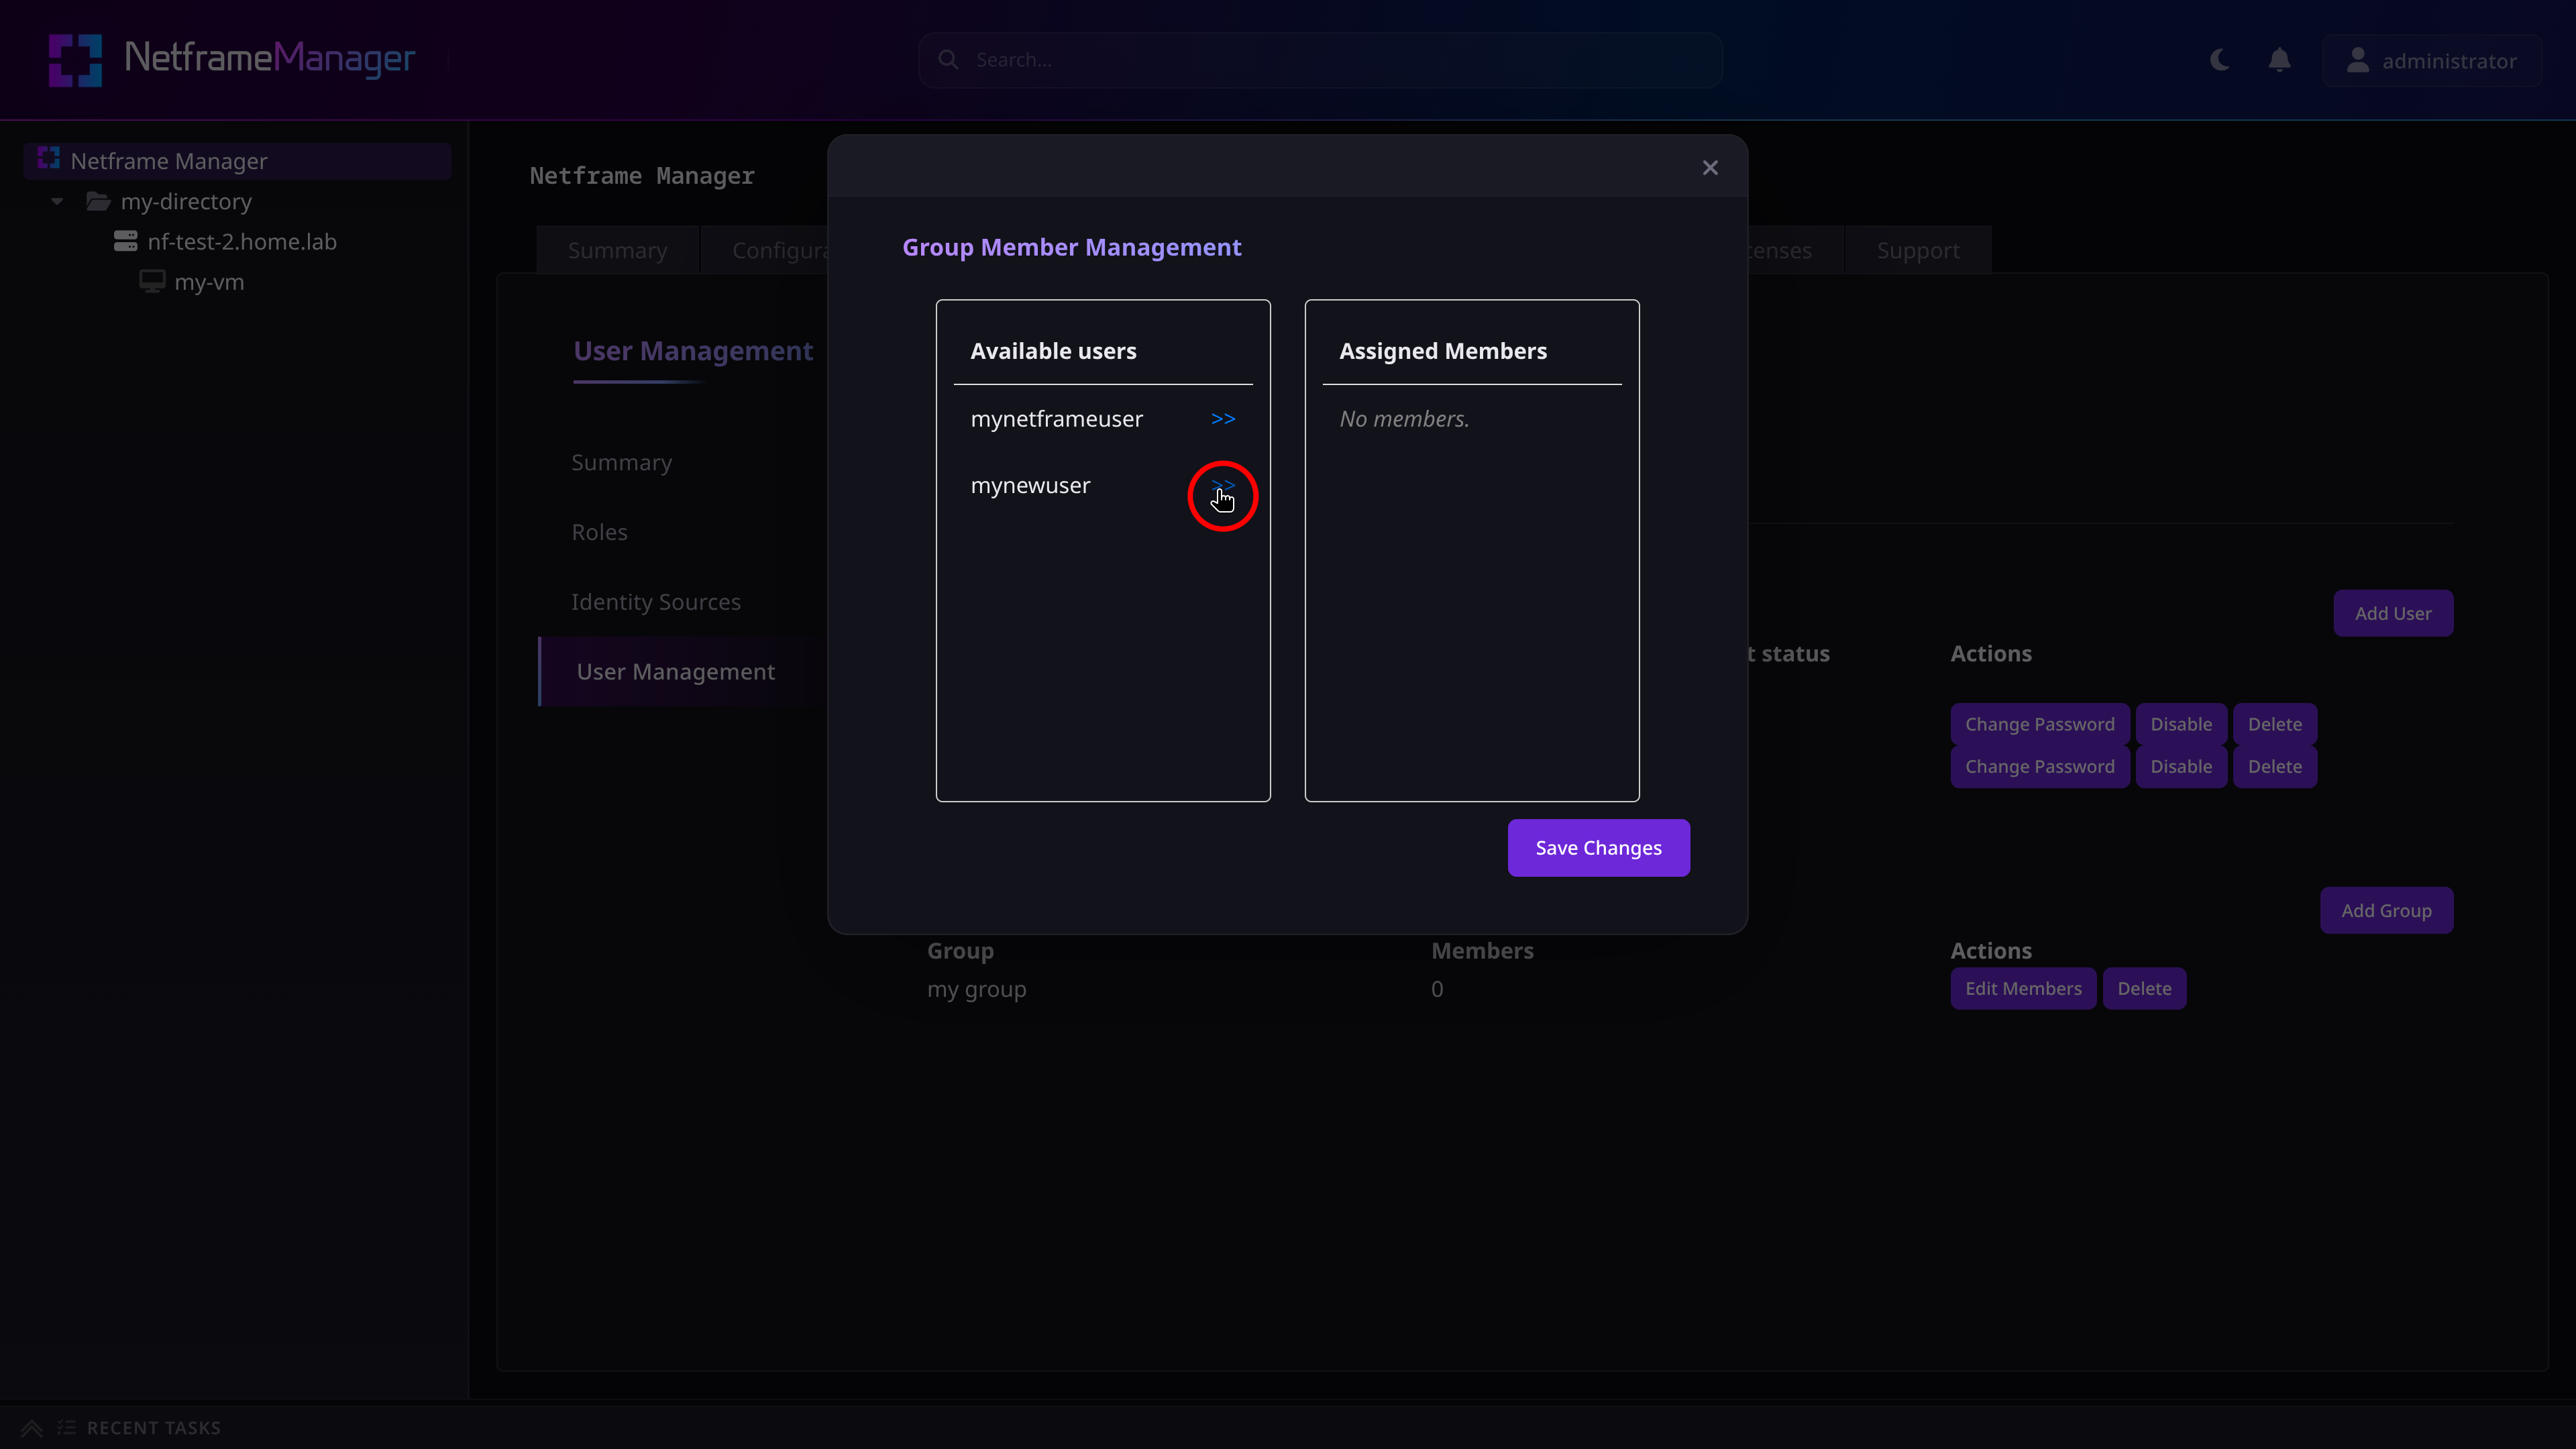
To remove a user from a group, press the arrows next to their name in the Assigned Members column
¶ Other Identity Sources (Active Directory)
Netframe supports adding external identity sources using Microsoft Active Directory (AD).
Important: It is strongly recommended that a service account with read-only access to Active Directory's Netframe users and groups be provisioned in Active Directory. This service account should be used as the identity source's lookup account in Netframe
Identity sources can be managed under the IAM tab's Identity Sources subtab. Pressing the Add Active Directory Source button will open a form to be filled with the AD source's details
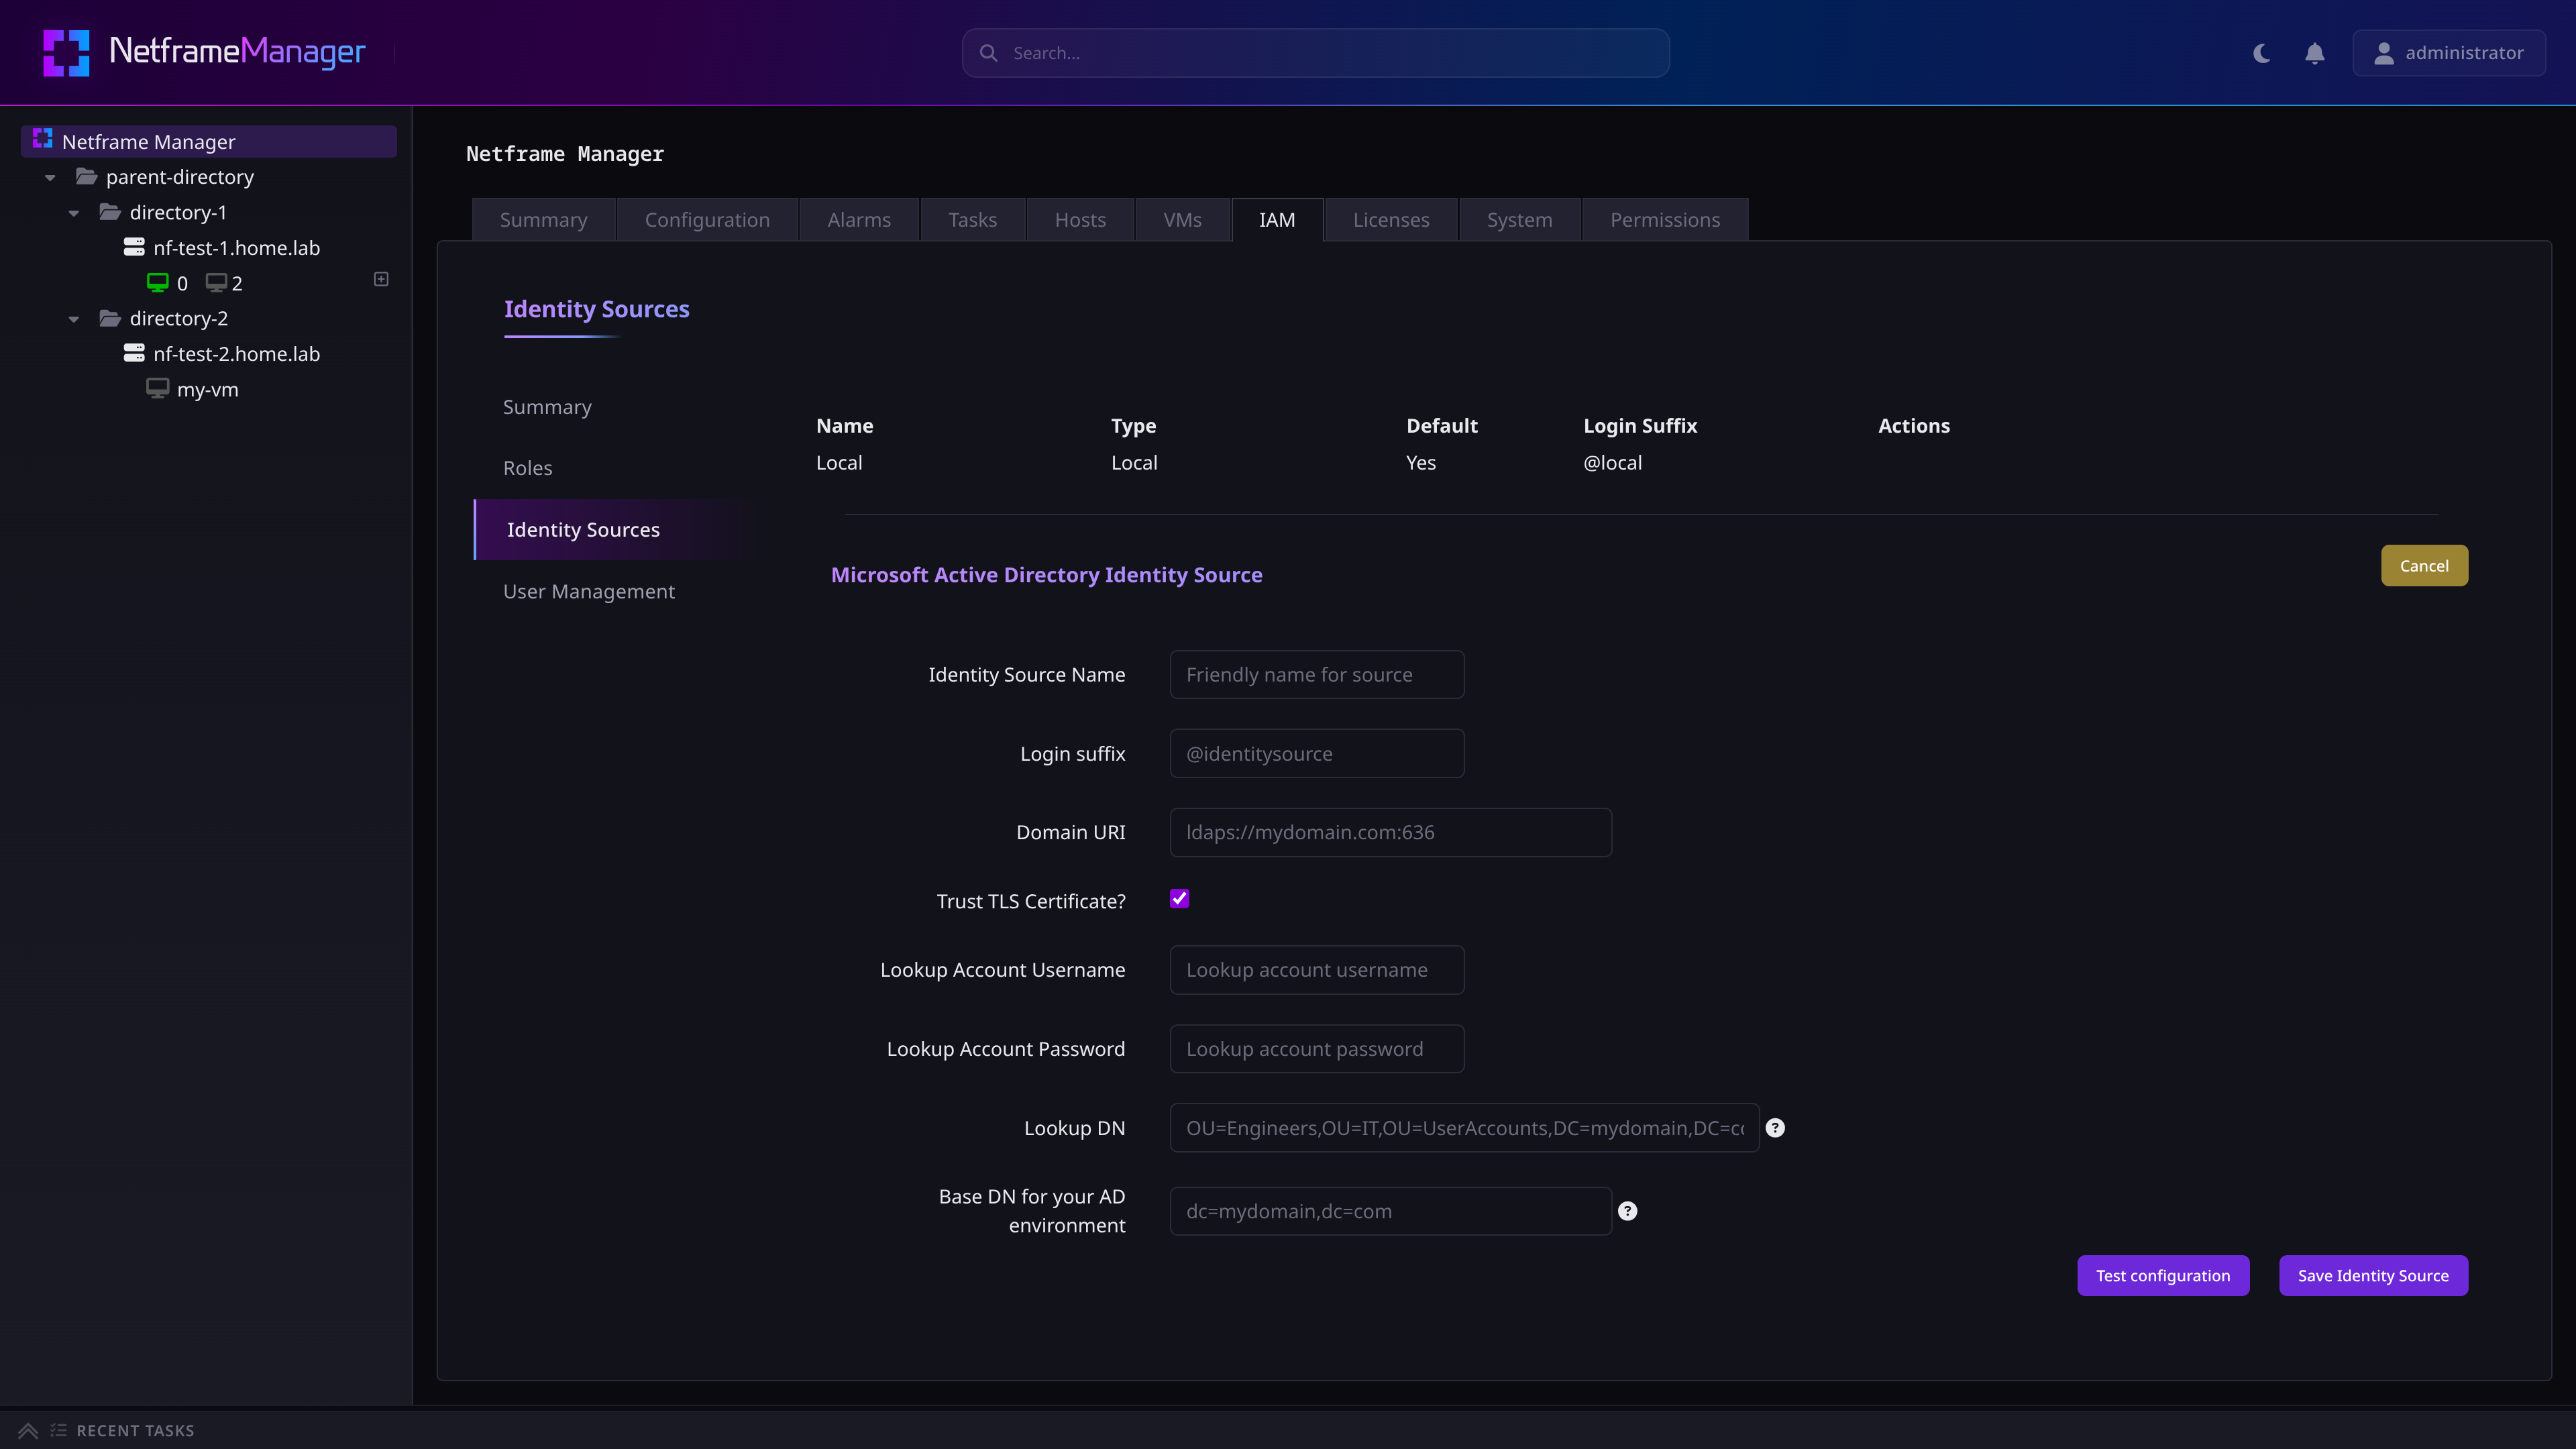
- Identity Source Name: The name the source will be saved under in Netframe
- Must contain at least 2 characters, and at least 1 letter
- Login Suffix: the suffix that will be used to login to Netframe as a user from the AD source.
- Must be formatted as
@<your suffix here>, and contain at least 1 letter - Does not need to match any configurations in Active Directory. This is local to Netframe only
- Must be formatted as
- Domain URI: The domain URI of your AD source
- Must be prefixed with
ldap://orldaps://, and suffixed with the appropriate port (:389for ldap or:636for ldaps)
- Must be prefixed with
- Lookup Account Username and Password: The AD user that Netframe will use to read identity data from AD
- As mentioned above, it is strongly recommended that a dedicated read-only service account be made for this purpose
- Lookup DN: The full
distinguishedNameof the Organizational Unit (OU) containing your identity data to be imported to Netframe- Can be found in AD by accessing the OU's Properties ⇒ Attribute Editor tab
- Base DN for your AD environment: The full
distinguishedNameof your AD's base/top-level domain- Can be found in AD by accessing the domain's Properties ⇒ Attribute Editor tab
After filling in all the fields, you can press the Test Configuration button to check that everything has been inputted correctly. Once you are satisfied, press the Save Identity Source button to add the identity source.
¶ Default Identity Source and Logging in to Netframe
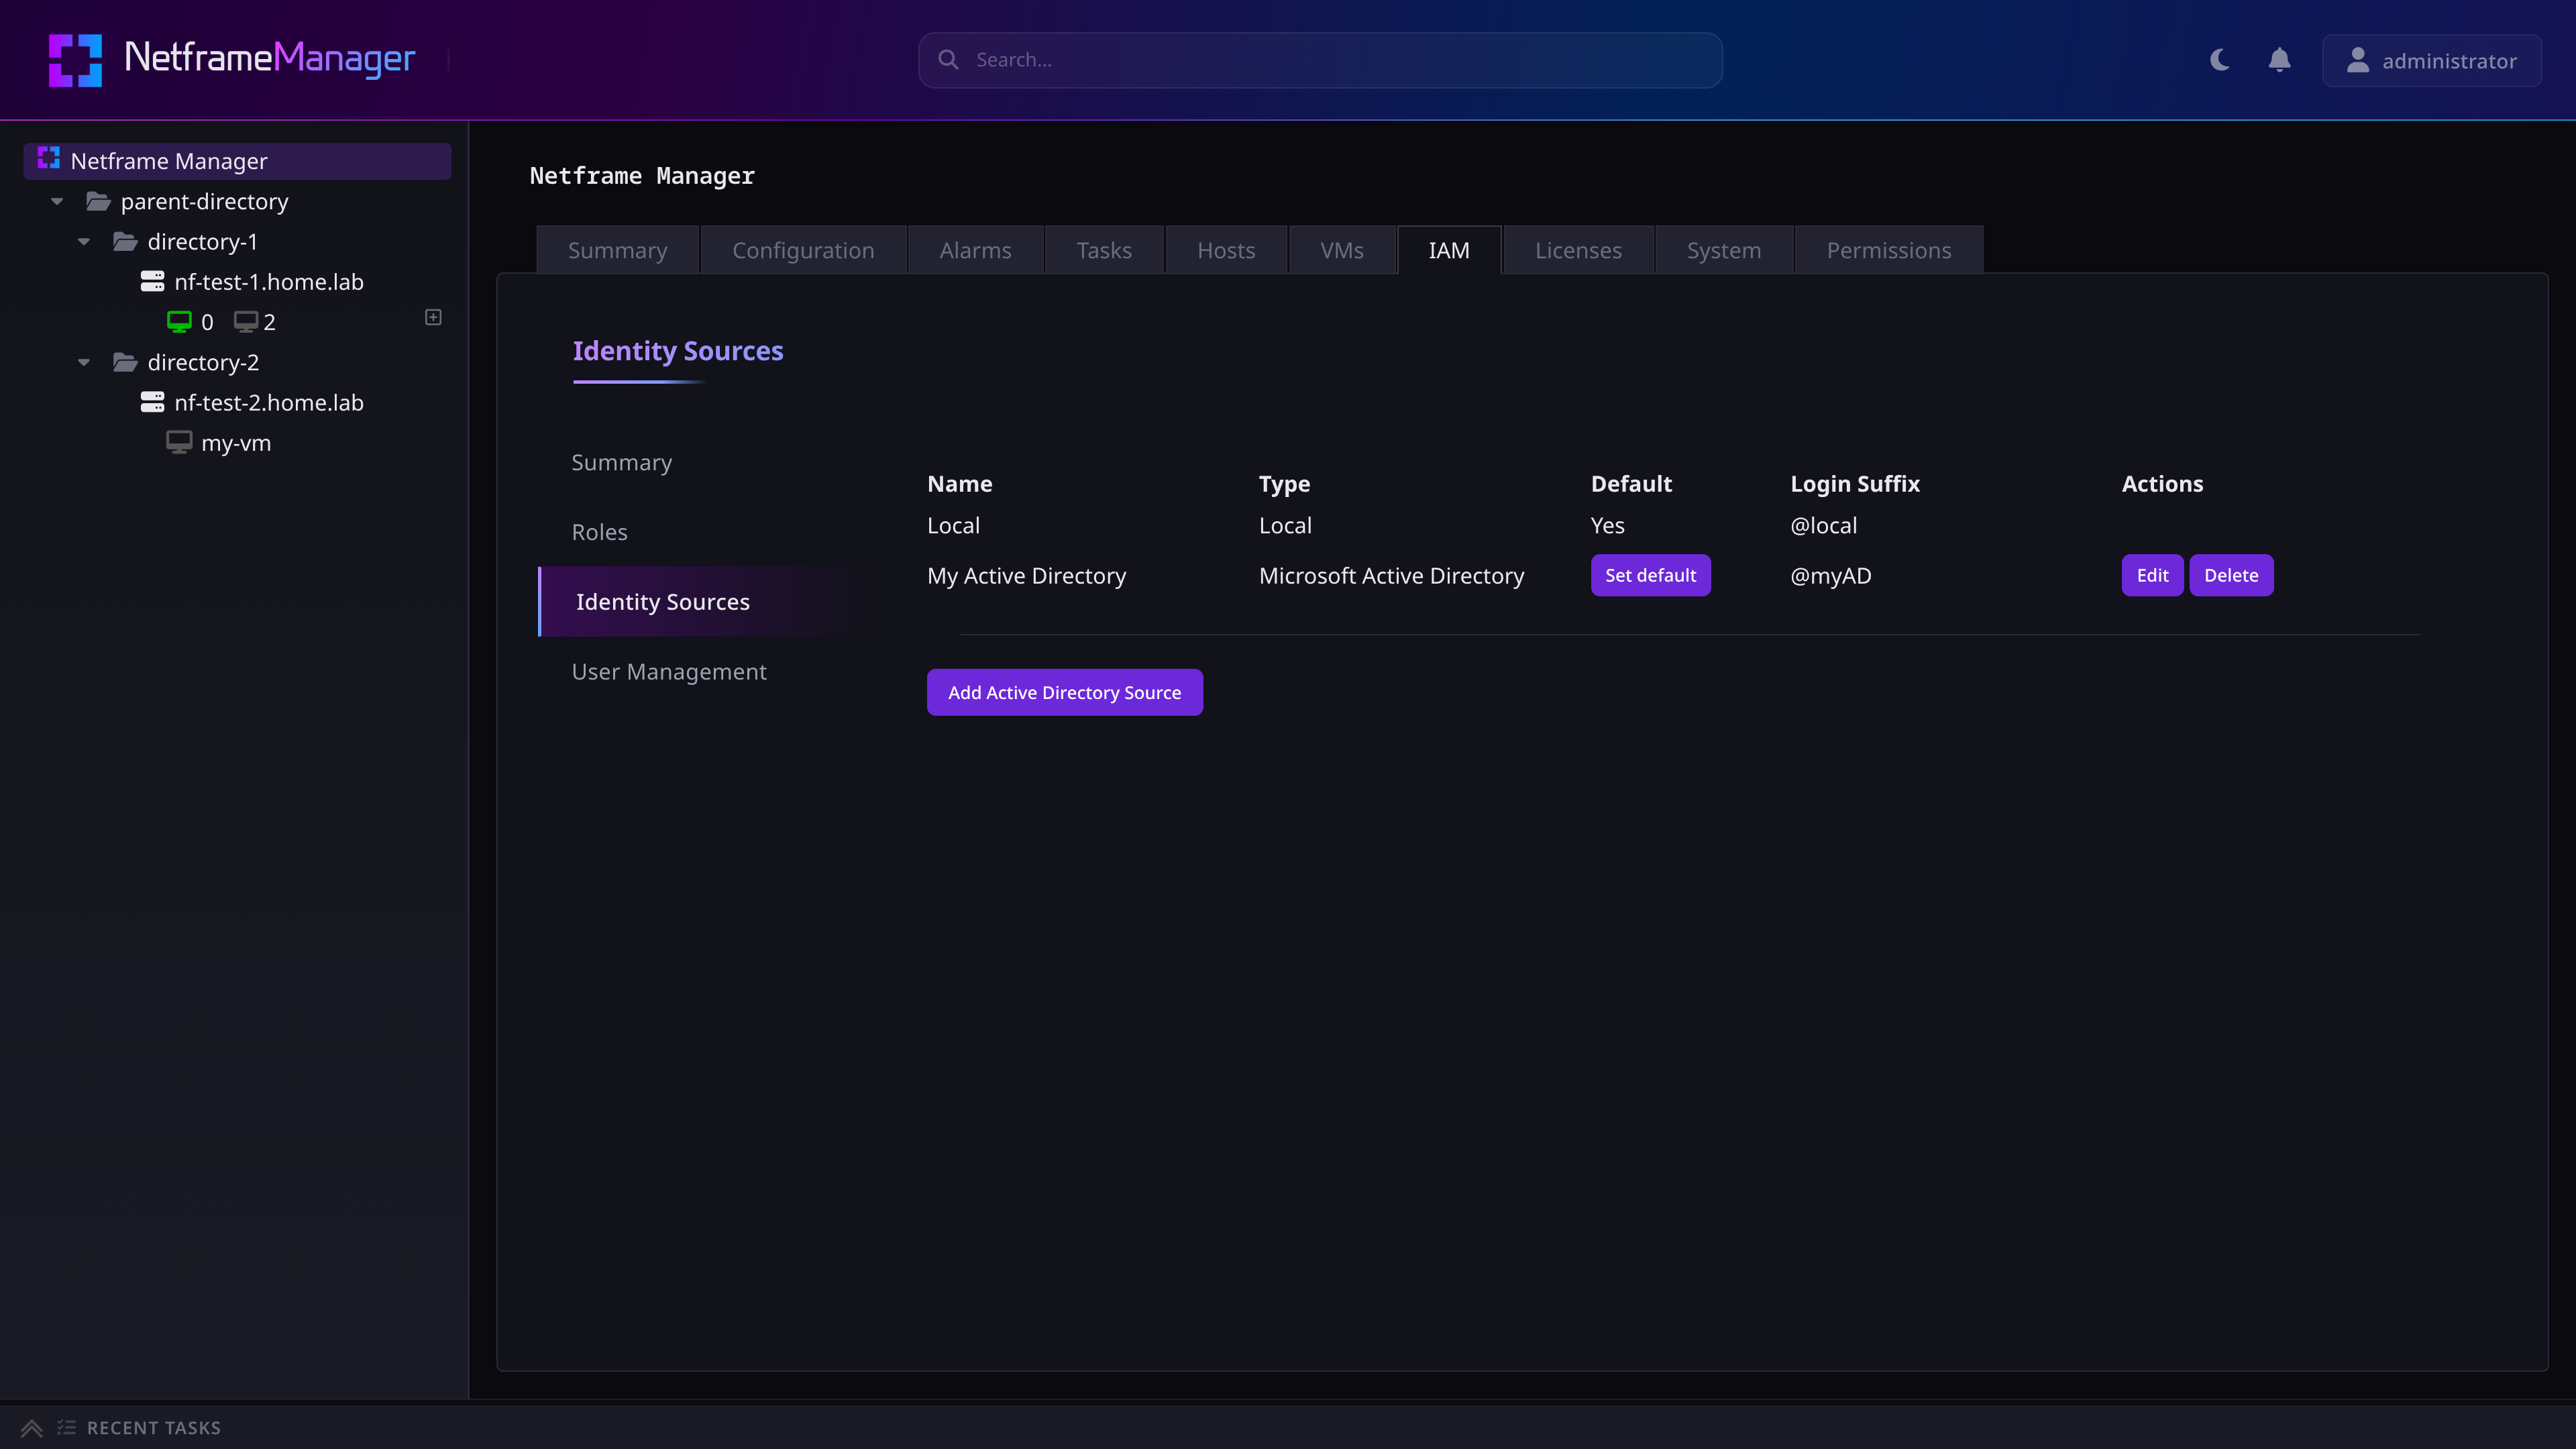
In the Identity Sources tab, one of the available sources can be selected as the “Default” identity source for Netframe to use. This will initially be set to the Local identity source, but can be changed to an AD source.
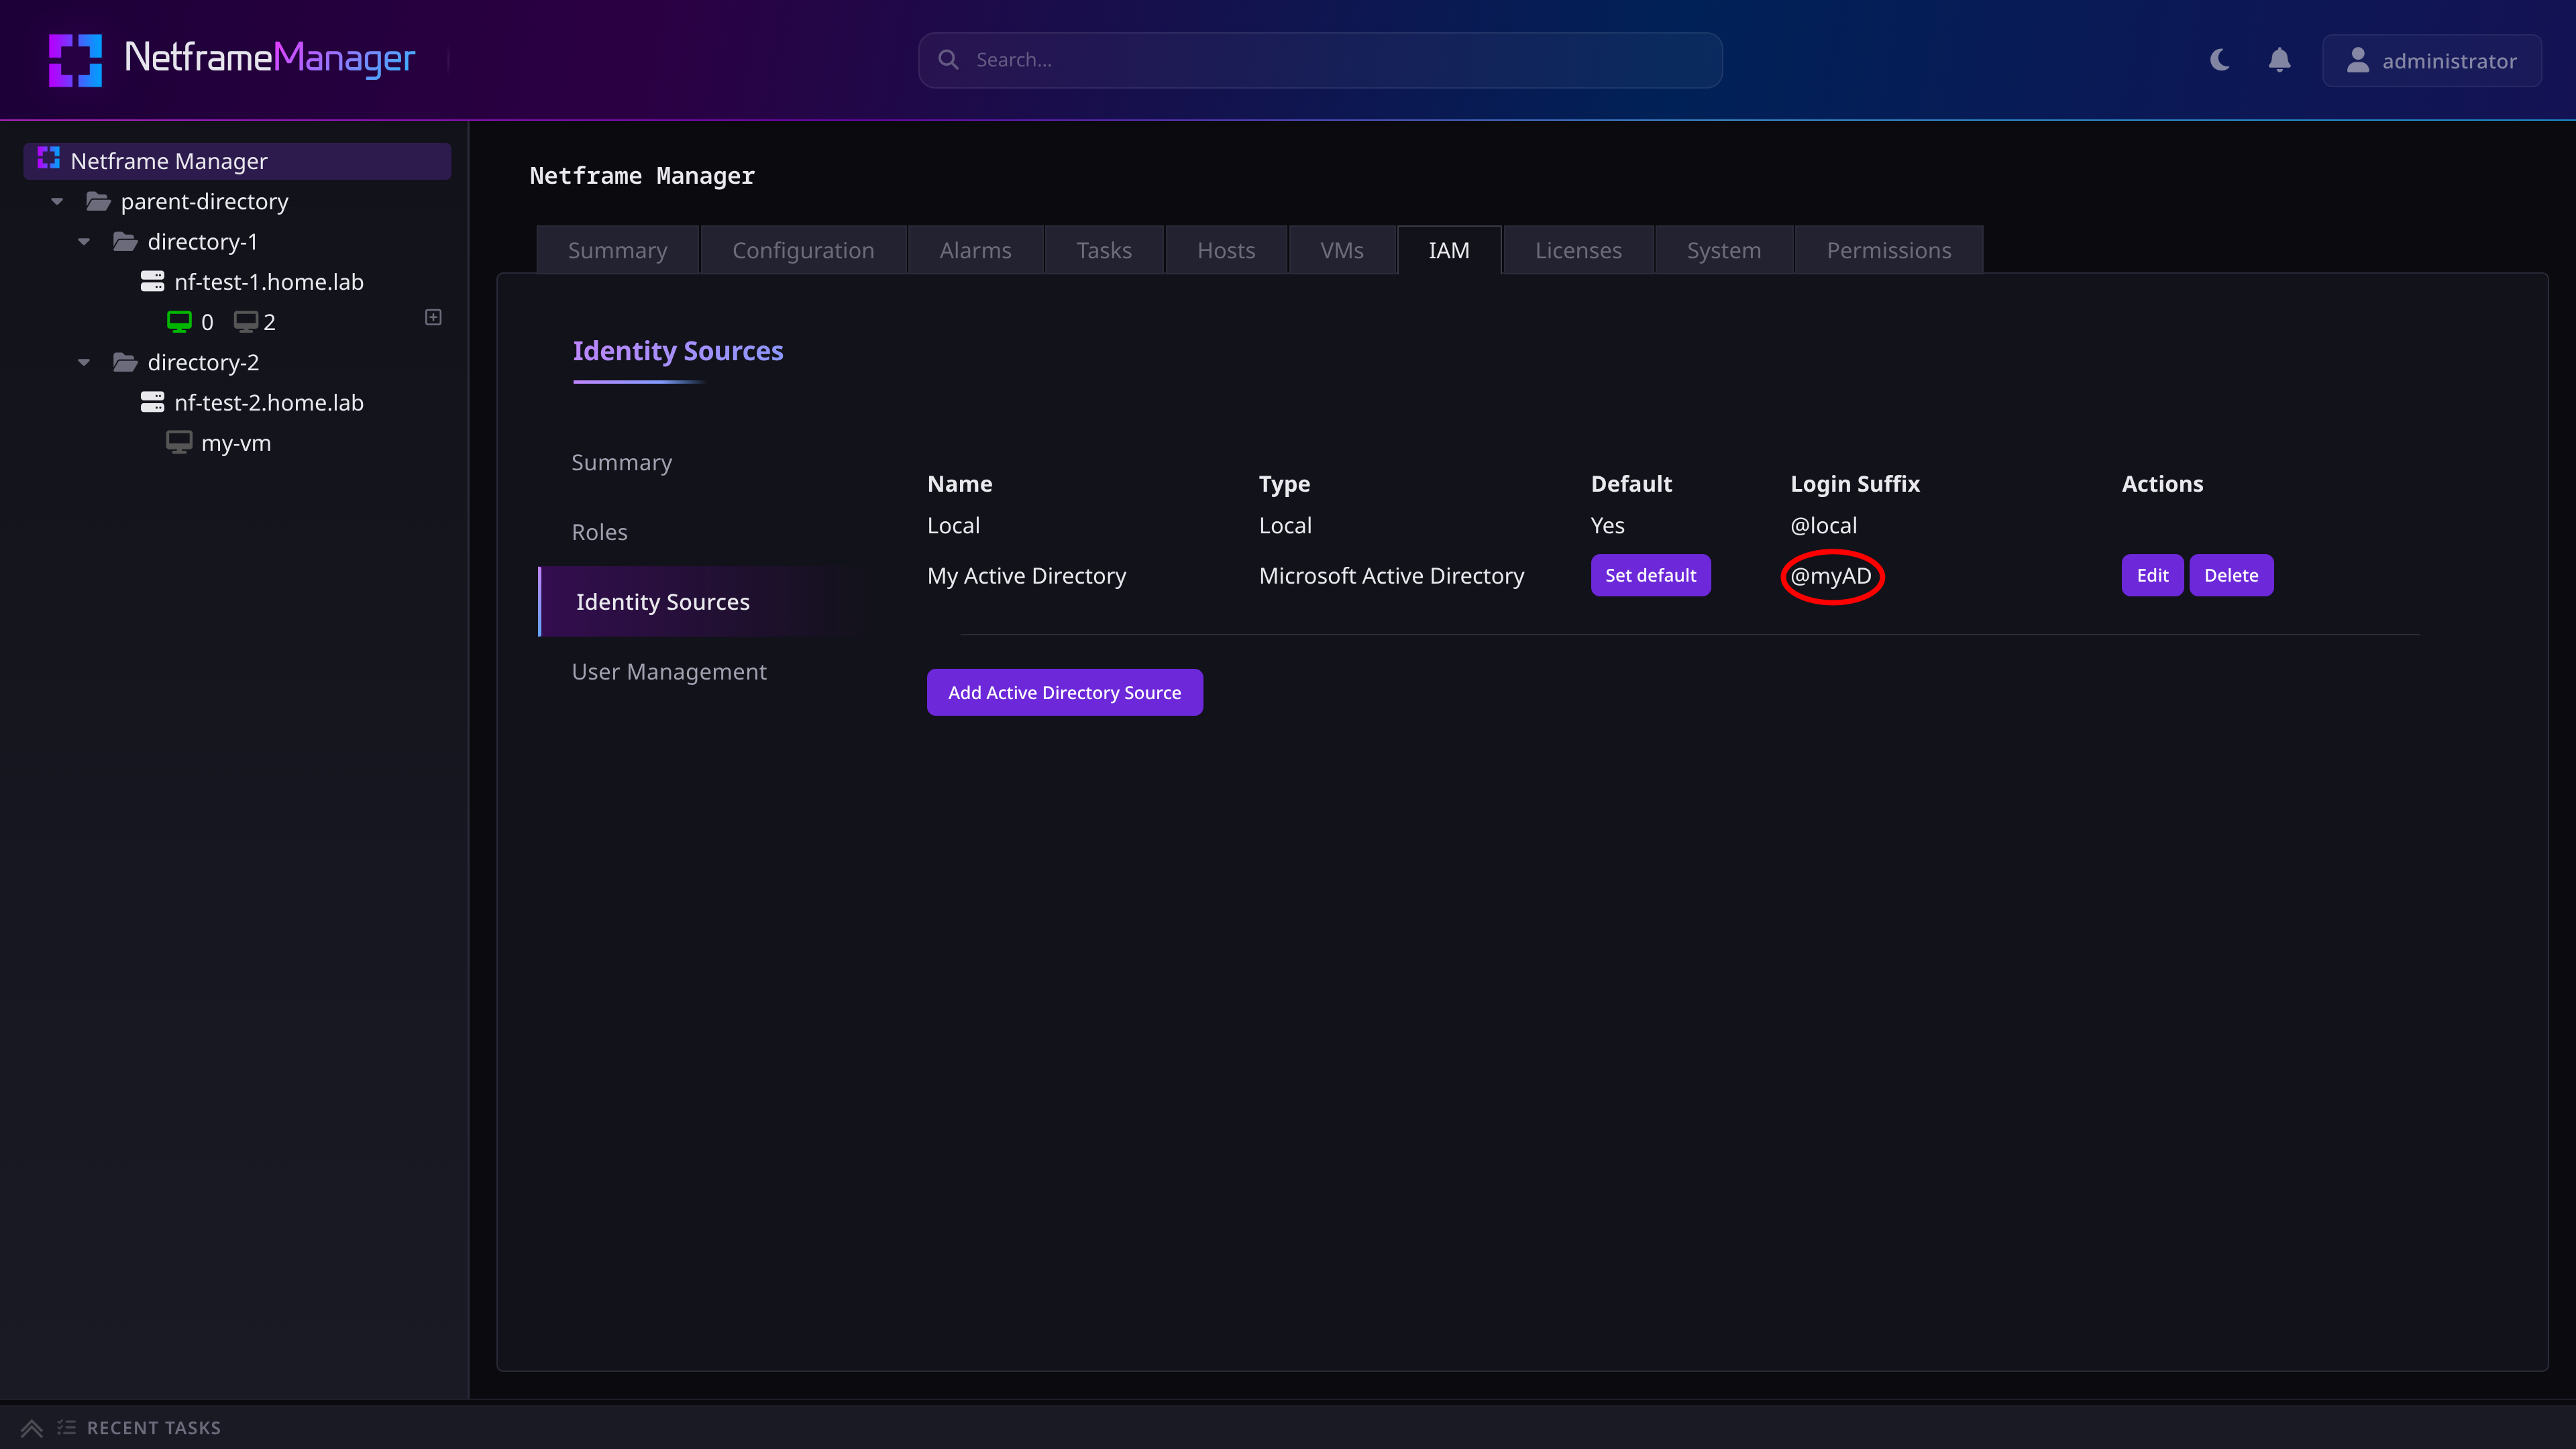
To log in to Netframe using a non-default identity source, take note of the source's Login Suffix in the Identity Sources tab.
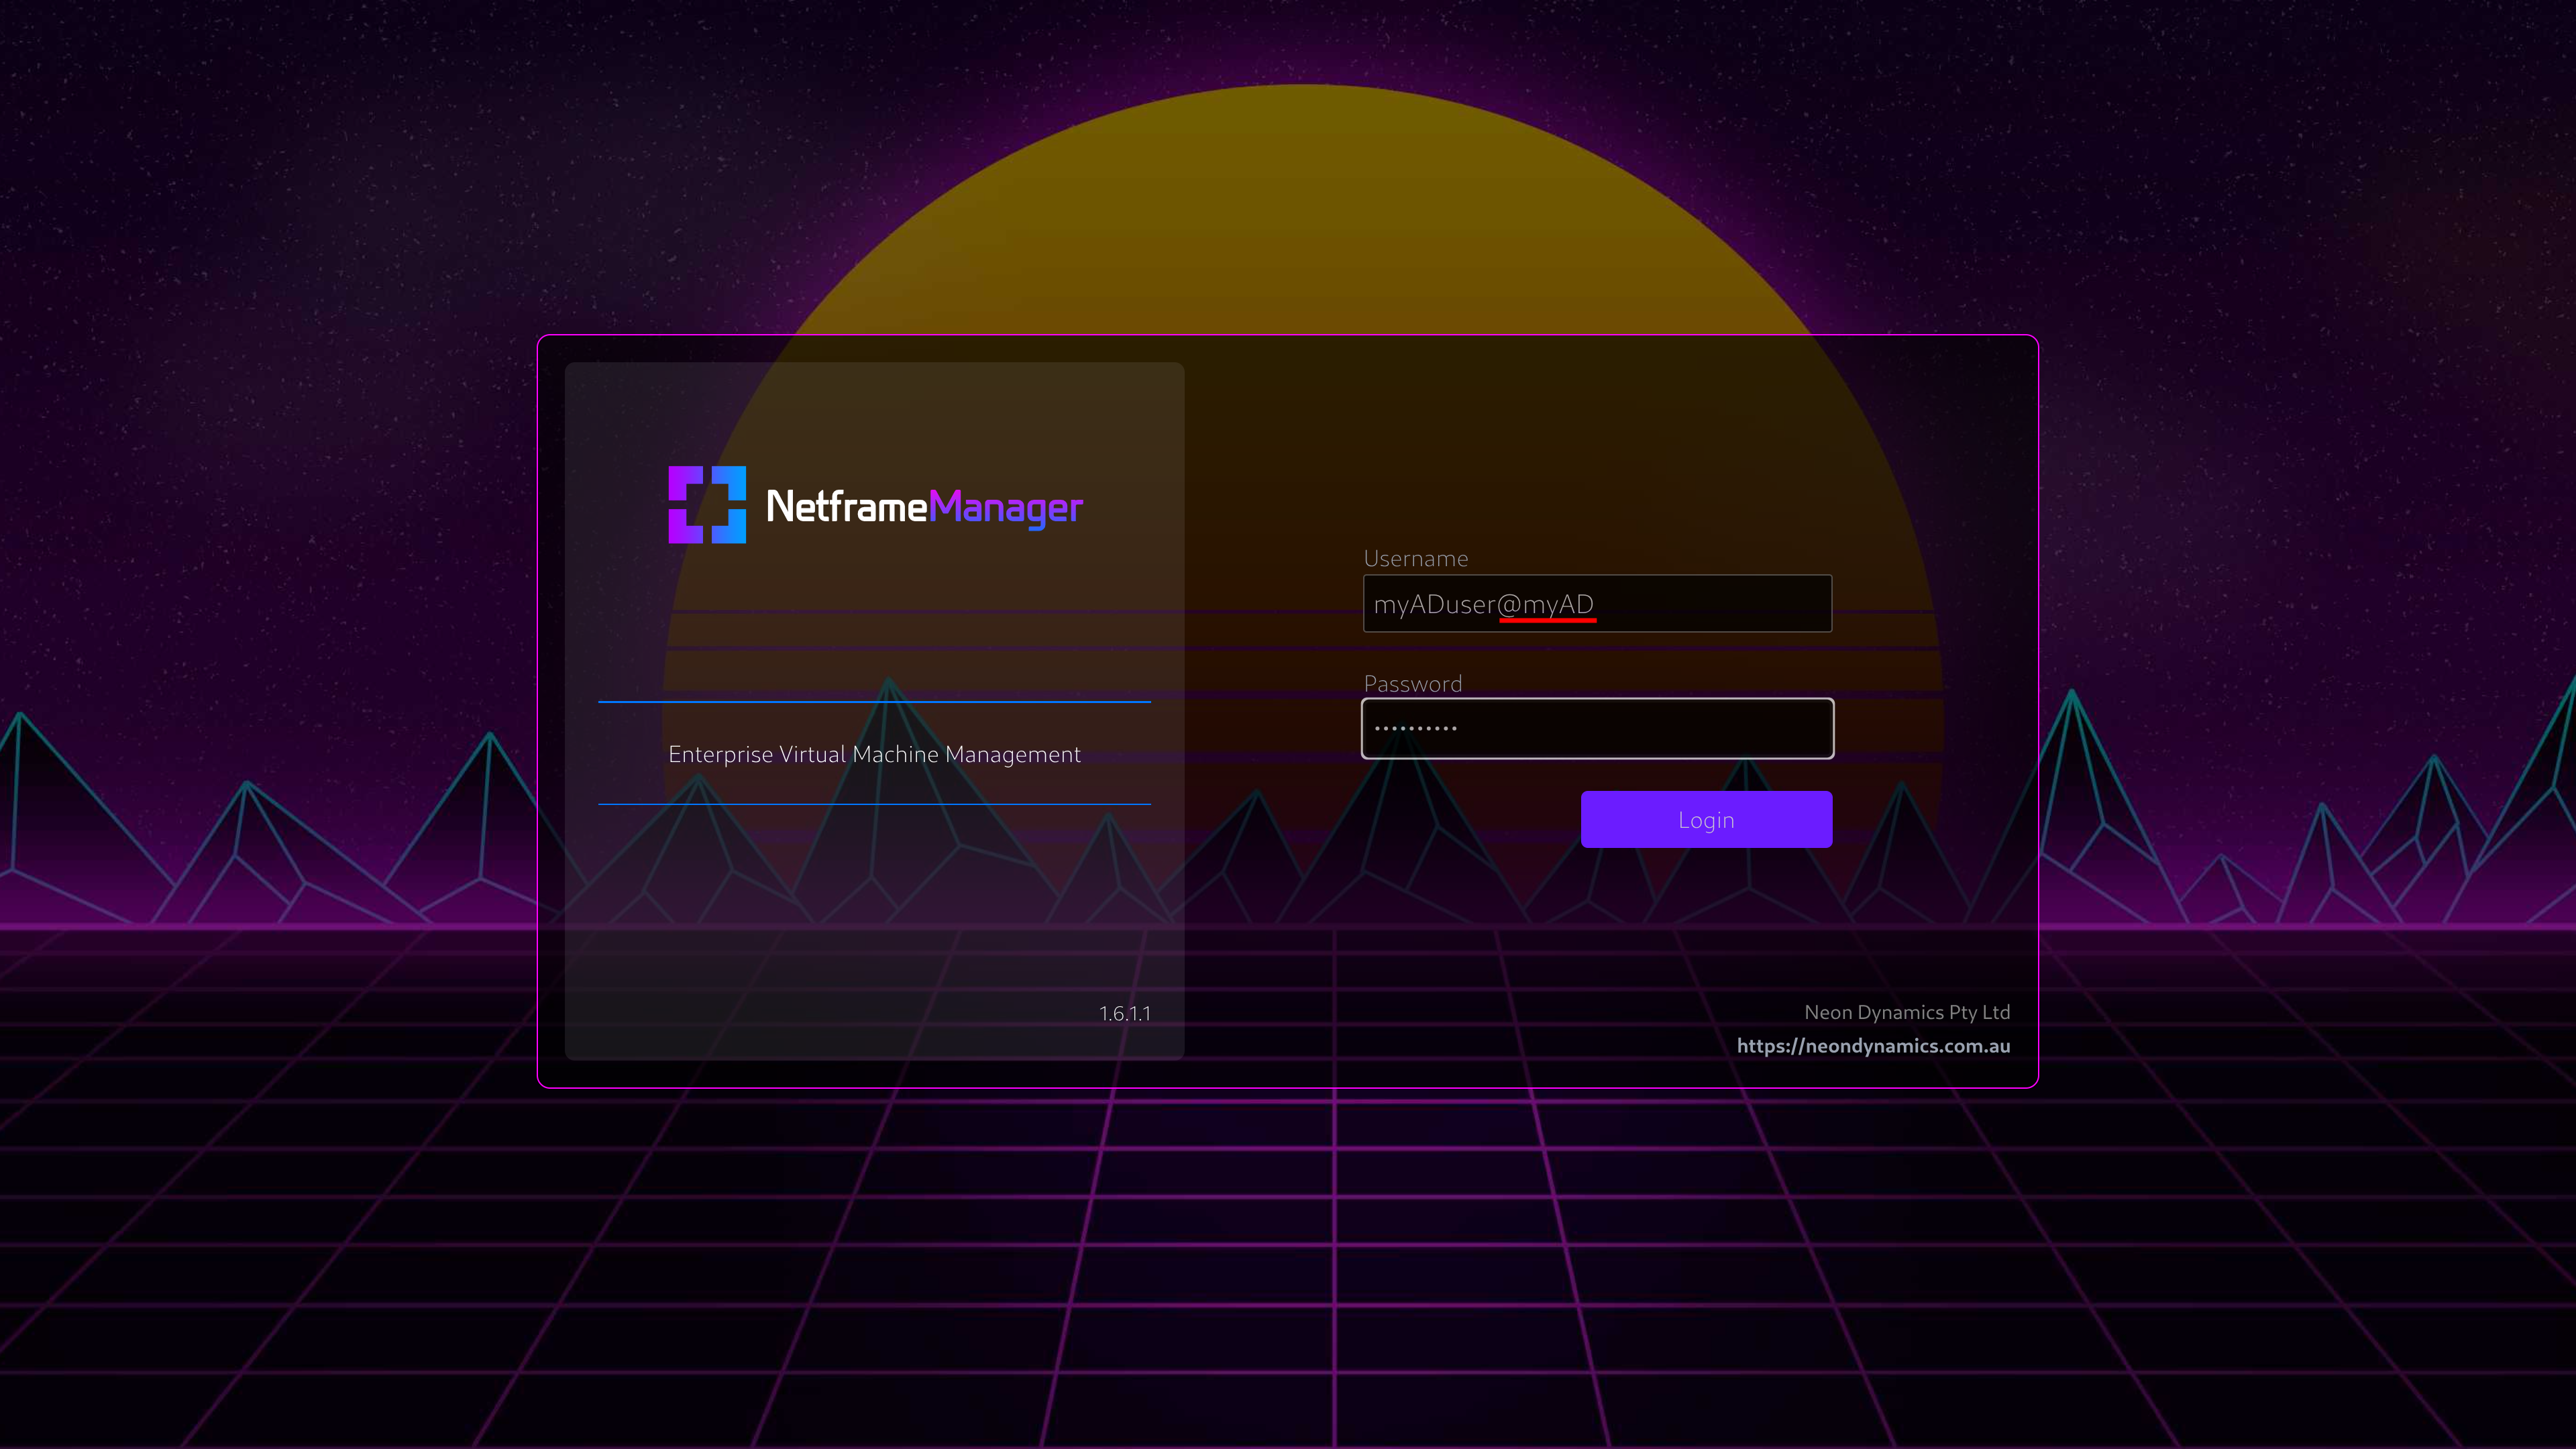
Then, to login to Netframe as a user from that source, append the user's login username with the suffix.
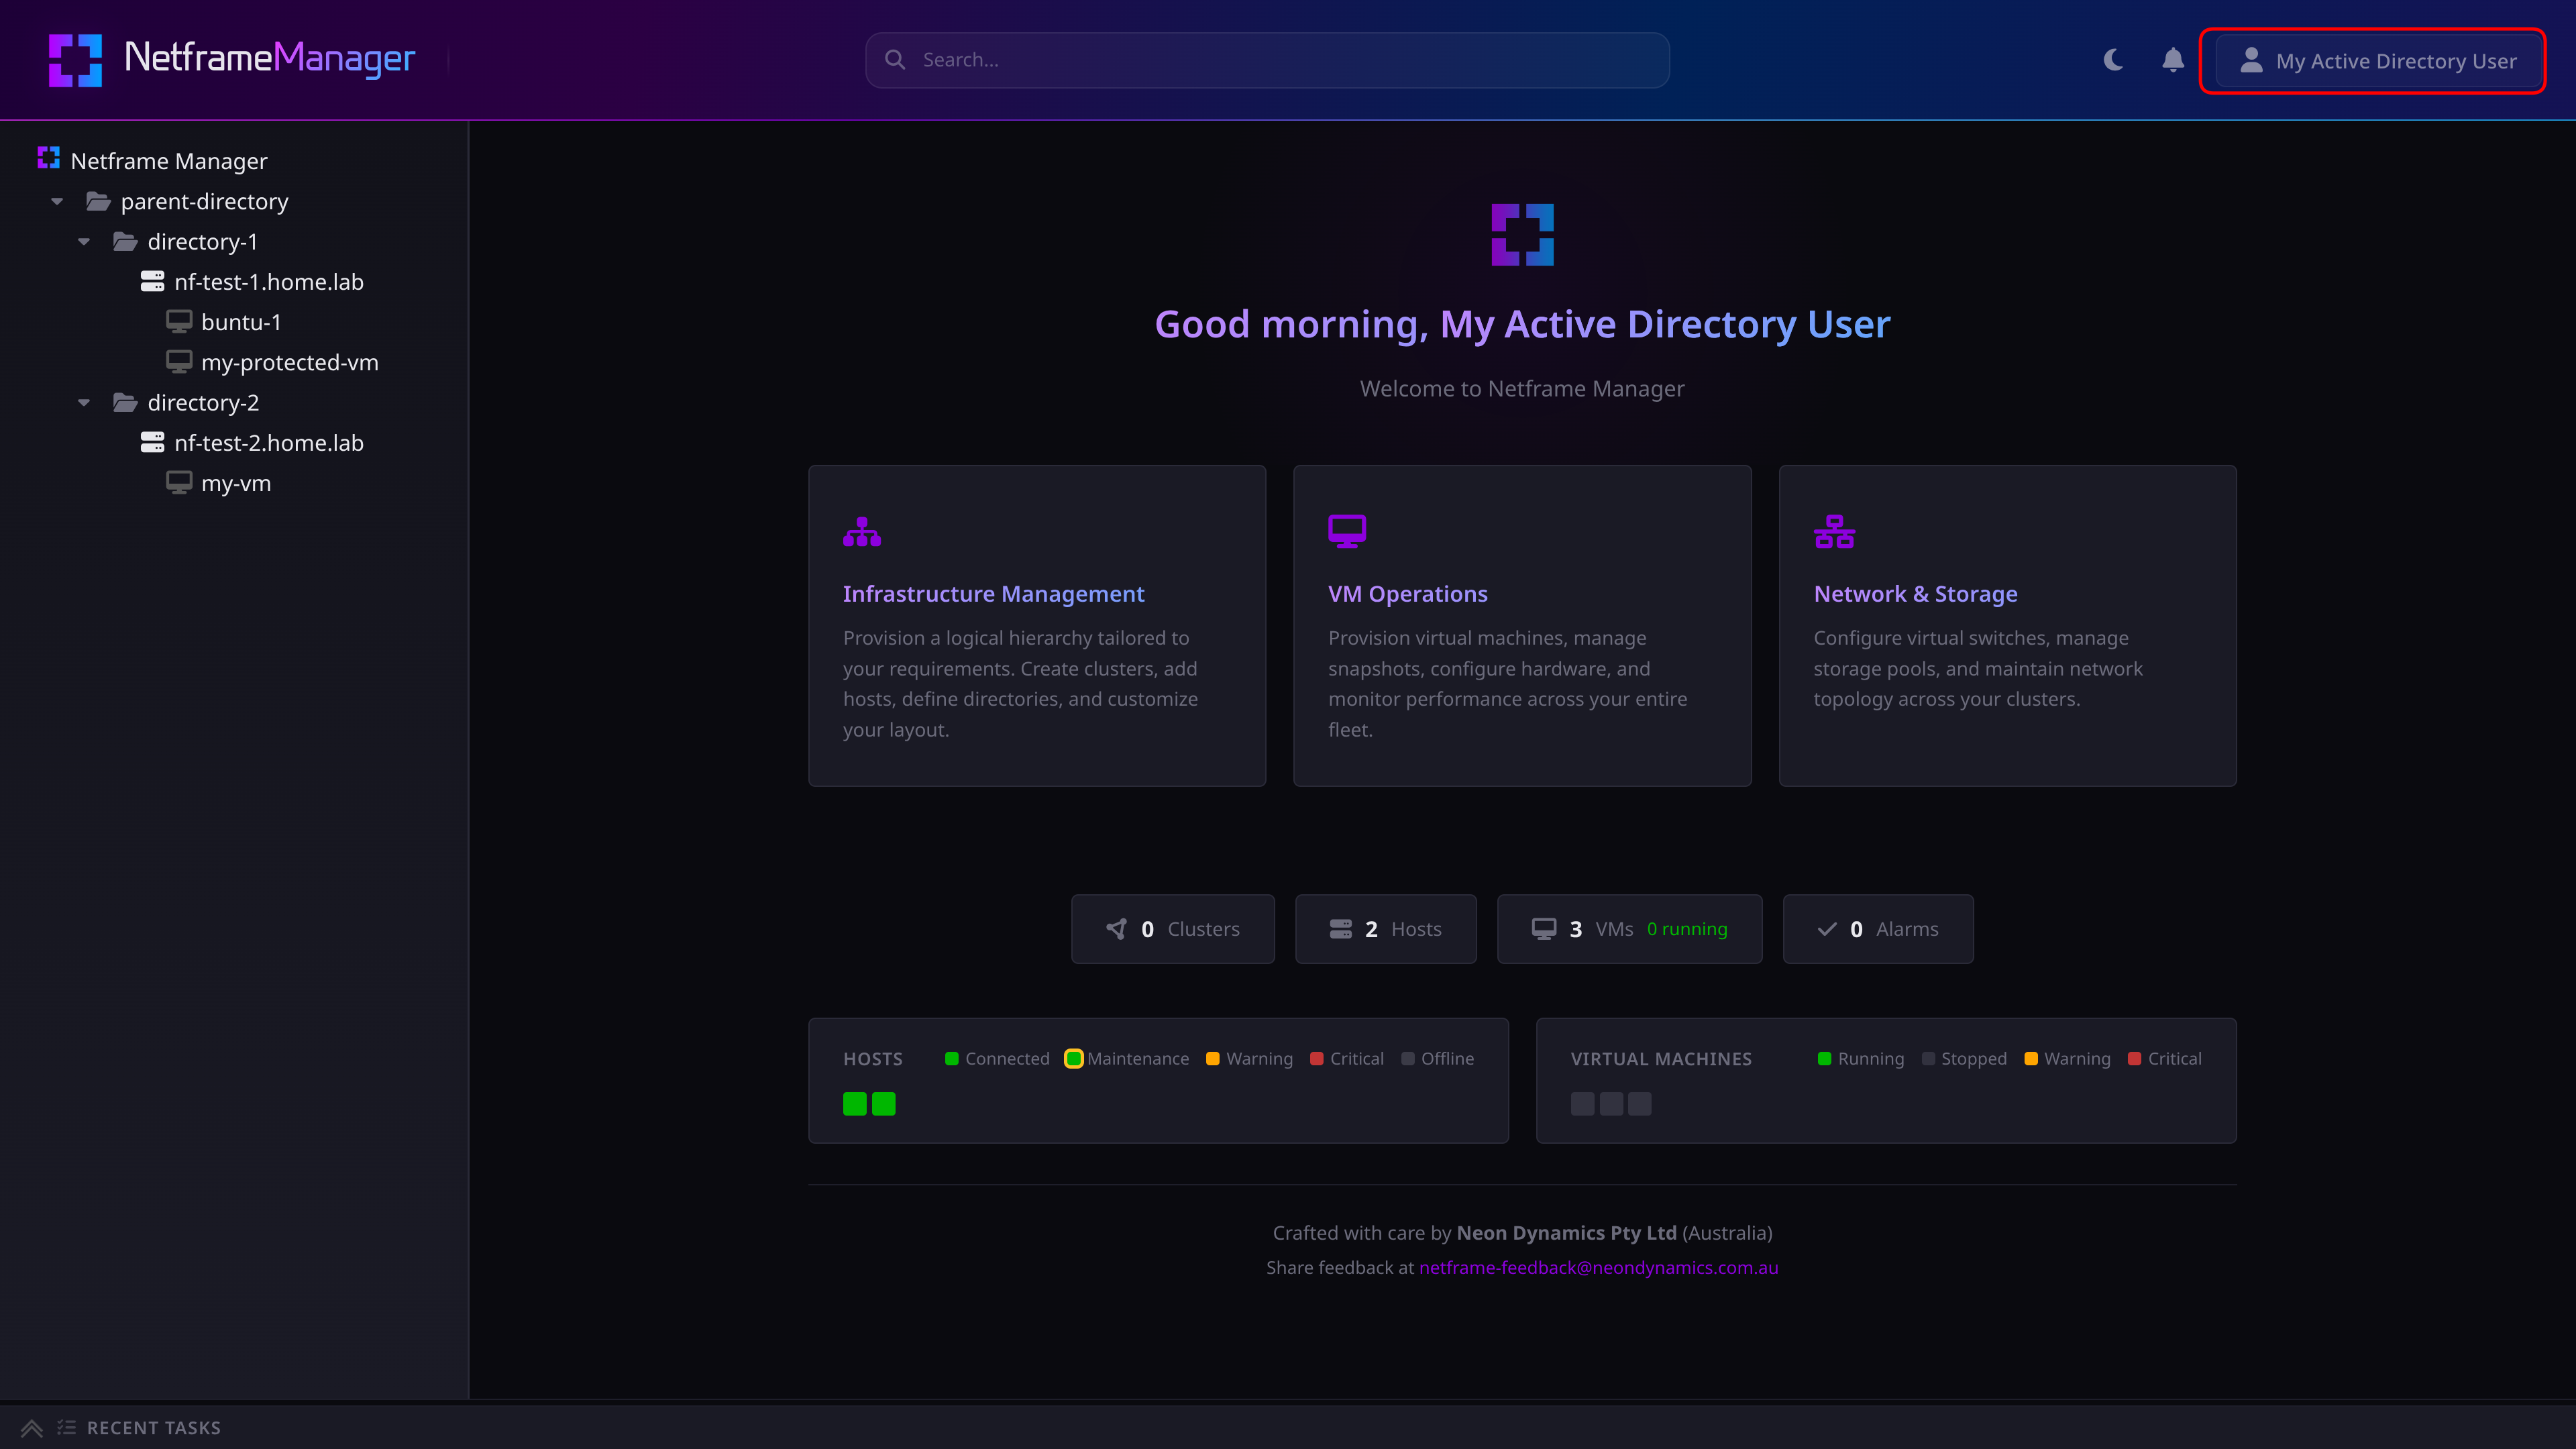
Note however that if the user or group has not been assigned any permissions, then they won't be able to see or access anything in Netframe. See below for how to assign permissions.
¶ Permissions and Roles
Fine-grained permissions and access control to everything in Netframe Manager can be configured using roles and by assigning them as permissions to users and groups.
¶ Permissions Overview
Permissions in Netframe can be assigned to individual objects, such as:
- The root Netframe Manager object
- Directories and clusters
- Netframe Core Hosts
- VMs
Furthermore, any permissions assigned to an object will propagate to all of its children and descendants, but not to its parents and ancestors.
Note: This means that any permissions assigned to a user on the root Netframe Manager object will propagate to everything else in Netframe. Access to specific infrastructure and objects can be further restricted. See Advanced Permissions below for an example
For example, using the following management infrastructure:
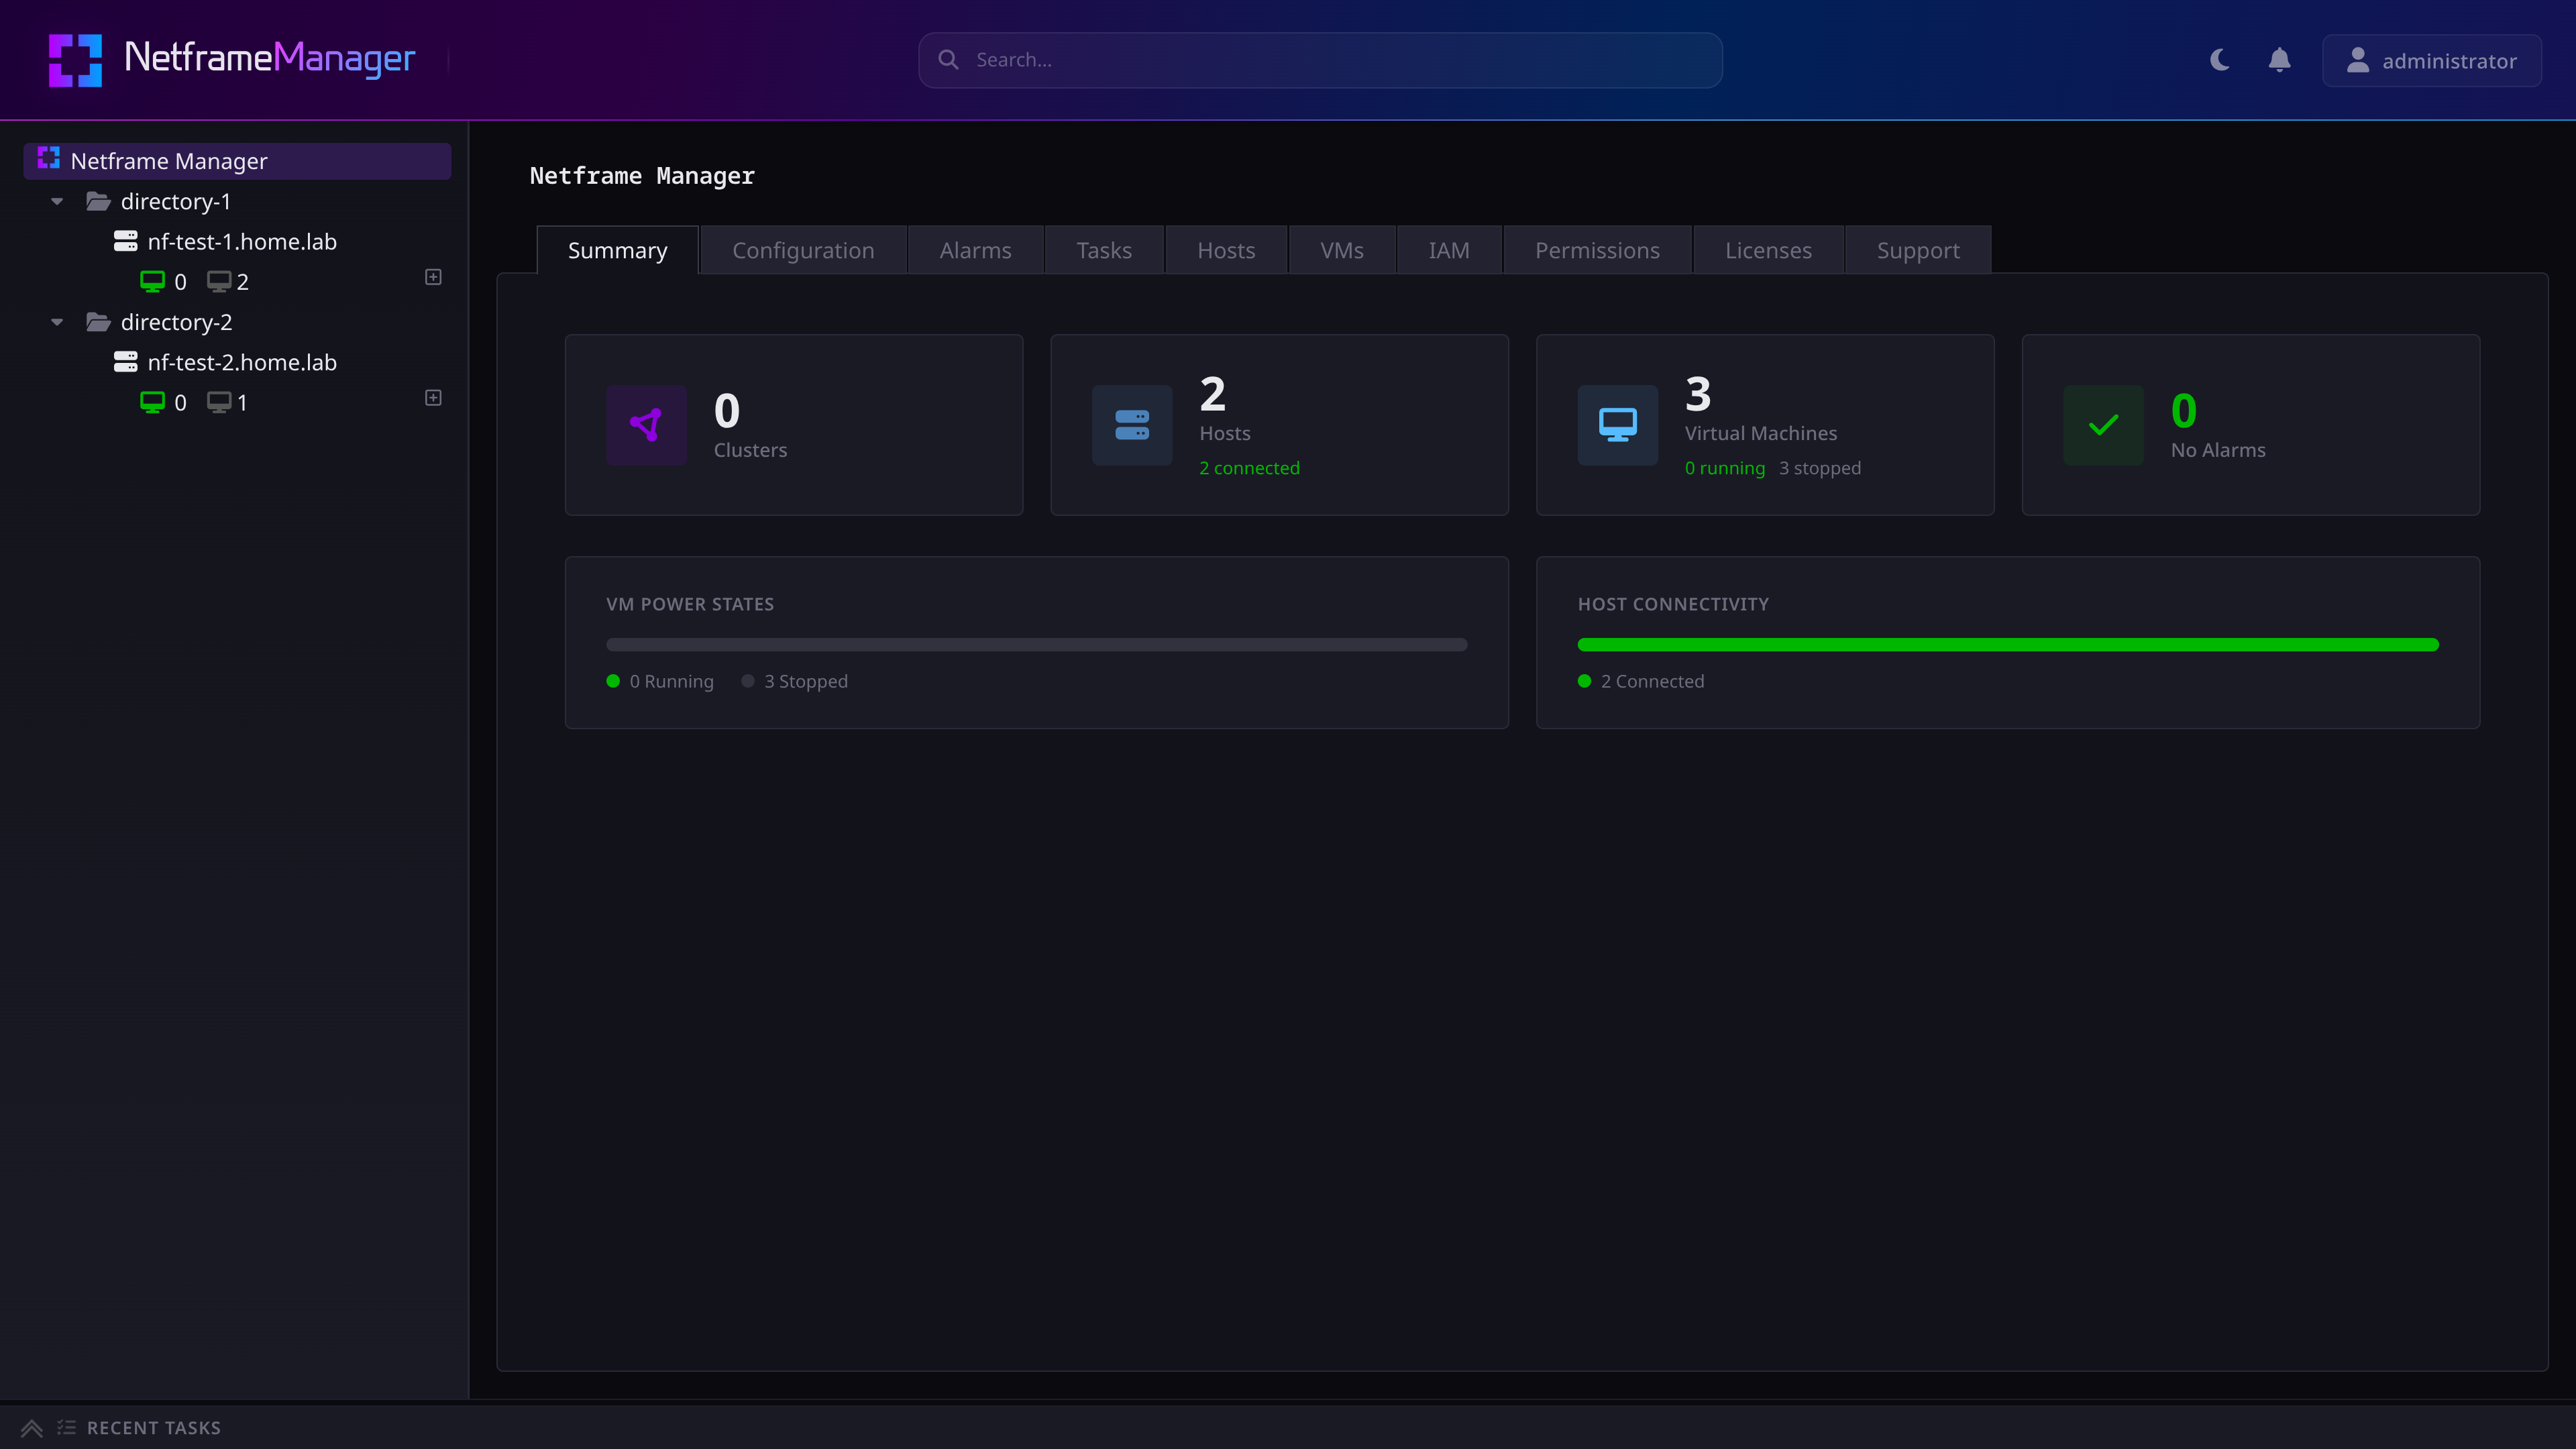
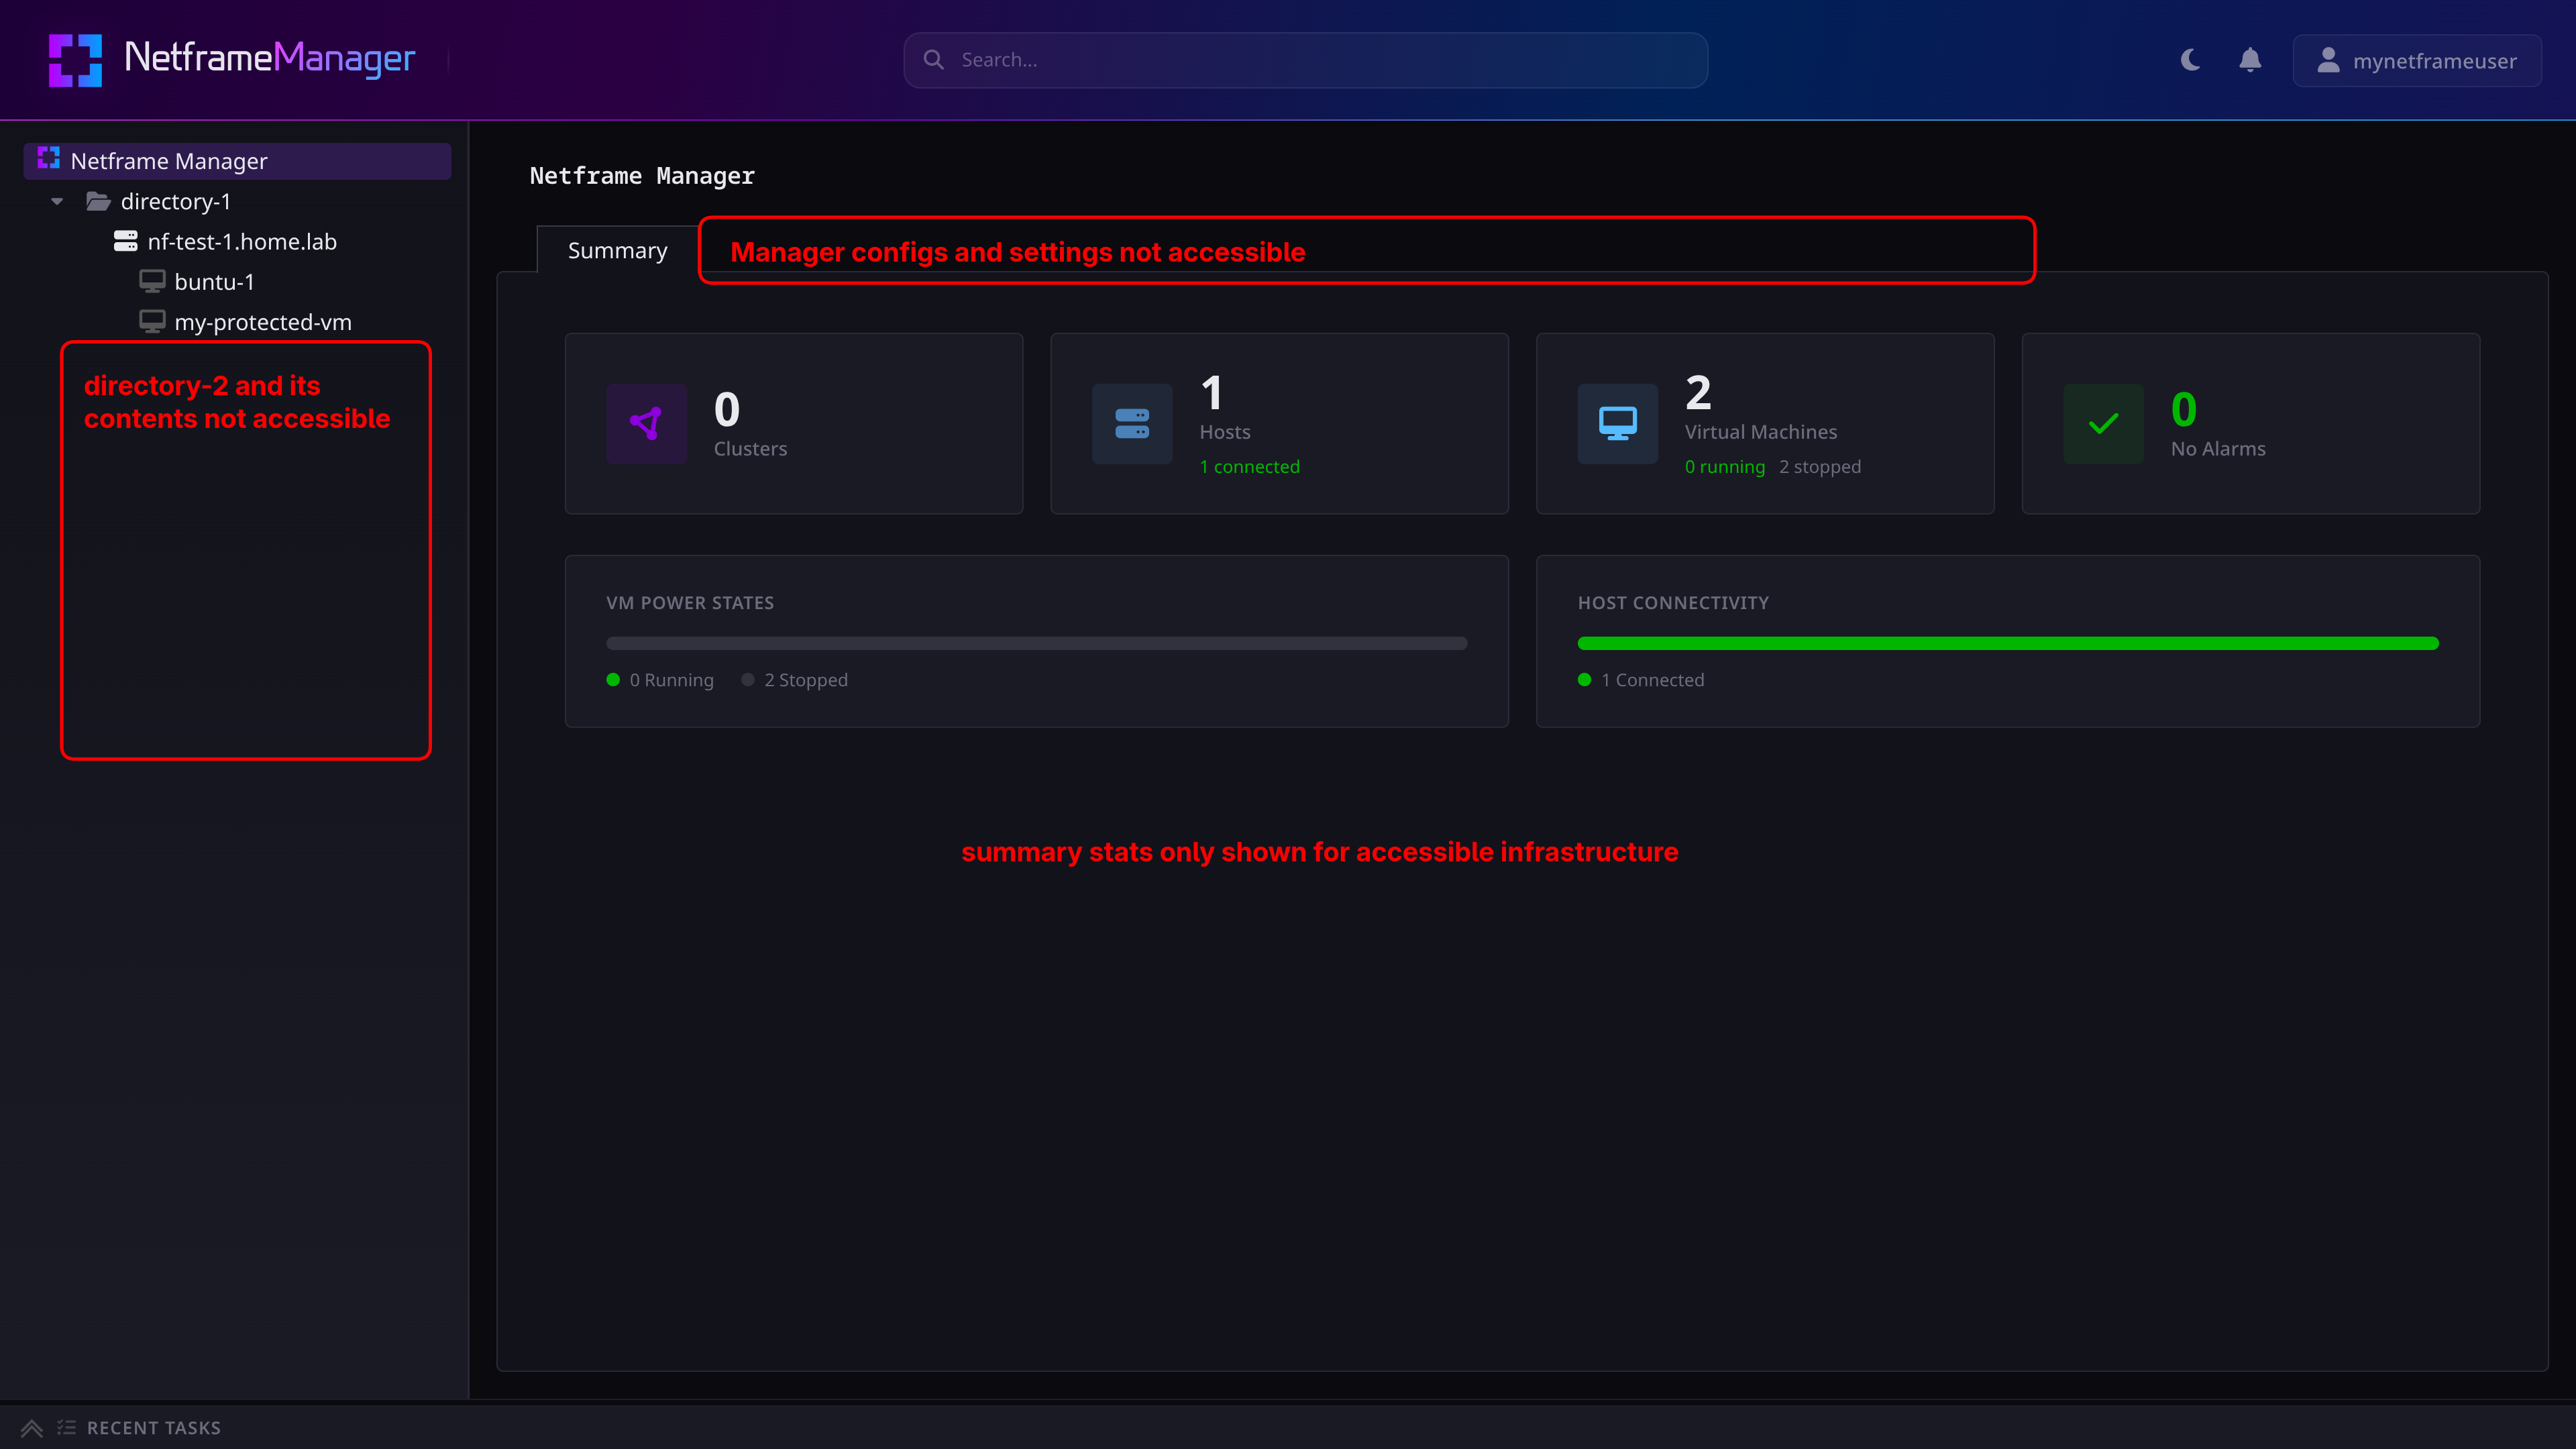
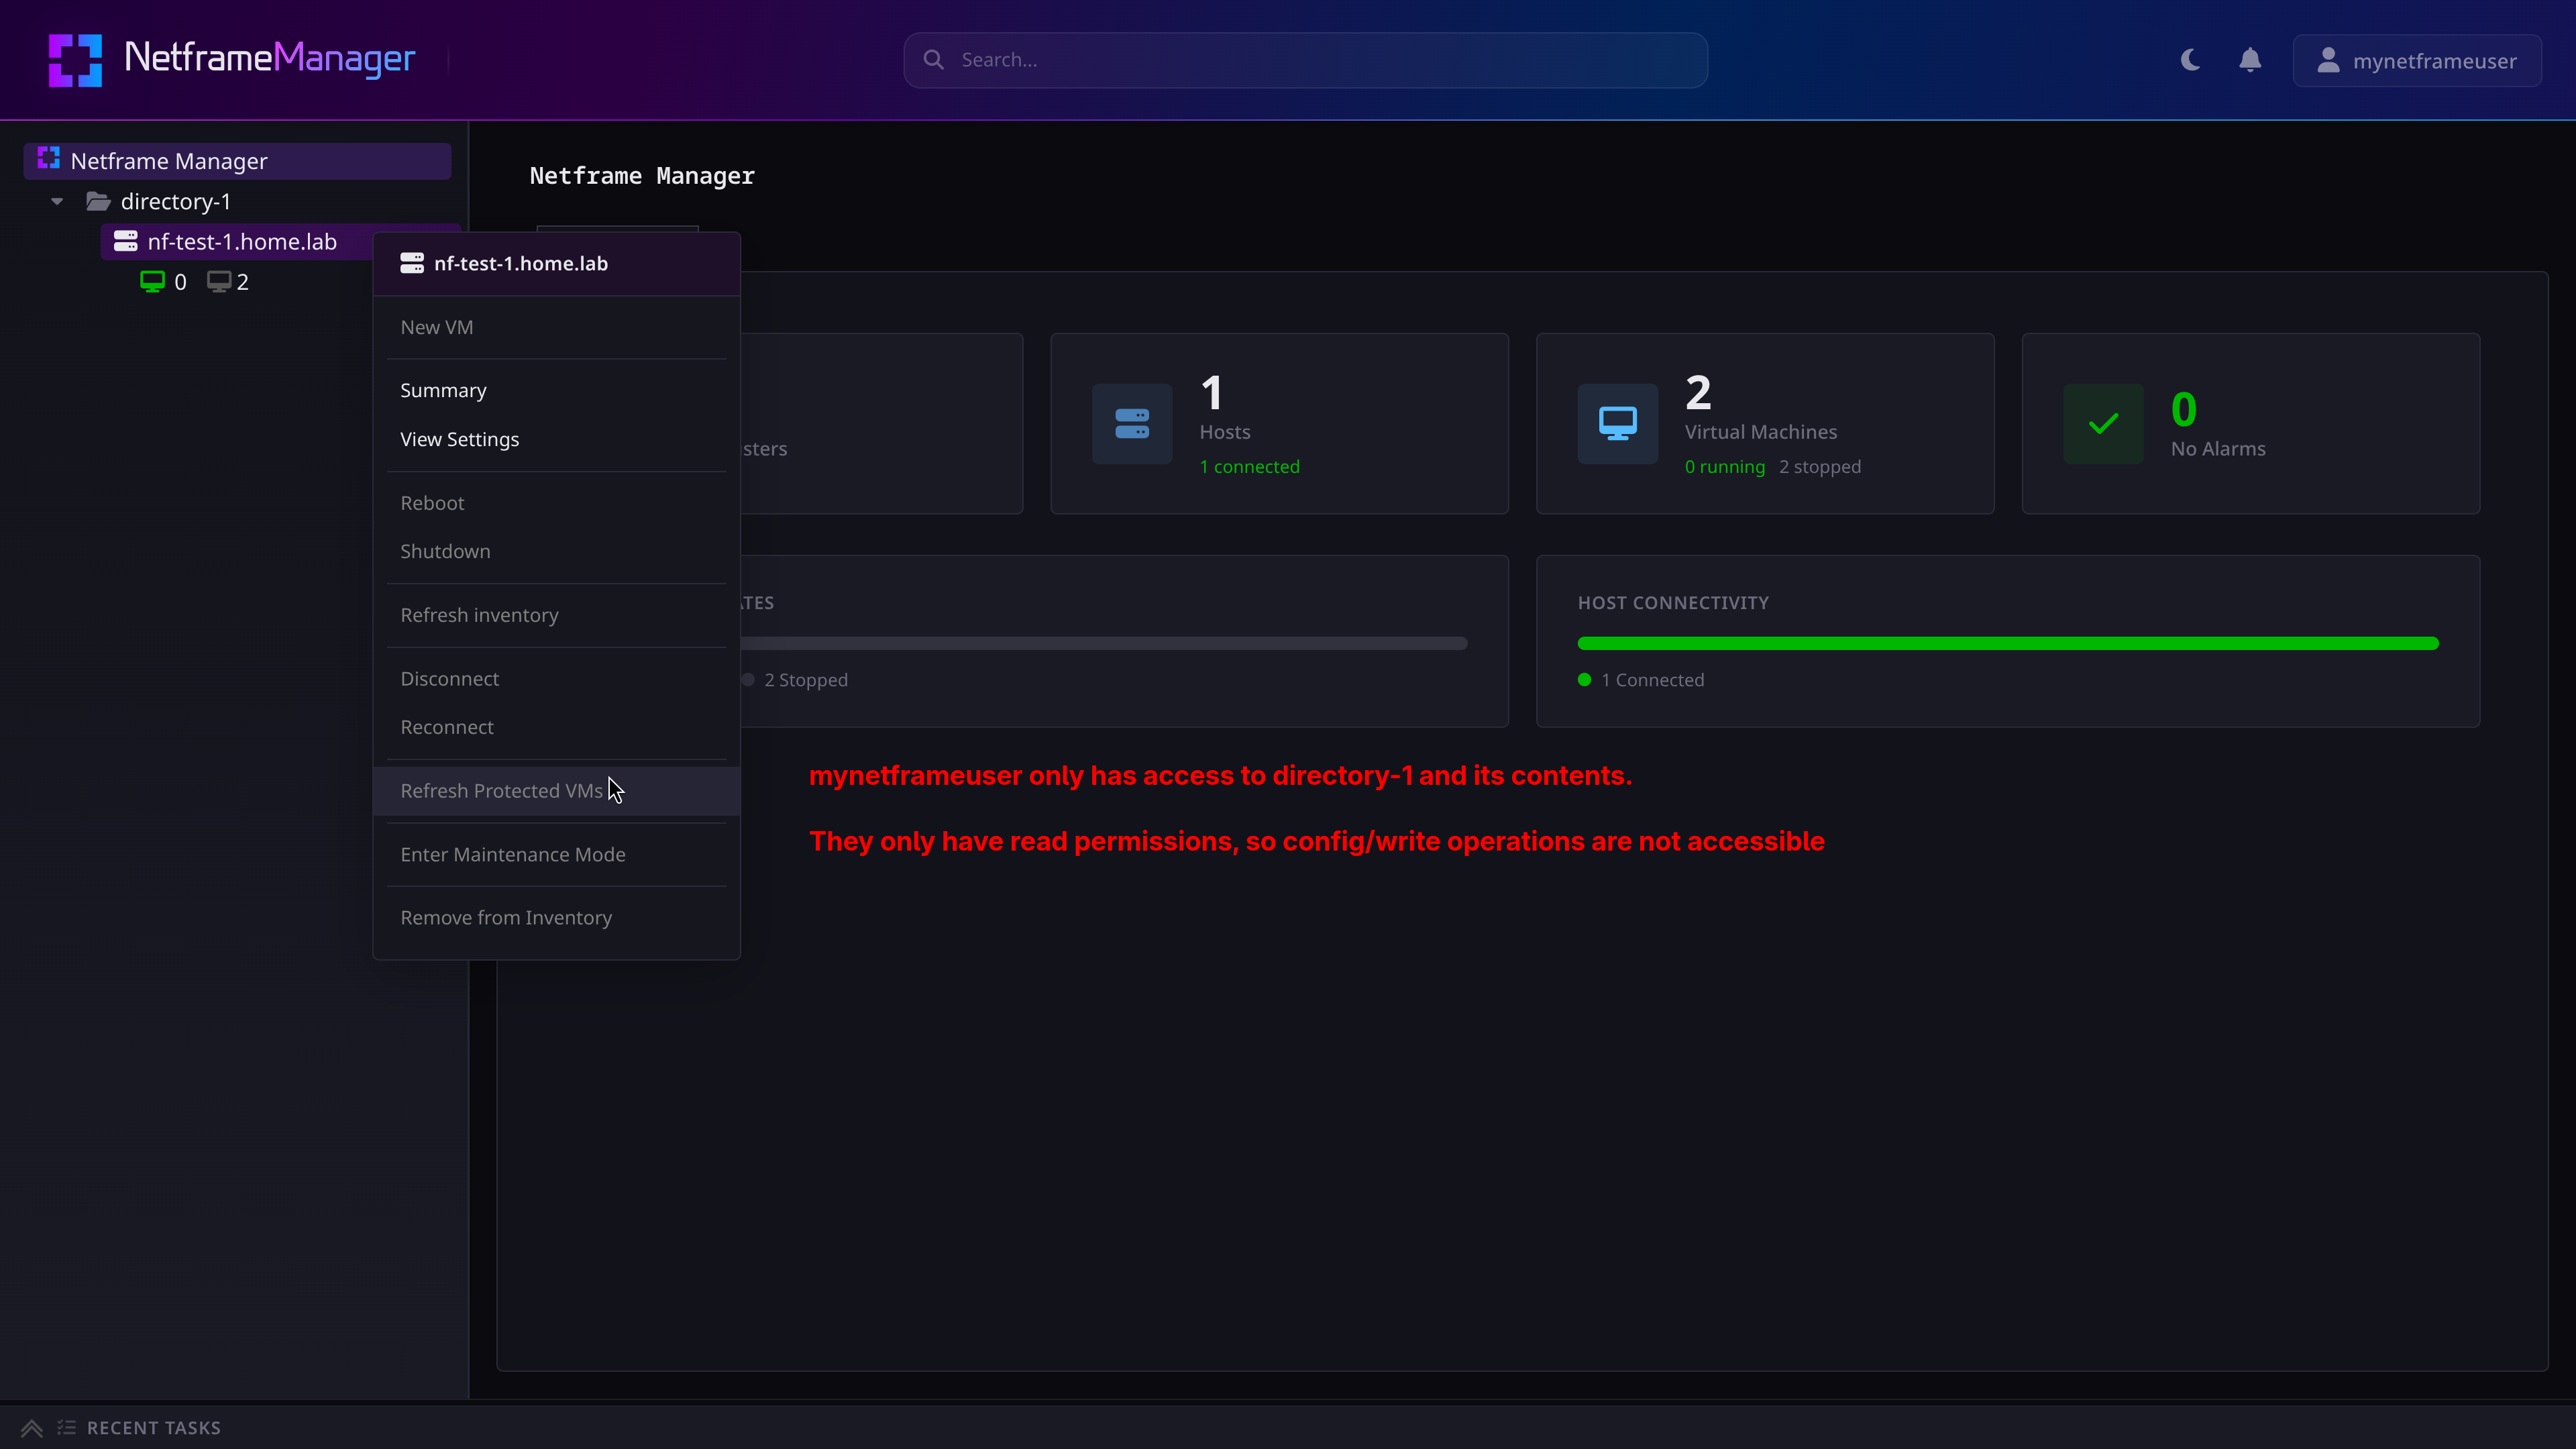
If a user is given read-only access permissions to directory-1, then they will be able to see and interact with (but not modify the configuration or state of):
- A summary on the root Netframe Manager object
- The directory
- The cluster within it
- Each Host and VM in the cluster
But won't be able to see or interact with:
directory-2and everything within it- The root Netframe Manager object's configurations
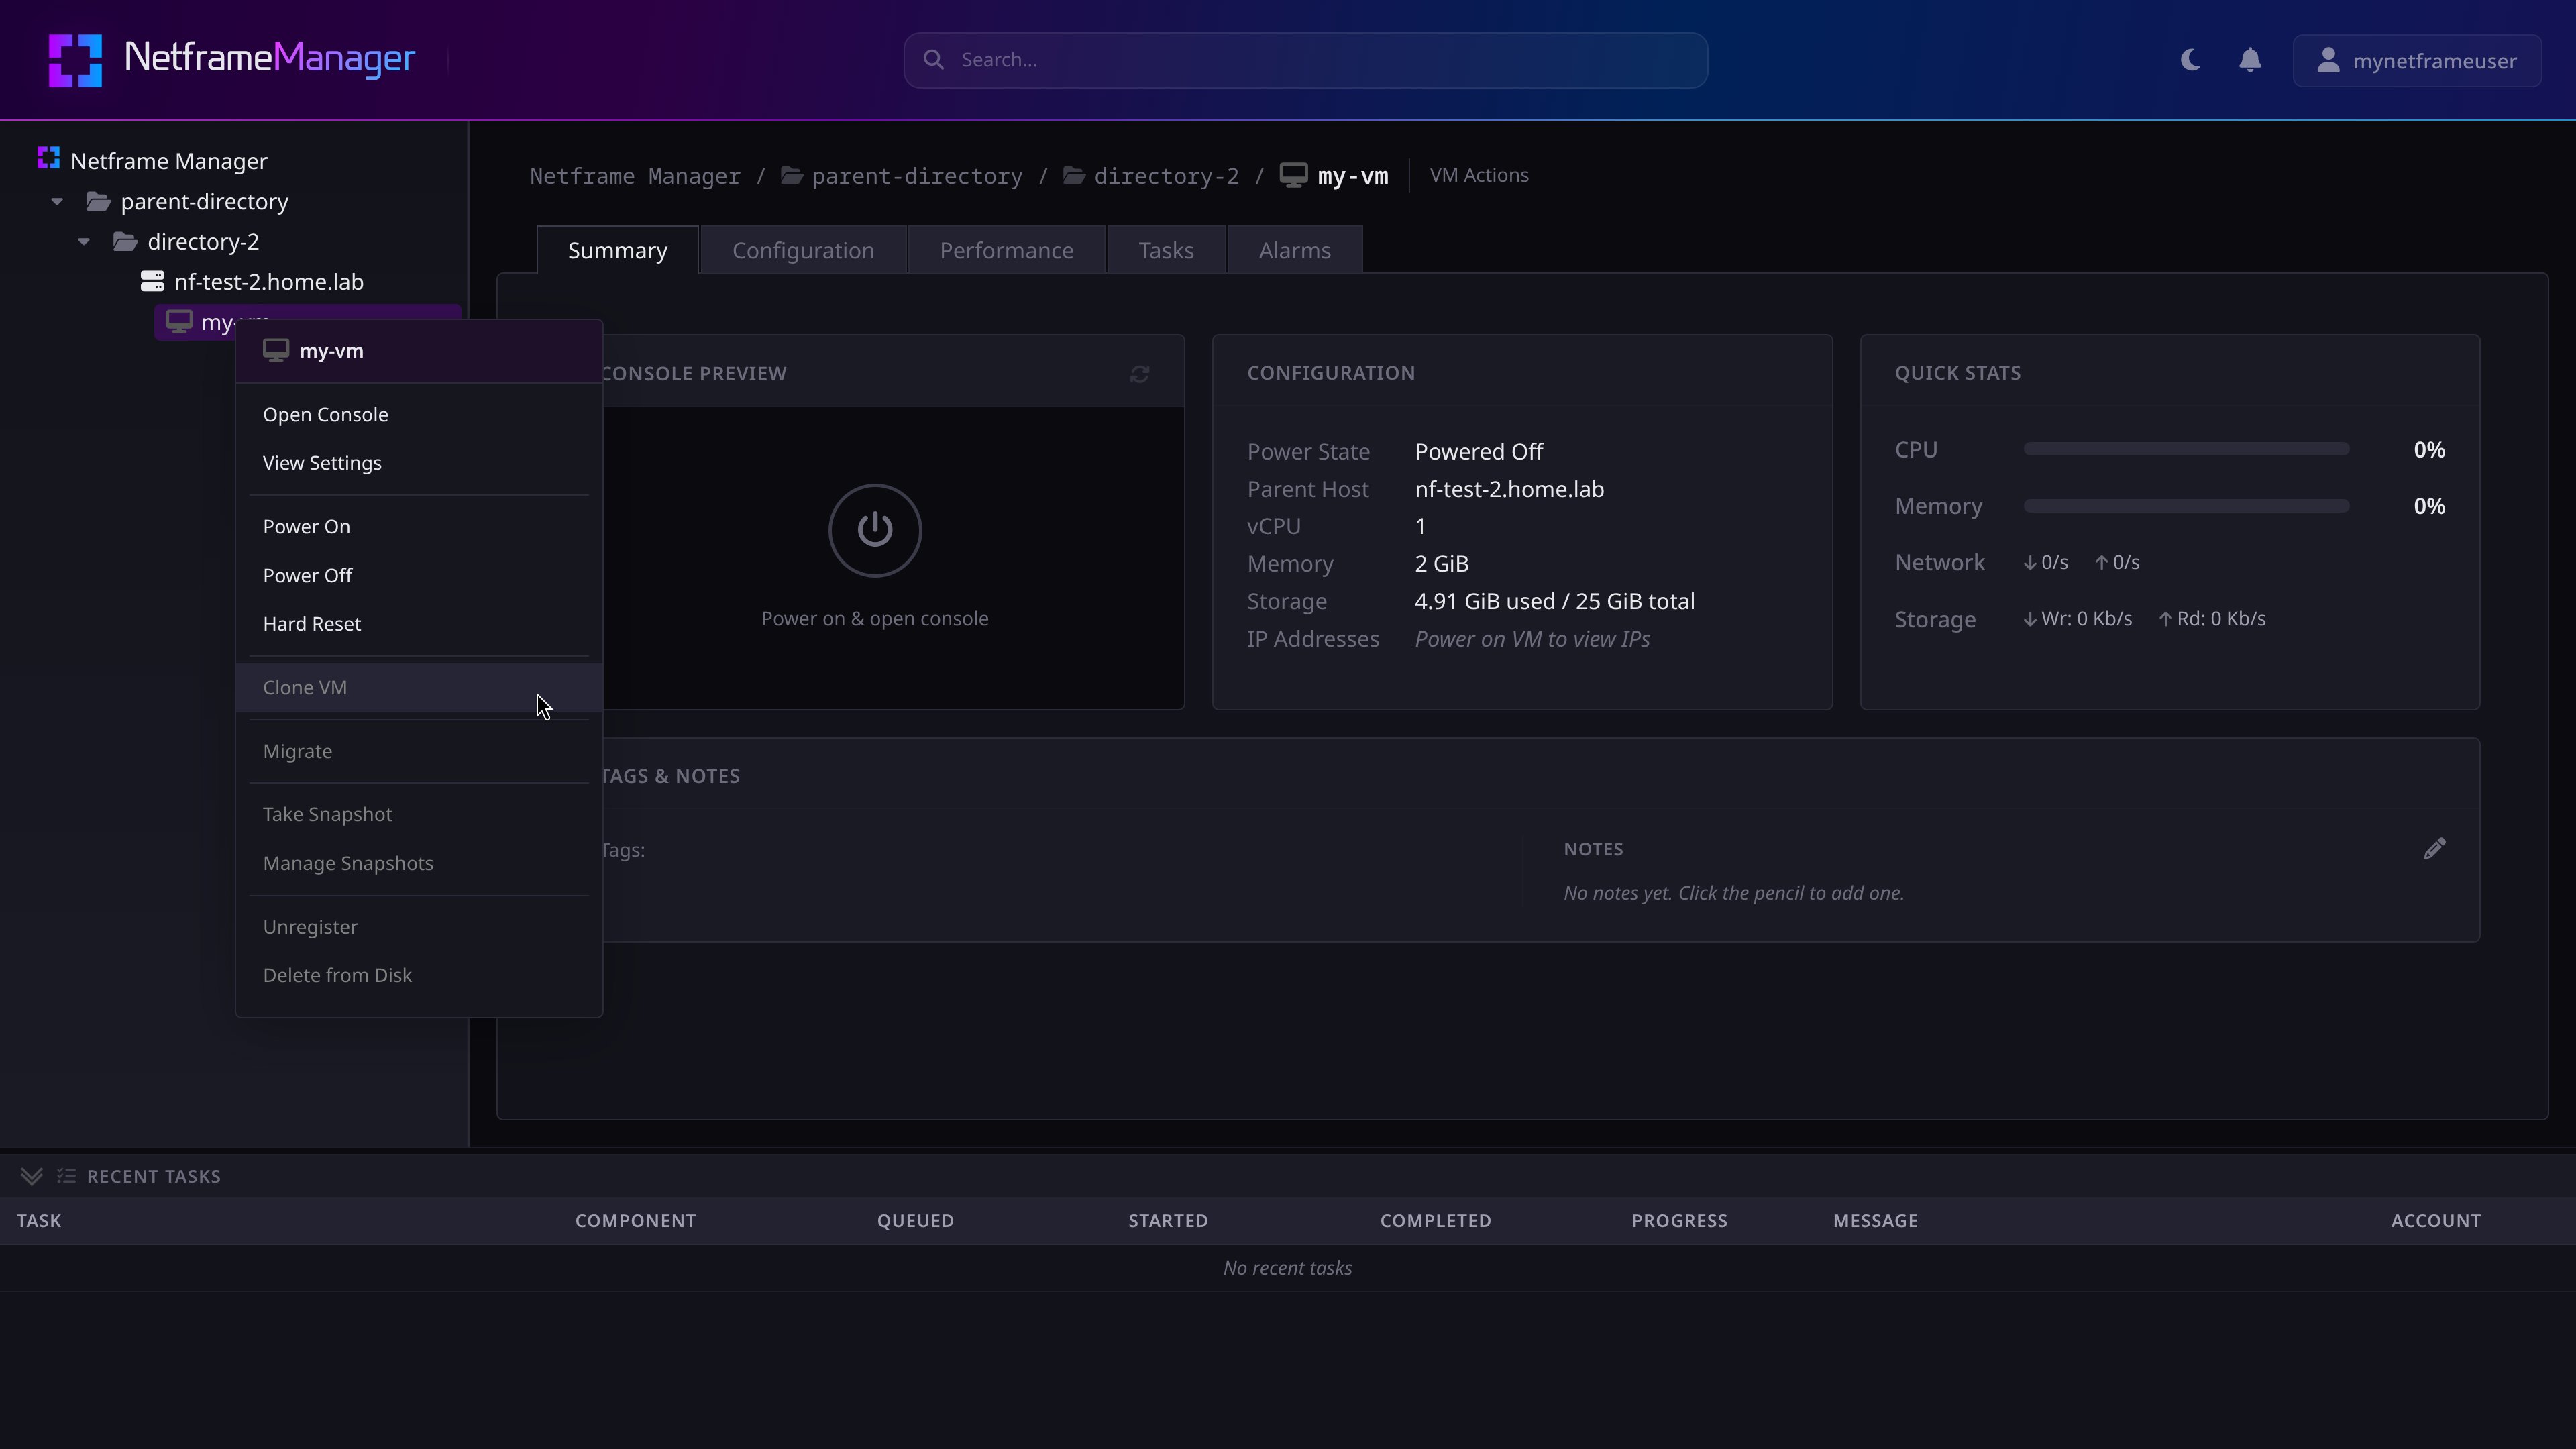
Their view in Netframe will appear as follows:
Note: Any permissions assigned to a user will extend to any API requests made using a token they've provisioned. Access permission can not be bypassed via API requests
¶ Roles
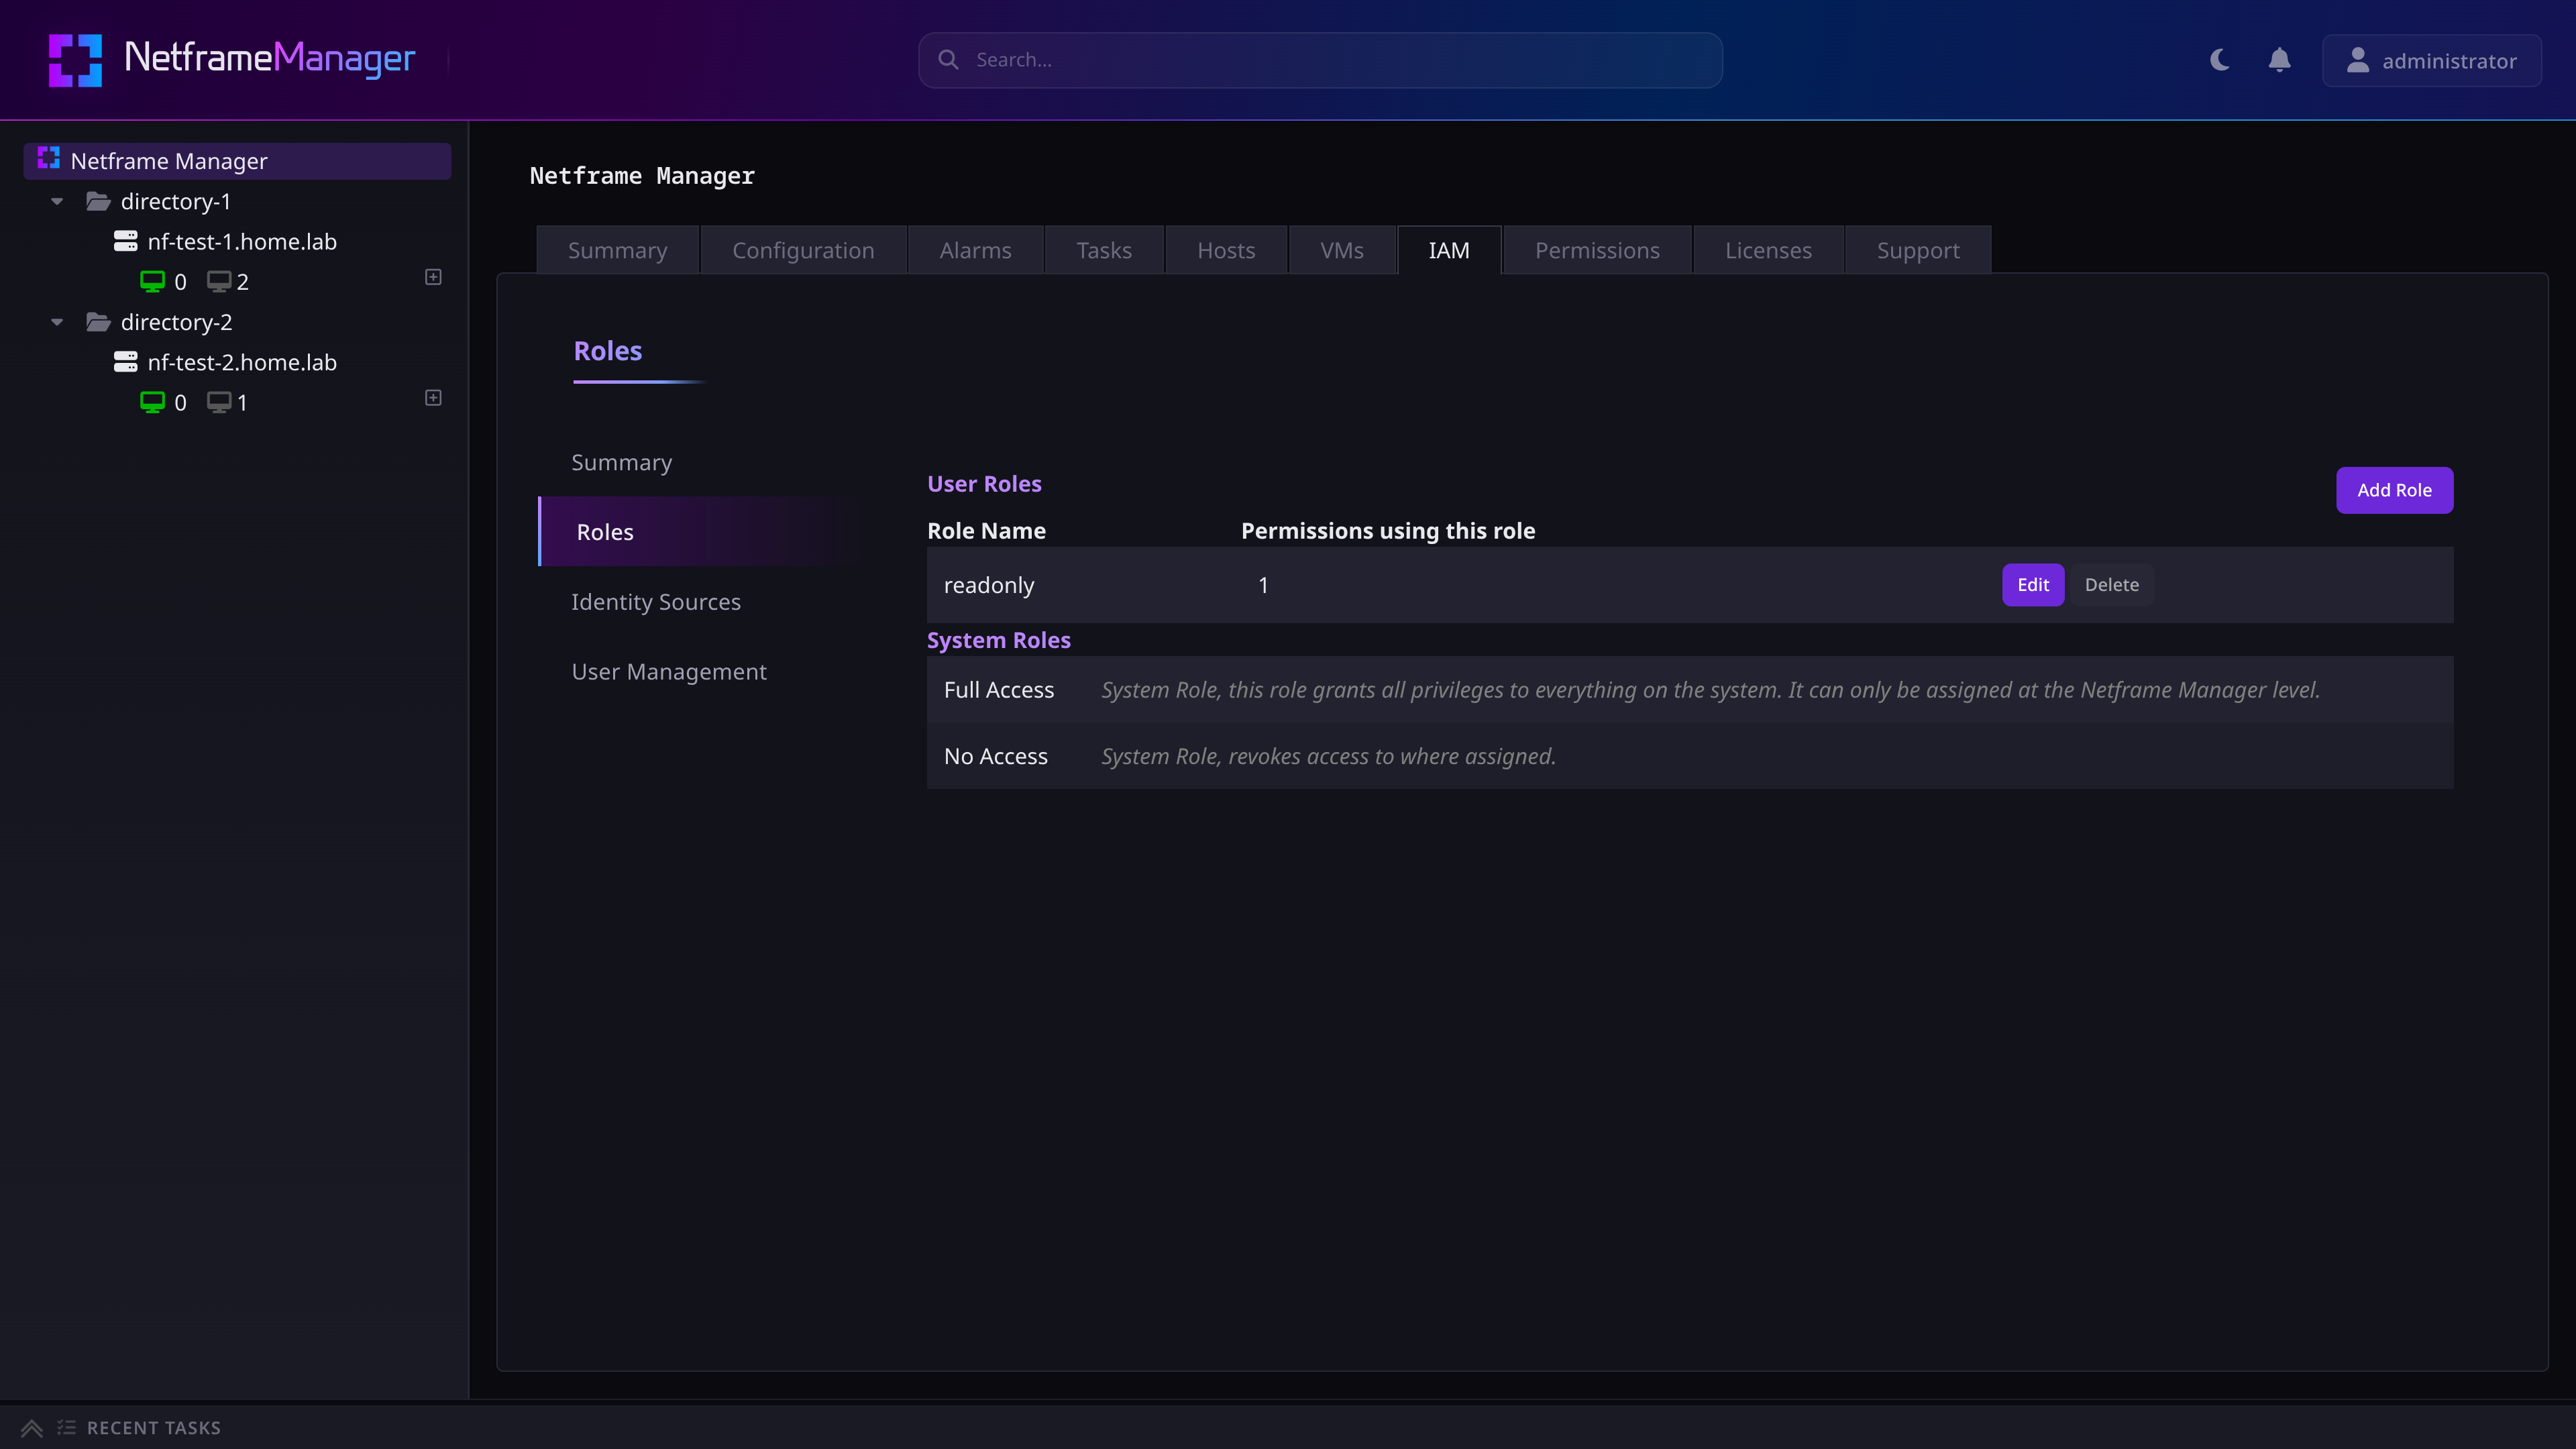
Netframe Manager comes with two default system roles, and allows the creation of additional custom roles.
Roles can be viewed and managed in the Netframe Manager's IAM tab under the Roles subtab.
¶ Default System Roles
There are two default system roles in Netframe:
- Full Access: Allows full read and write access to everything in Netframe. Can only be assigned to the root Netframe Manager object
- No Access: Content will not be viewable or interactable (including via API requests)
Note: The system roles have some special behaviors when used to apply permissions. See Advanced Permissions below for more info
¶ Custom Roles
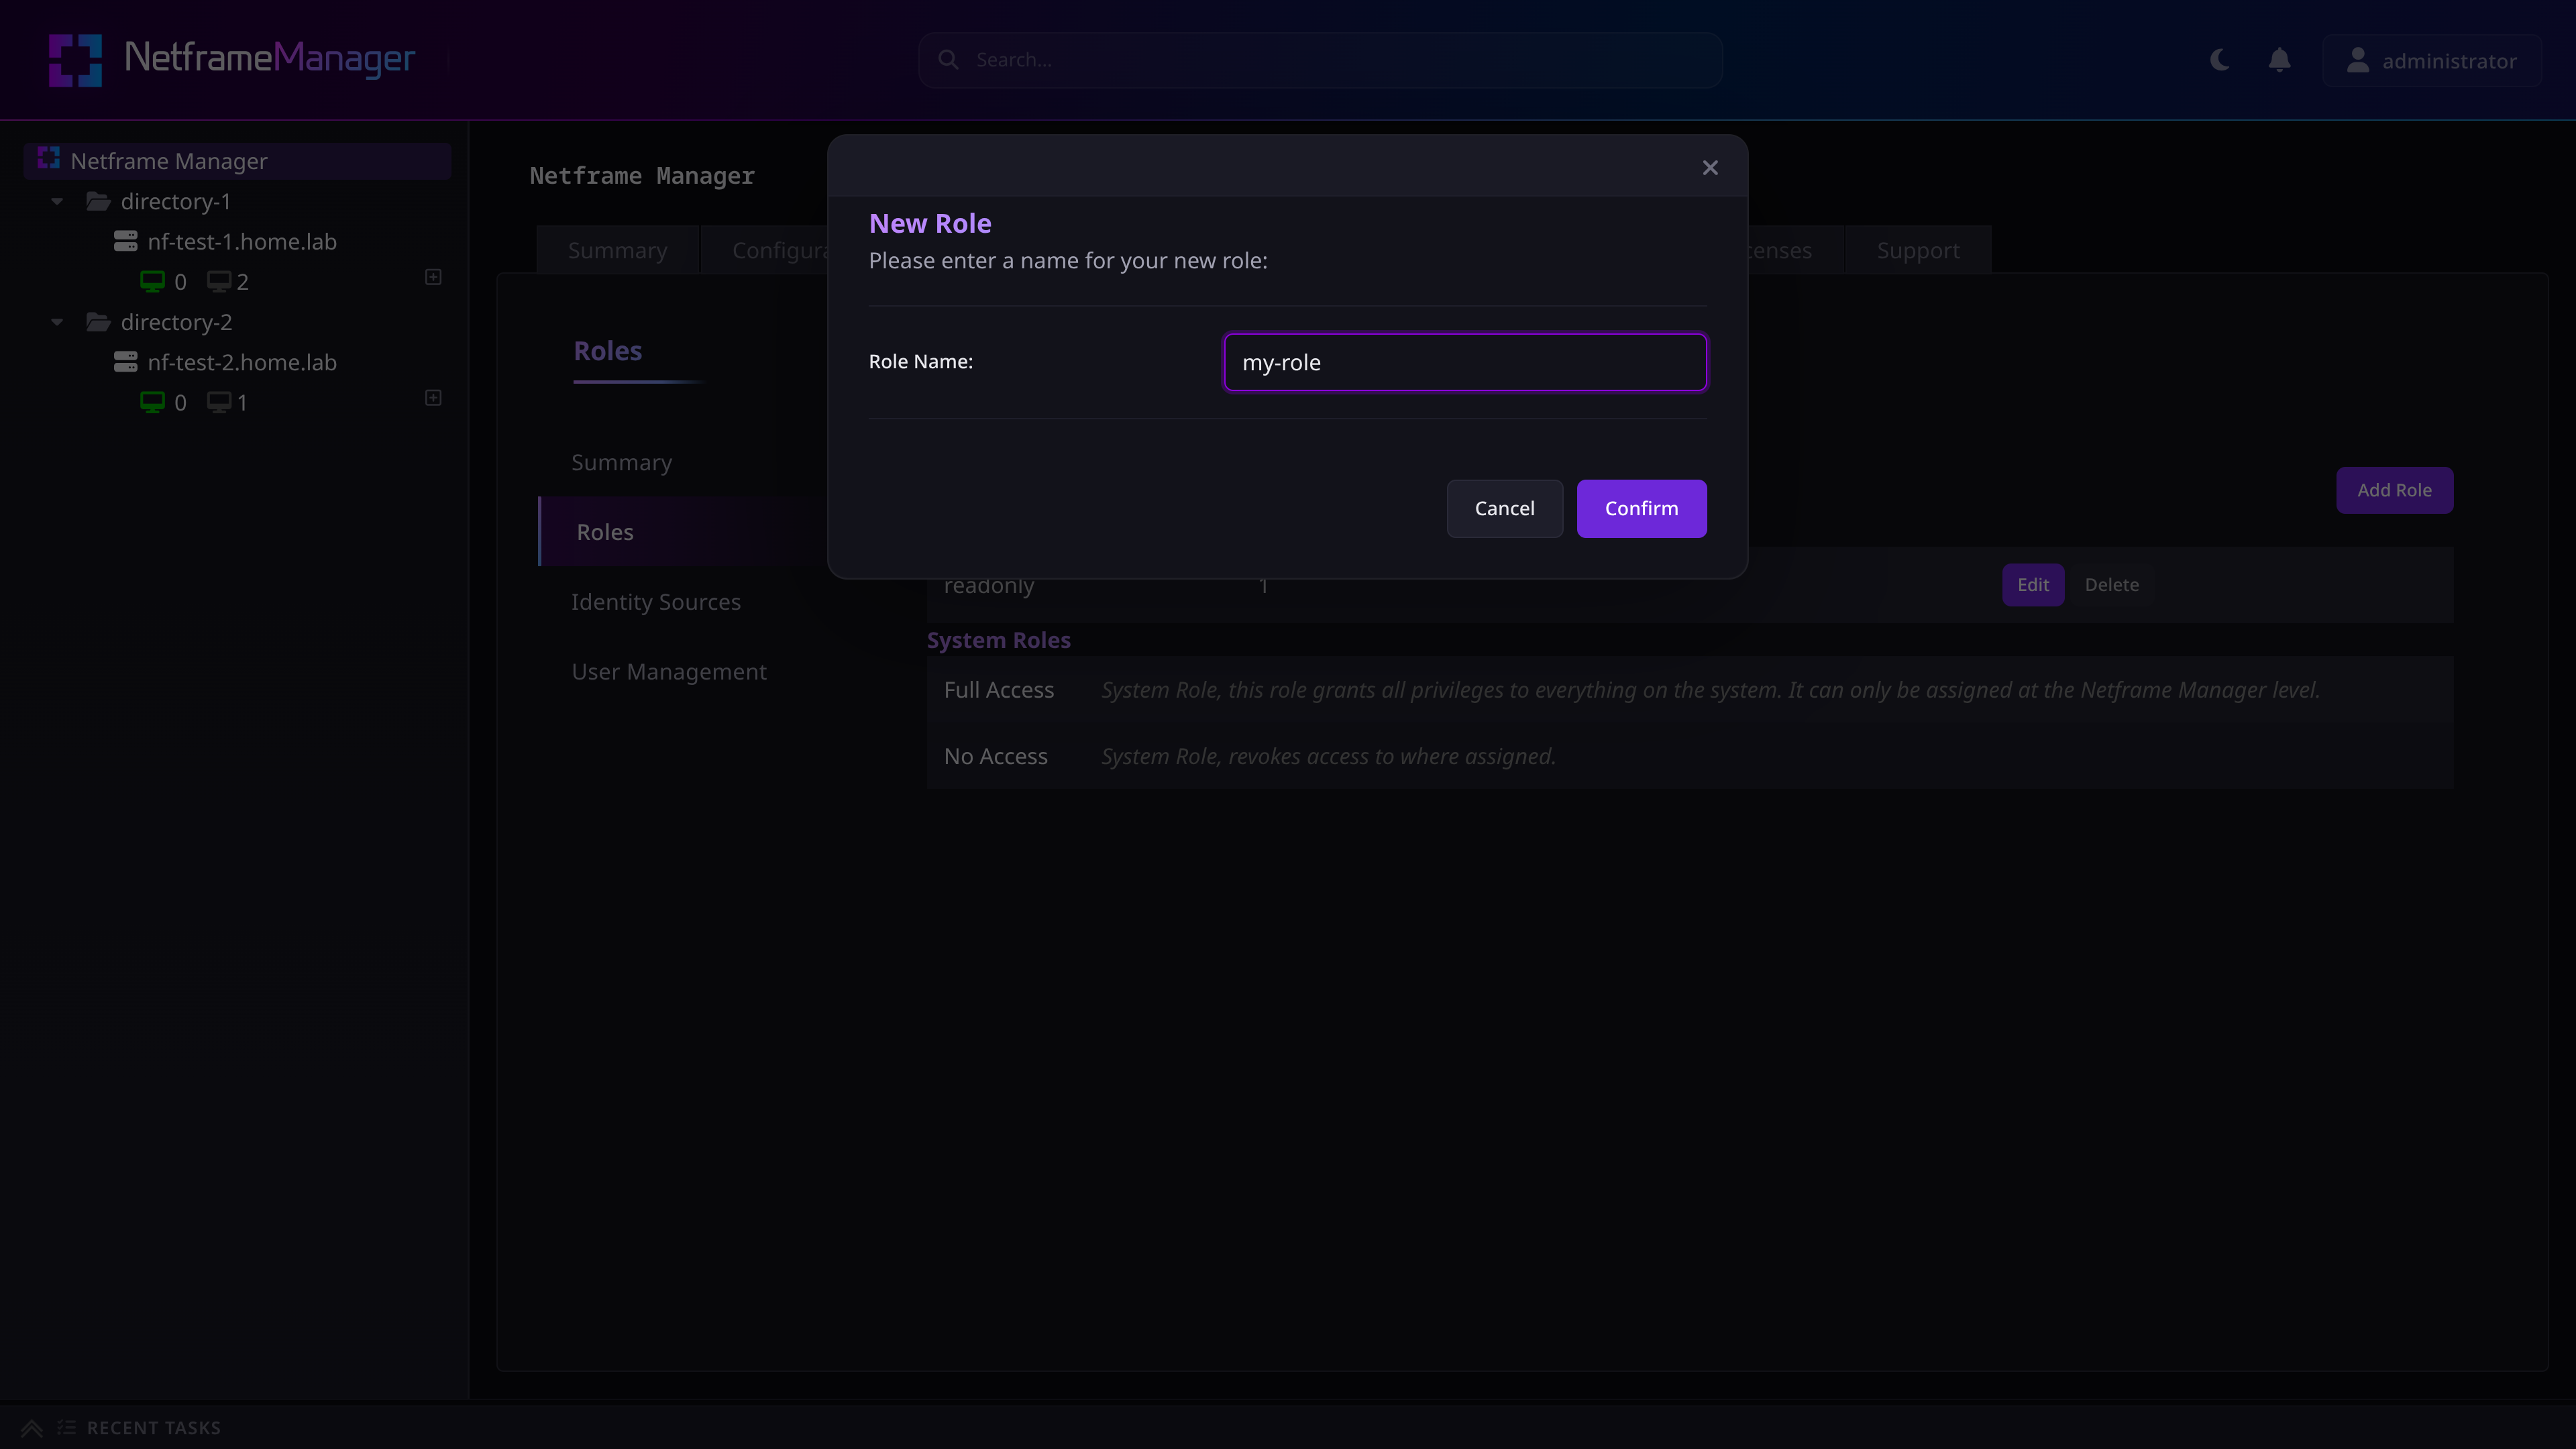
To create a custom role with specific privileges, press the Add Role button, and name your new role.
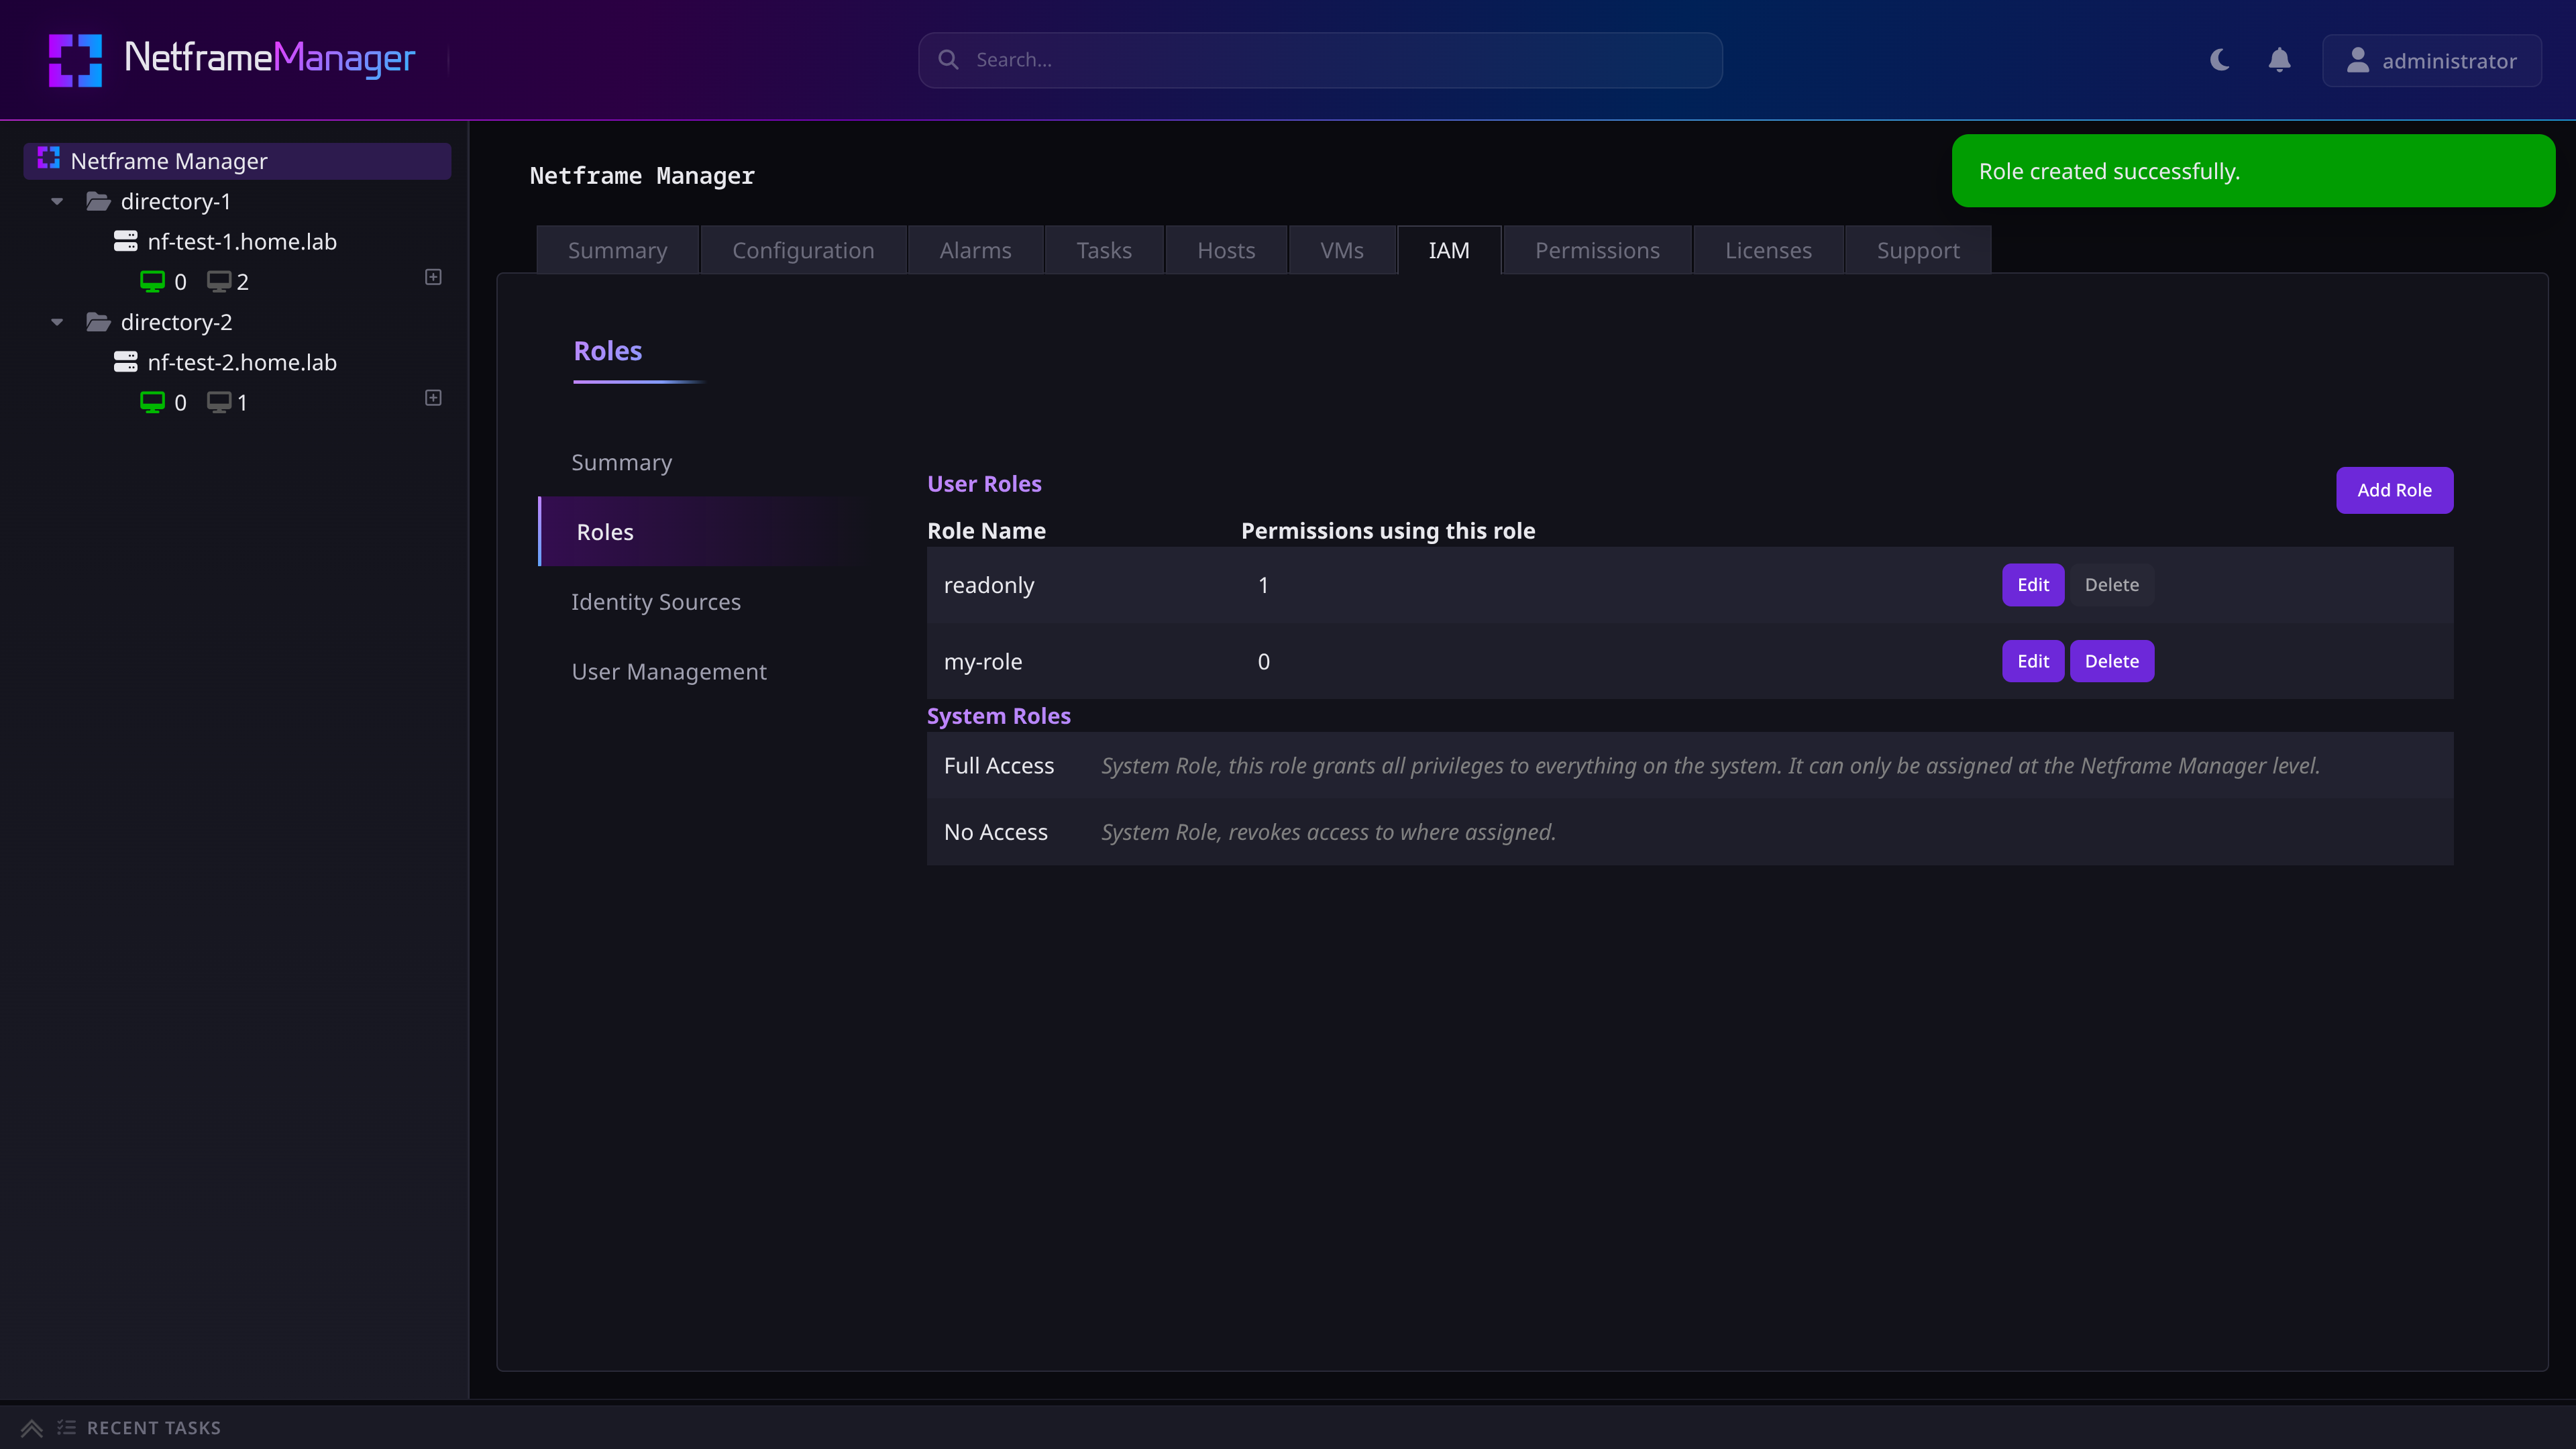
Then, edit the new role to assign privileges to it
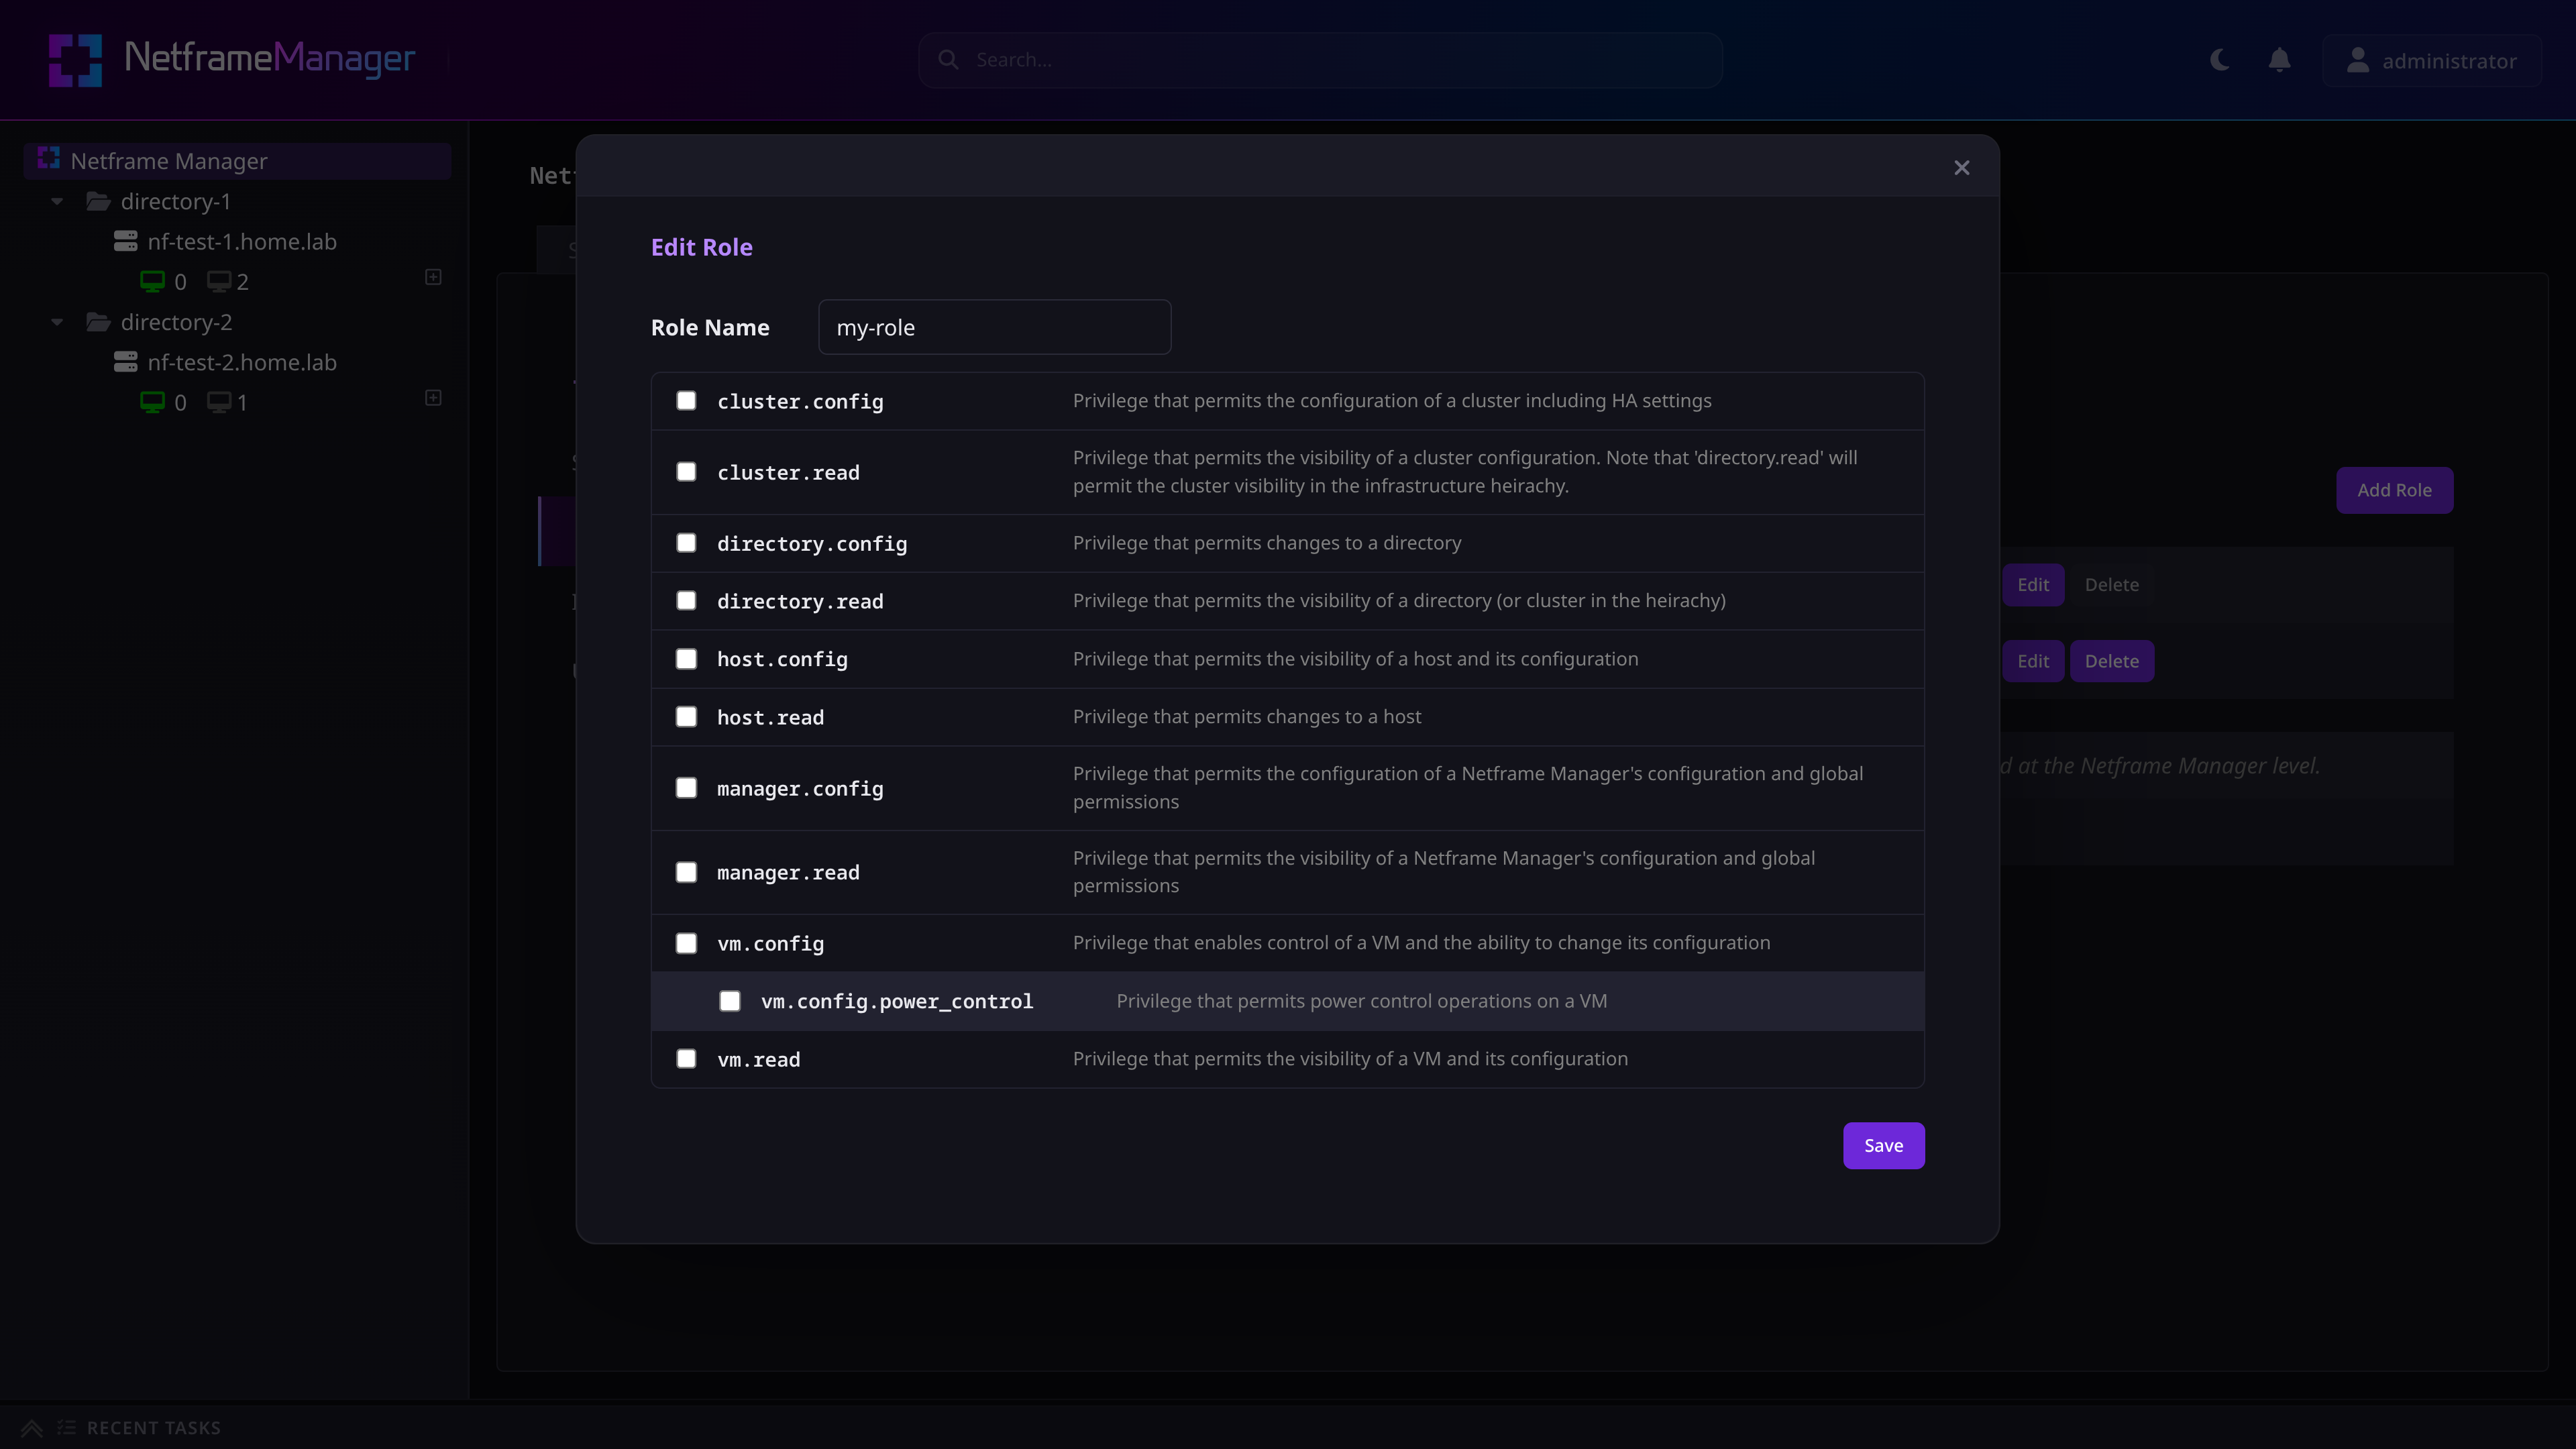
The read and/or write (called config in manager) privileges can be independently added to roles for the following infrastructure objects:
- Manager
- Permits the global configurations on the root Netframe Manager object, and the Permissions tab on each infrastructure object
- Directories
- Clusters
- Hosts
- VMs
- also offers a vm power controls privilege, enabling power control operations while still disabling vm configuration modifications
Note: Clusters are considered to be a special type of Directory, so the
directory.readprivilege will also allow clusters to be viewed in the infrastructure hierarchy, but won't allow clusters' stats and configurations to be viewed.Likewise, the
directory.configprivilege will allow clusters to be moved and renamed just like directories, but won't allow their specific configurations (including HA) to be modified.
Once the desired privileges have been selected, press the save button to update the role.
However, the role still needs to be used to applied as a permission before it can take effect.
¶ Assigning Permissions
Permissions are assigned to objects in the infrastructure hierarchy, and work by applying a role's privileges to a selected user or user group.
Note: Any permissions assigned to an object will propagate to the object's children and descendants.
To add a permission, navigate to your desired infrastructure object's Permissions tab, and press the Add Permission button
- Selecting the root Netframe Manager object will apply the permission to everything in your infrastructure
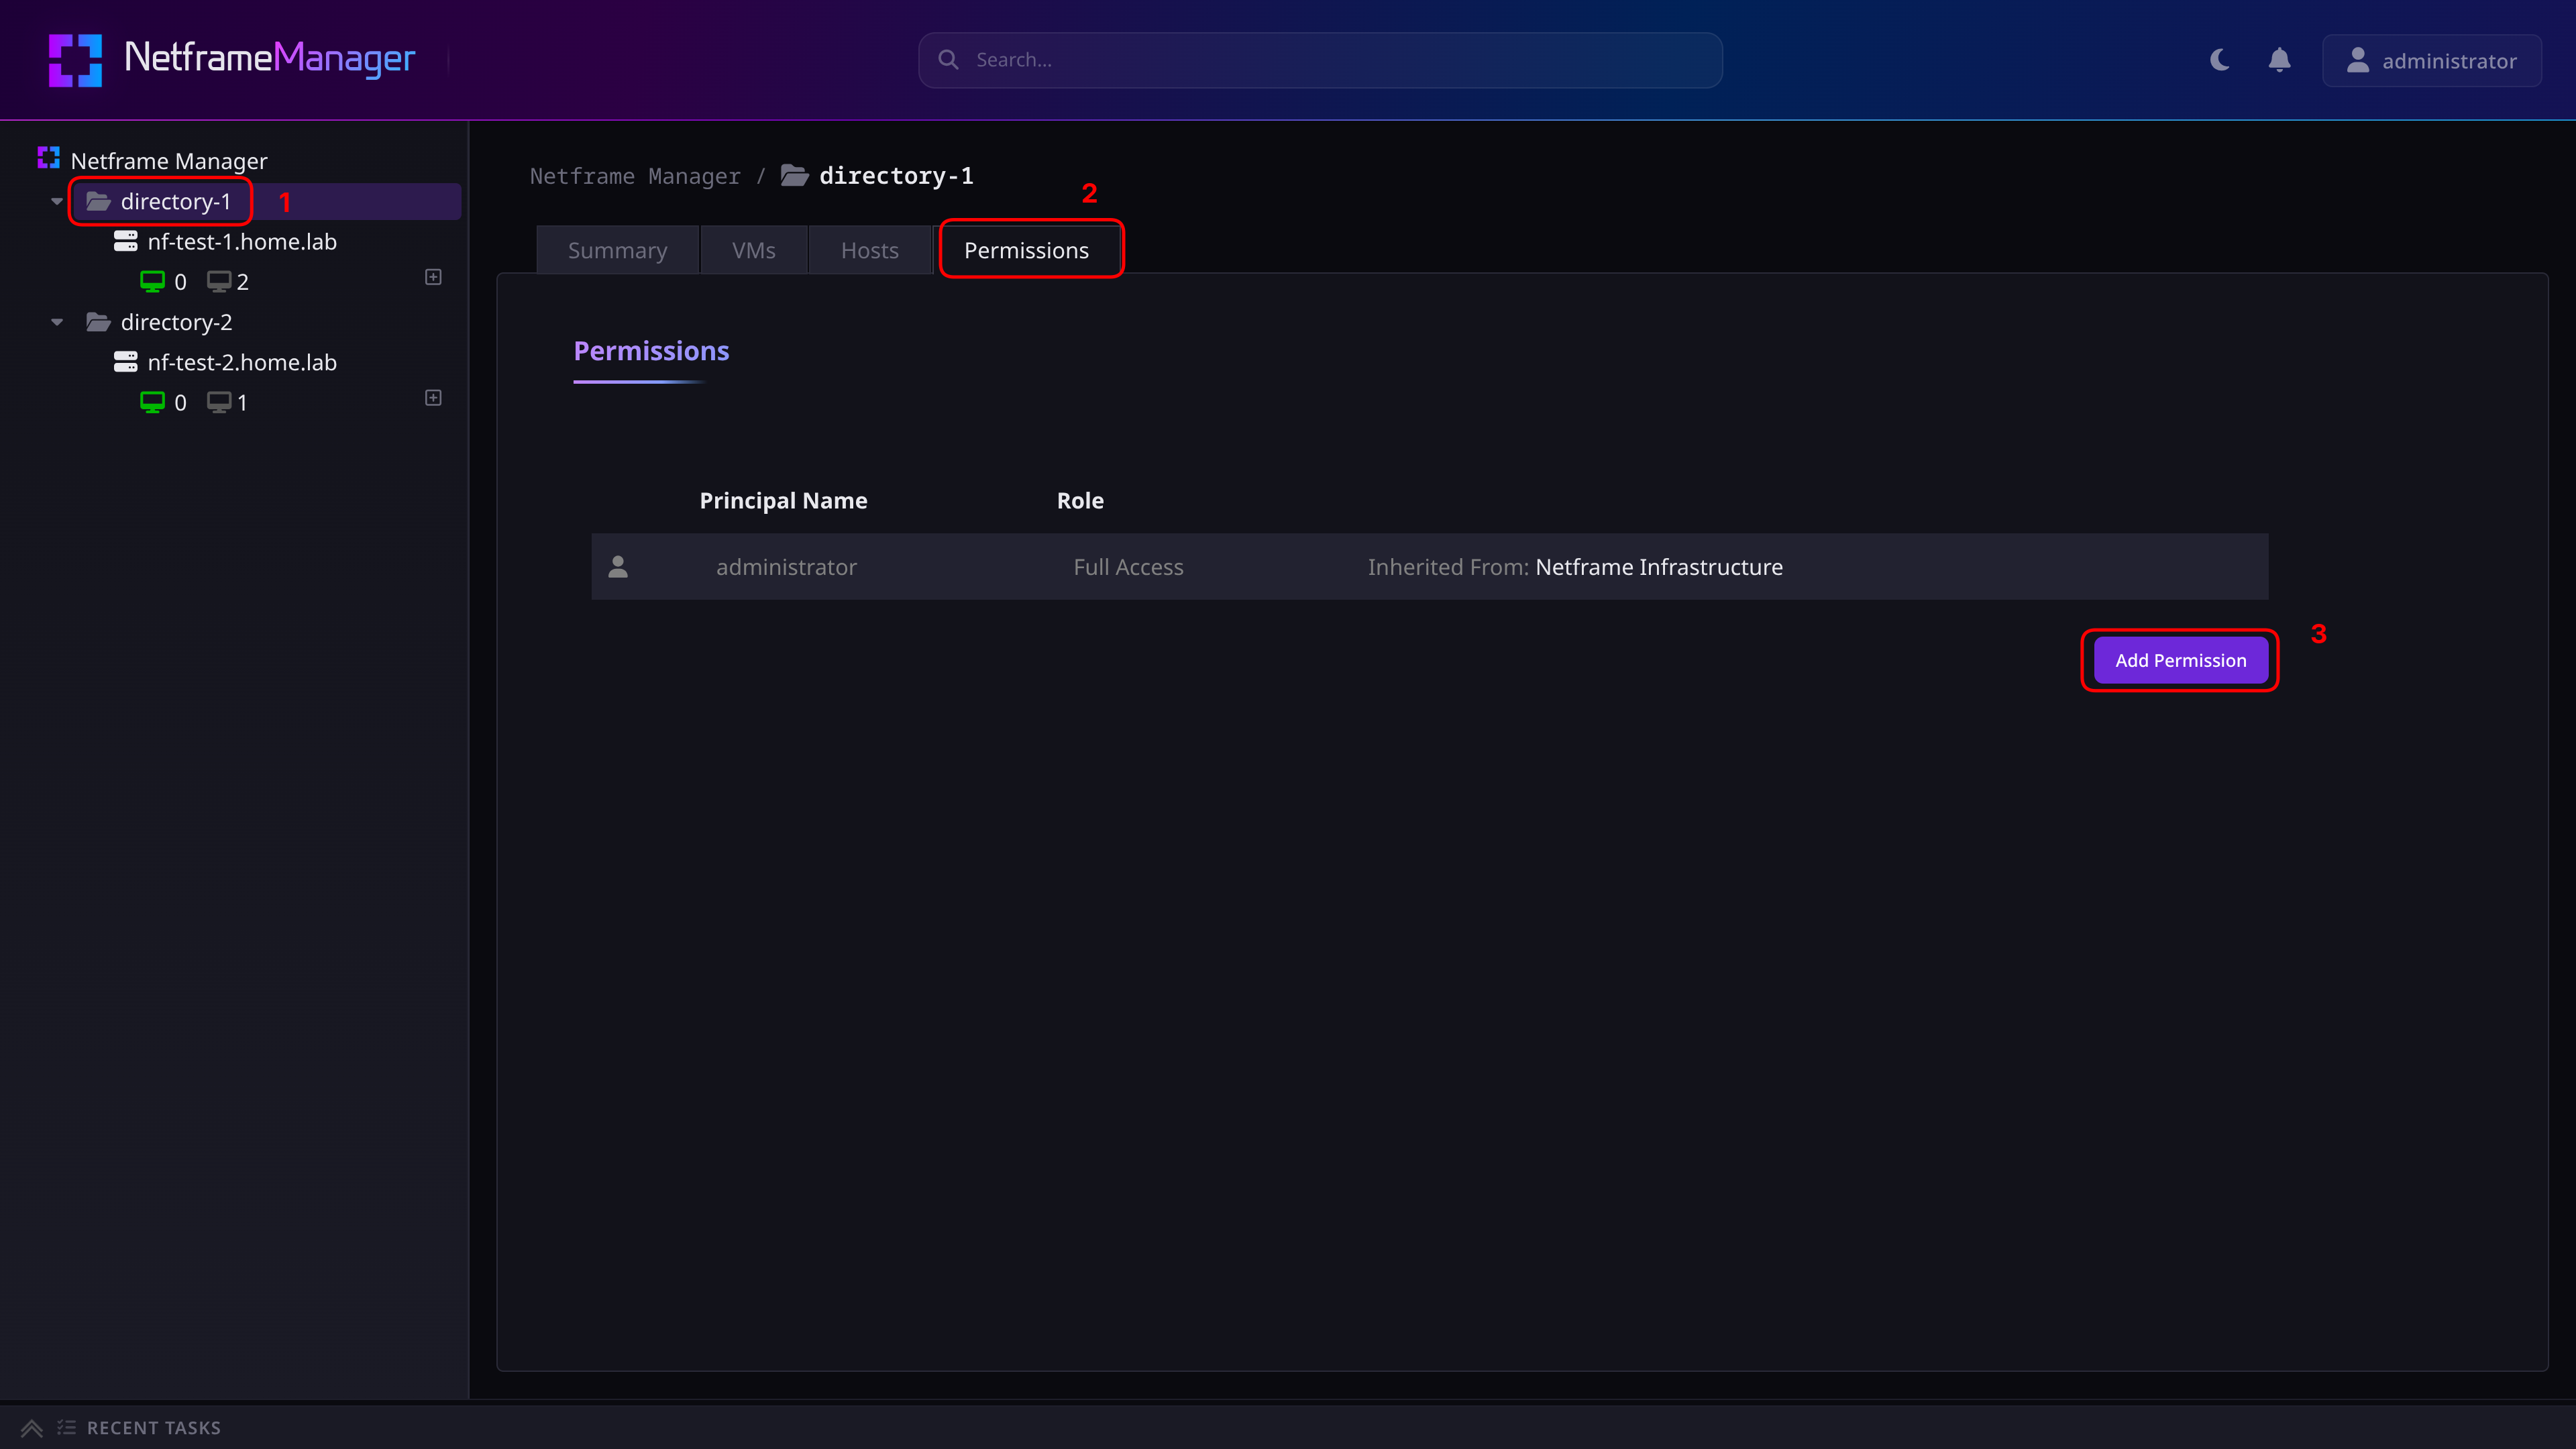
You will then be prompted to:
- Select an identity source
- Select a user or user group from that identity source
- Select the role to apply
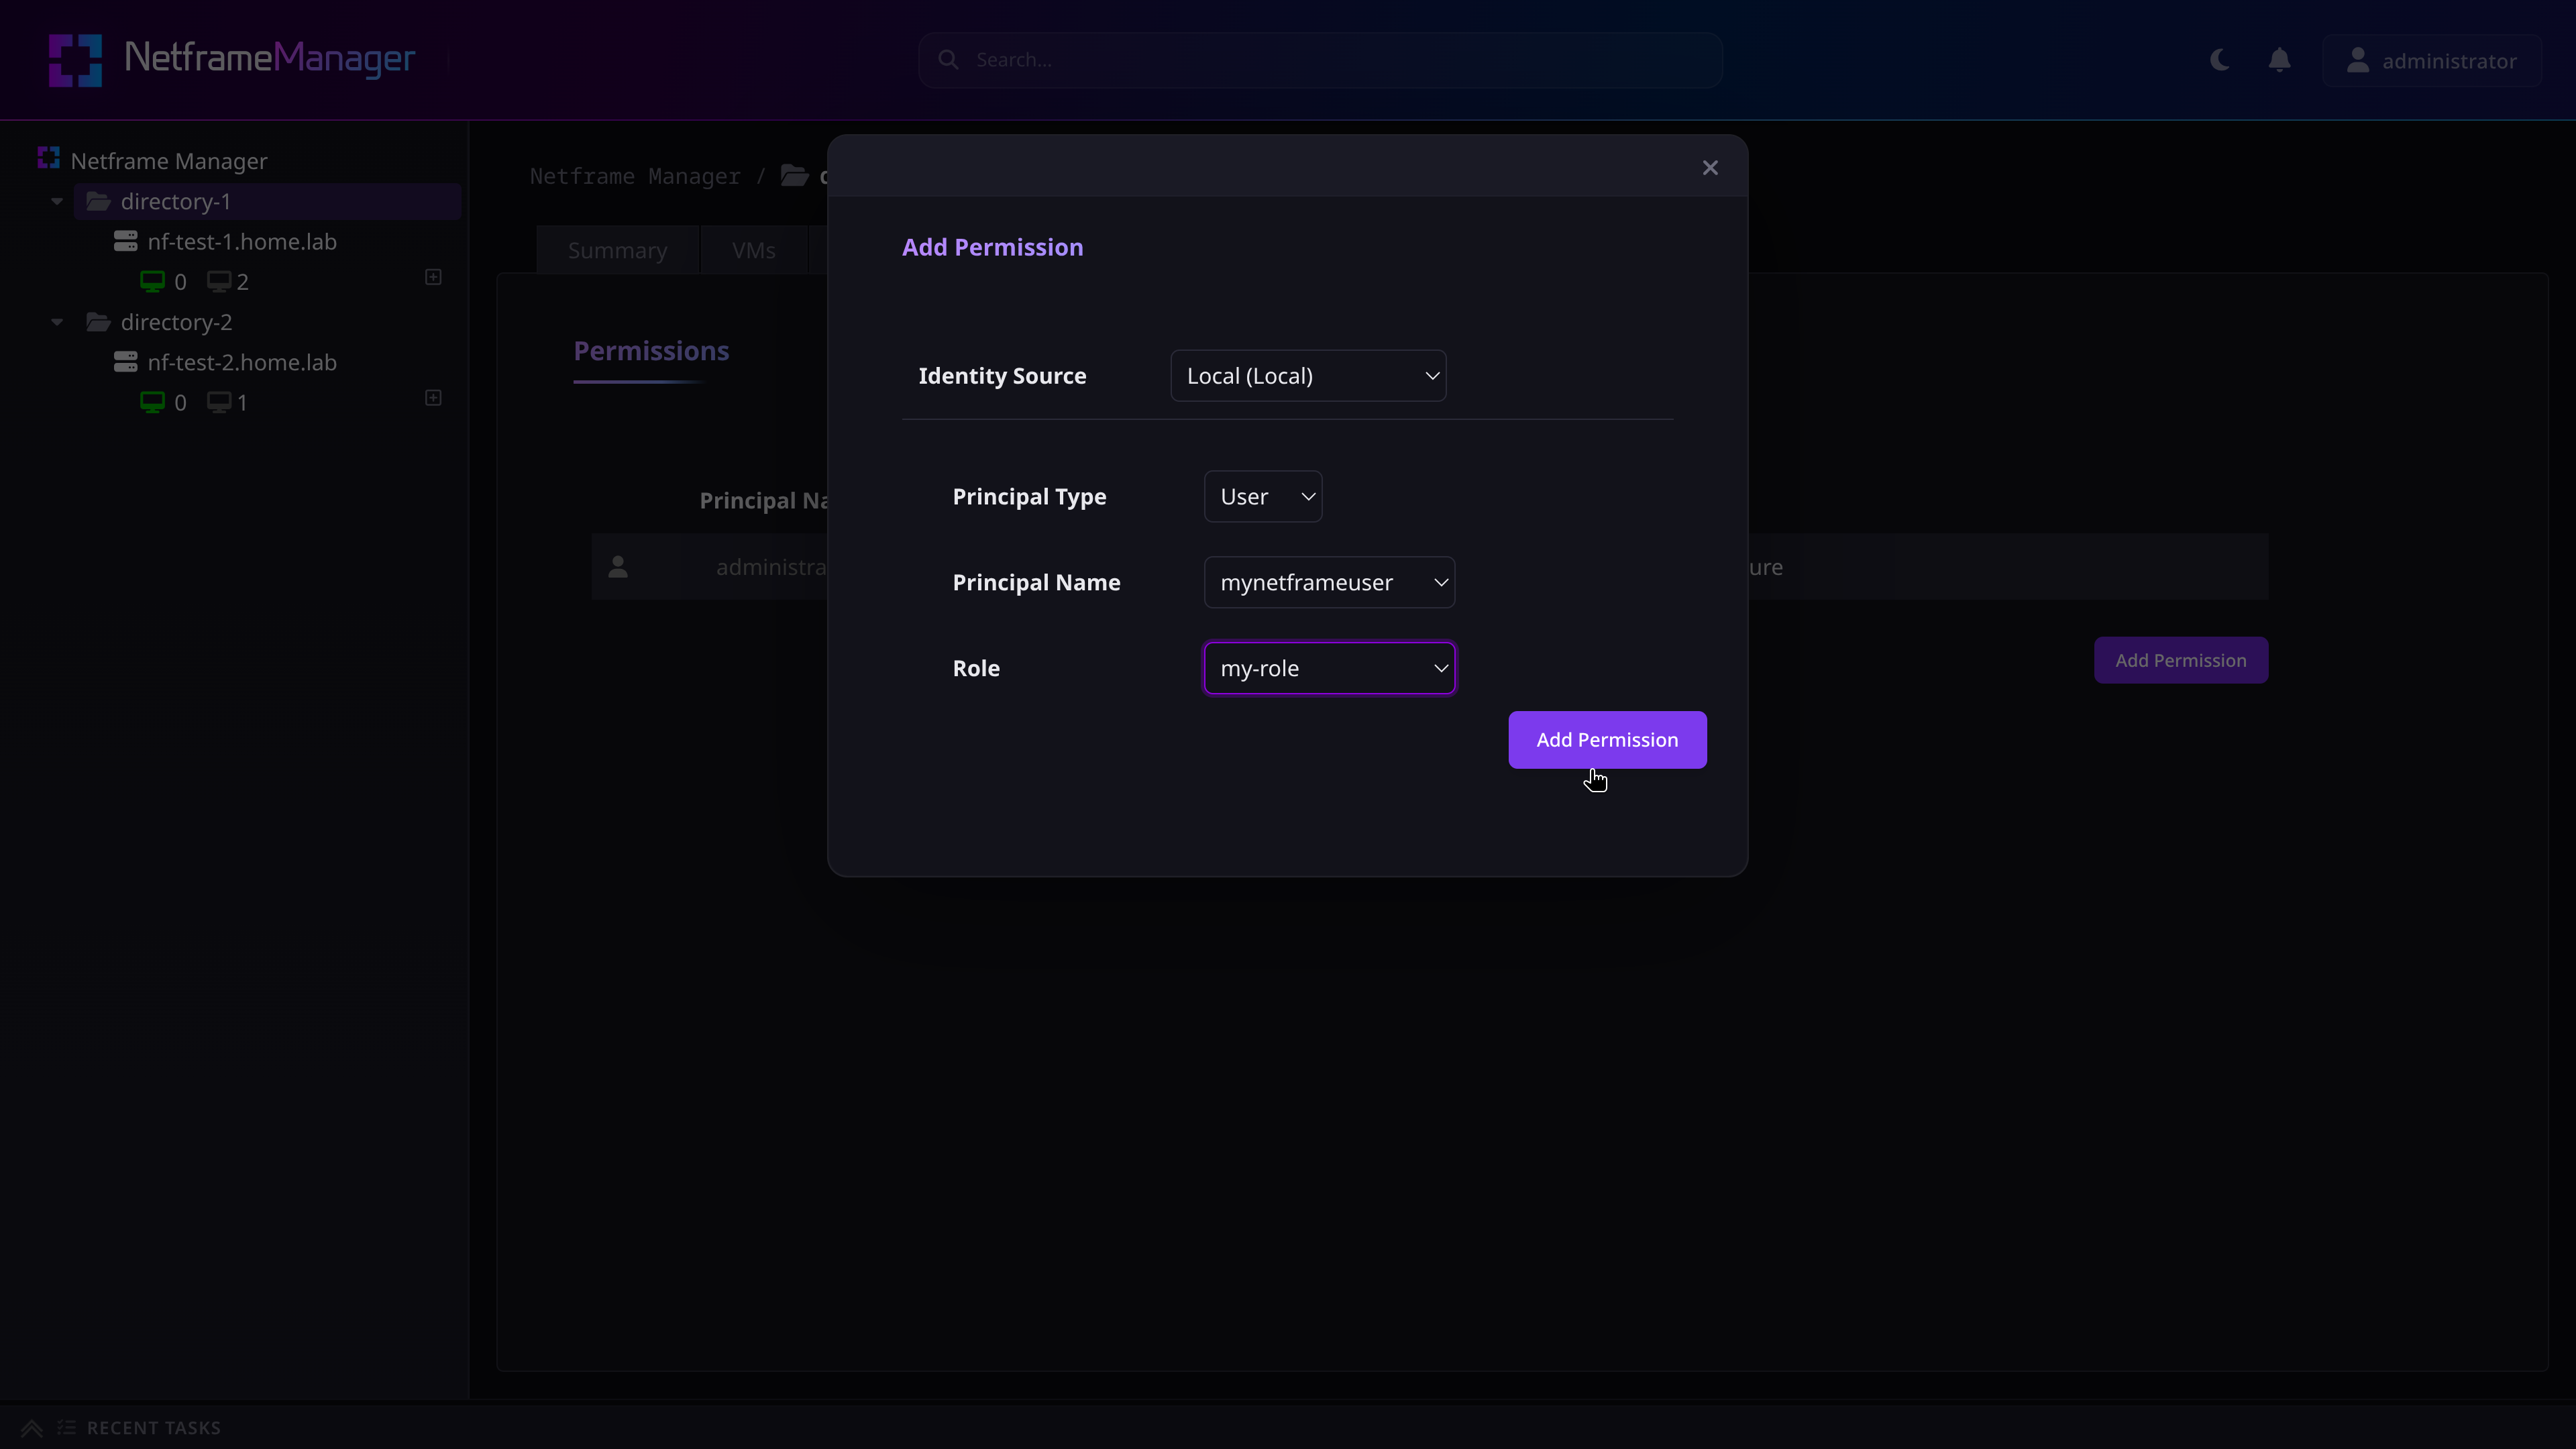
Pressing Add Permission will then add your new permission to the infrastructure object.
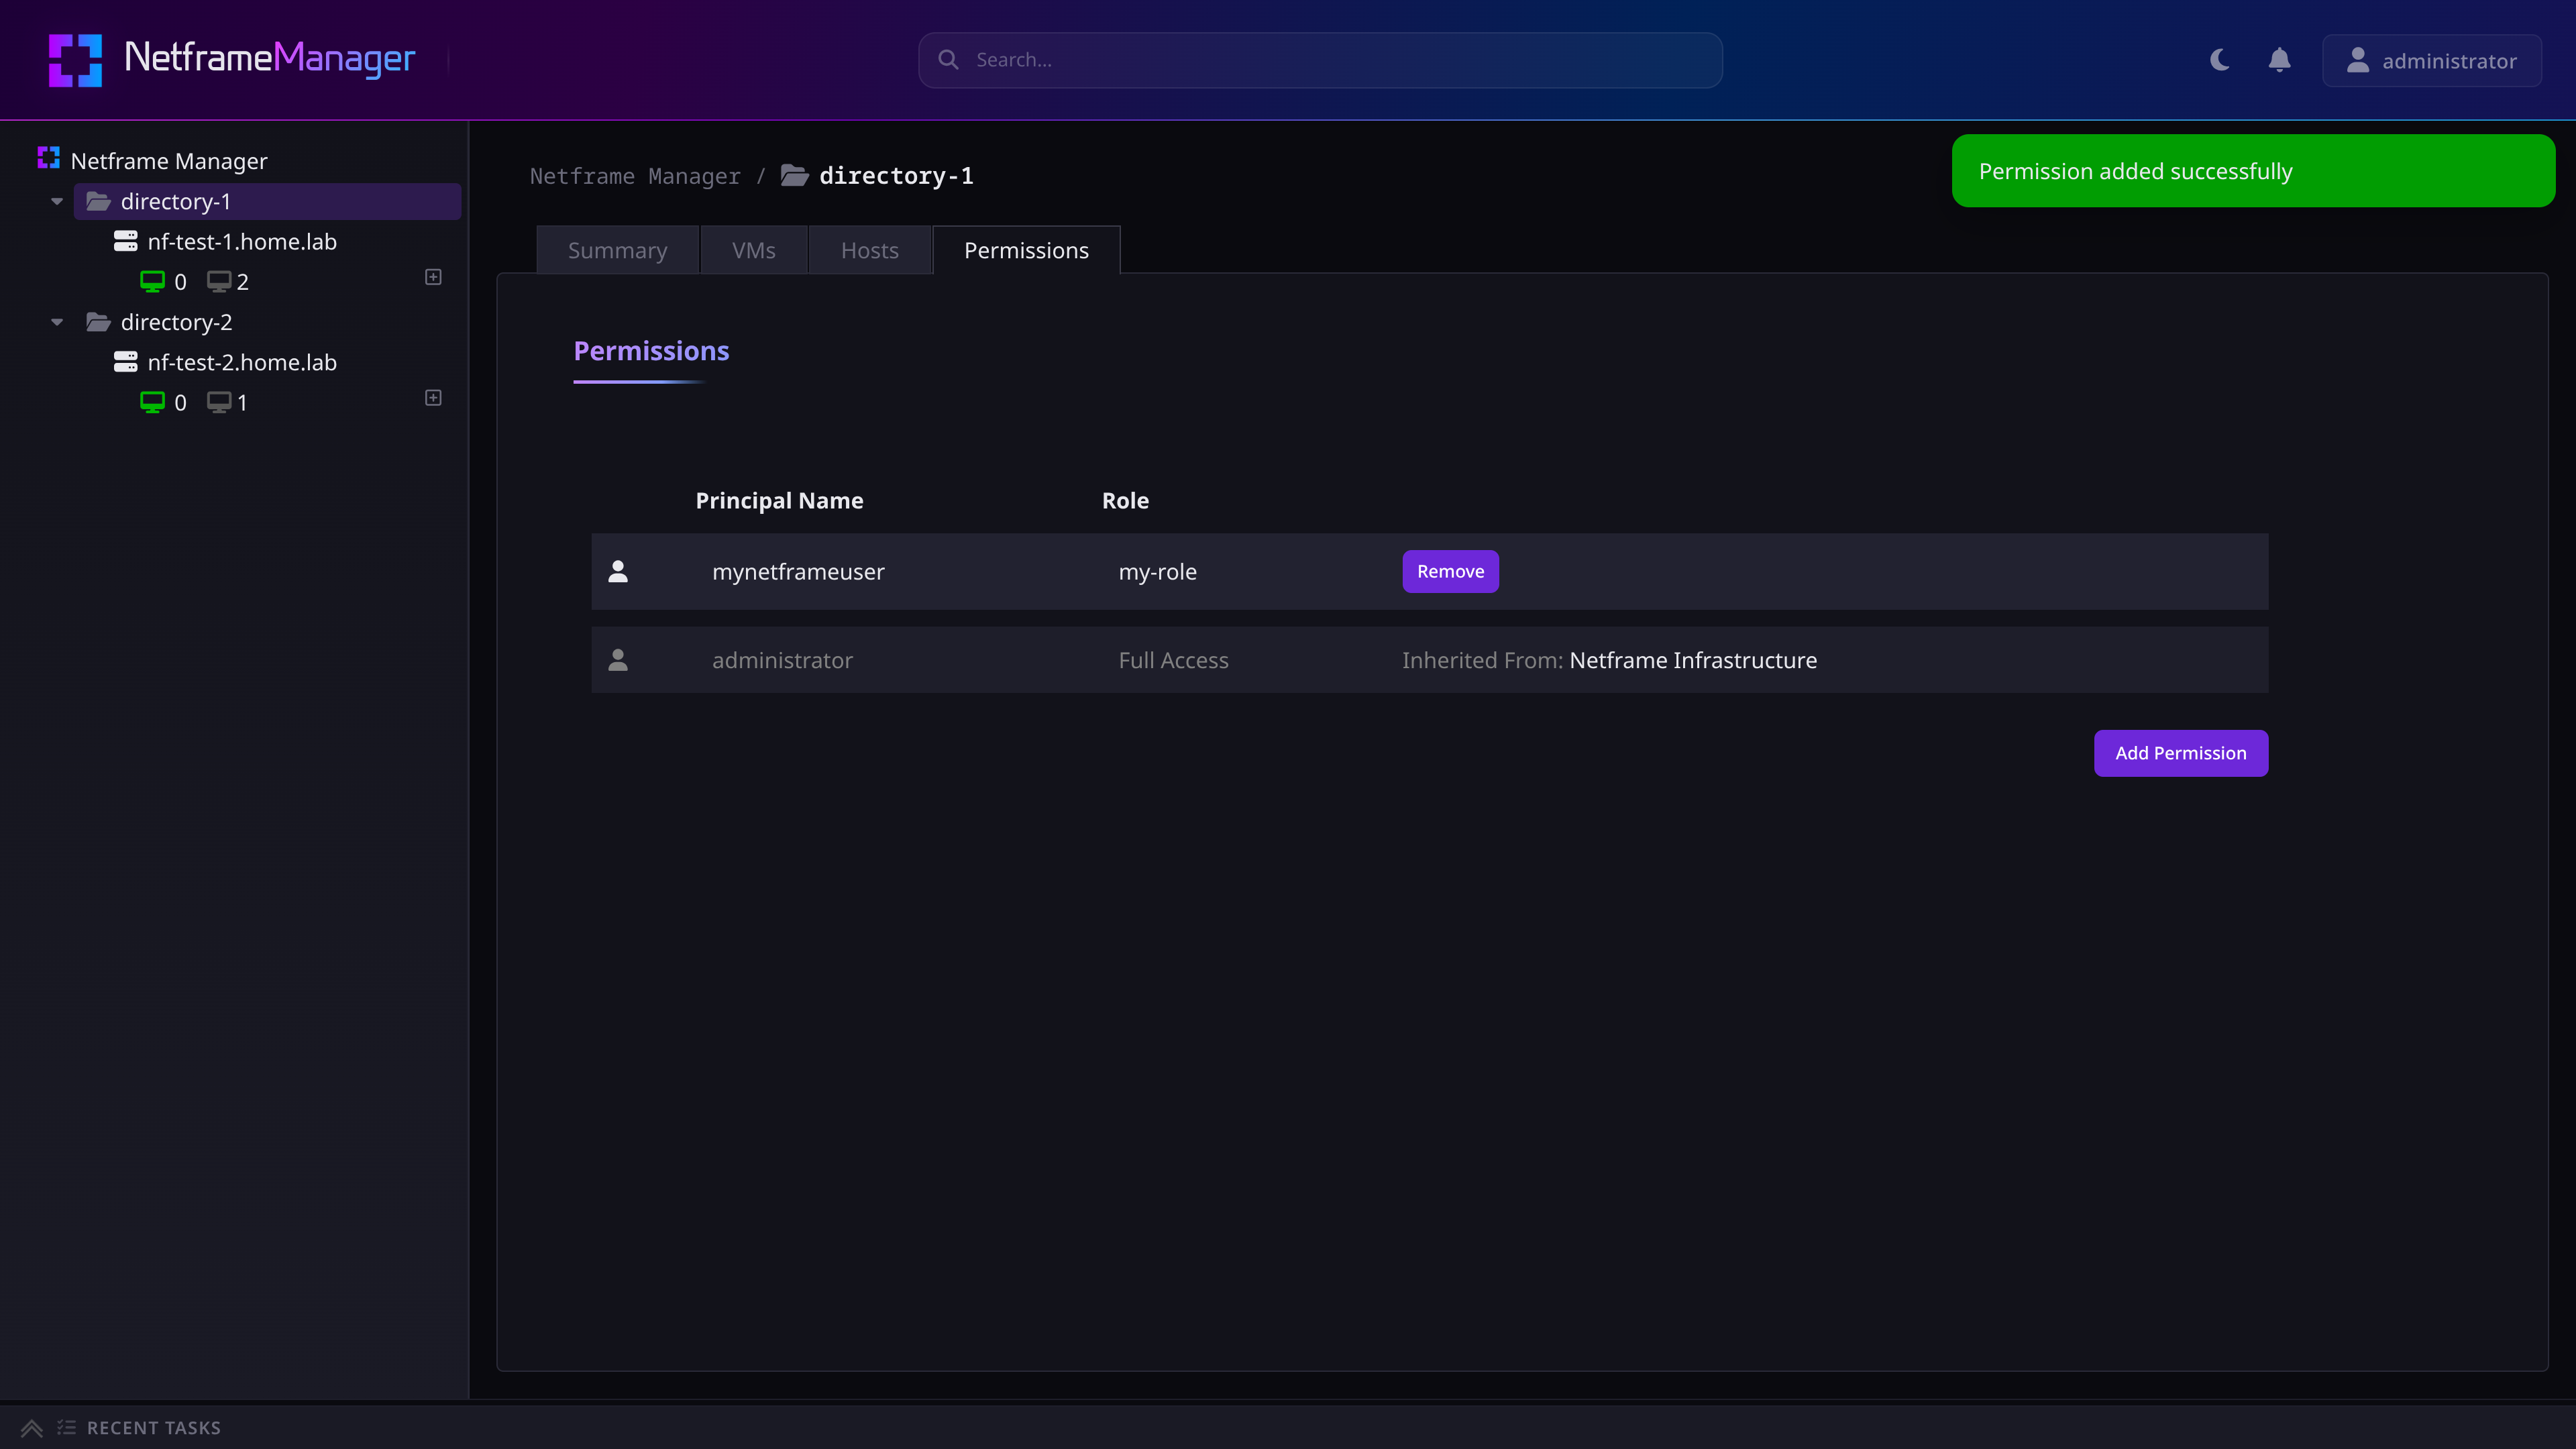
The permission's success can be verified on the target user account/s
¶ Advanced Permissions
When multiple different permissions are assigned in the infrastructure hierarchy, they are aggregated together.
In permissions aggregation, the default system roles have some special properties:
- Full Access can only be assigned to the root Netframe Manager object. If this is assigned to a user, any other access restrictions are bypassed. Use with caution
- No Access currently overrides all other permissions on an entity – if on an entity a user is given both the No Access role and a different custom role, the custom role will not be applied
- Additional role permissions can still be applied to children and descendants of No Access entities, just not the No Access entity itself
In particular, the No Access role can be combined with other custom roles to facilitate more complex access control.
¶ Worked example
Consider the following situation:
- You have a group
my-groupwith multiple users - You have a
parent-directorywith two childrendirectory-1anddirectory-2 - You want the group to have read-only permissions for a
parent-directoryand its contents, excludingdirectory-1 - You want a special user
myspecialuserto have full access to a specific VMmy-vmindirectory-2the directory
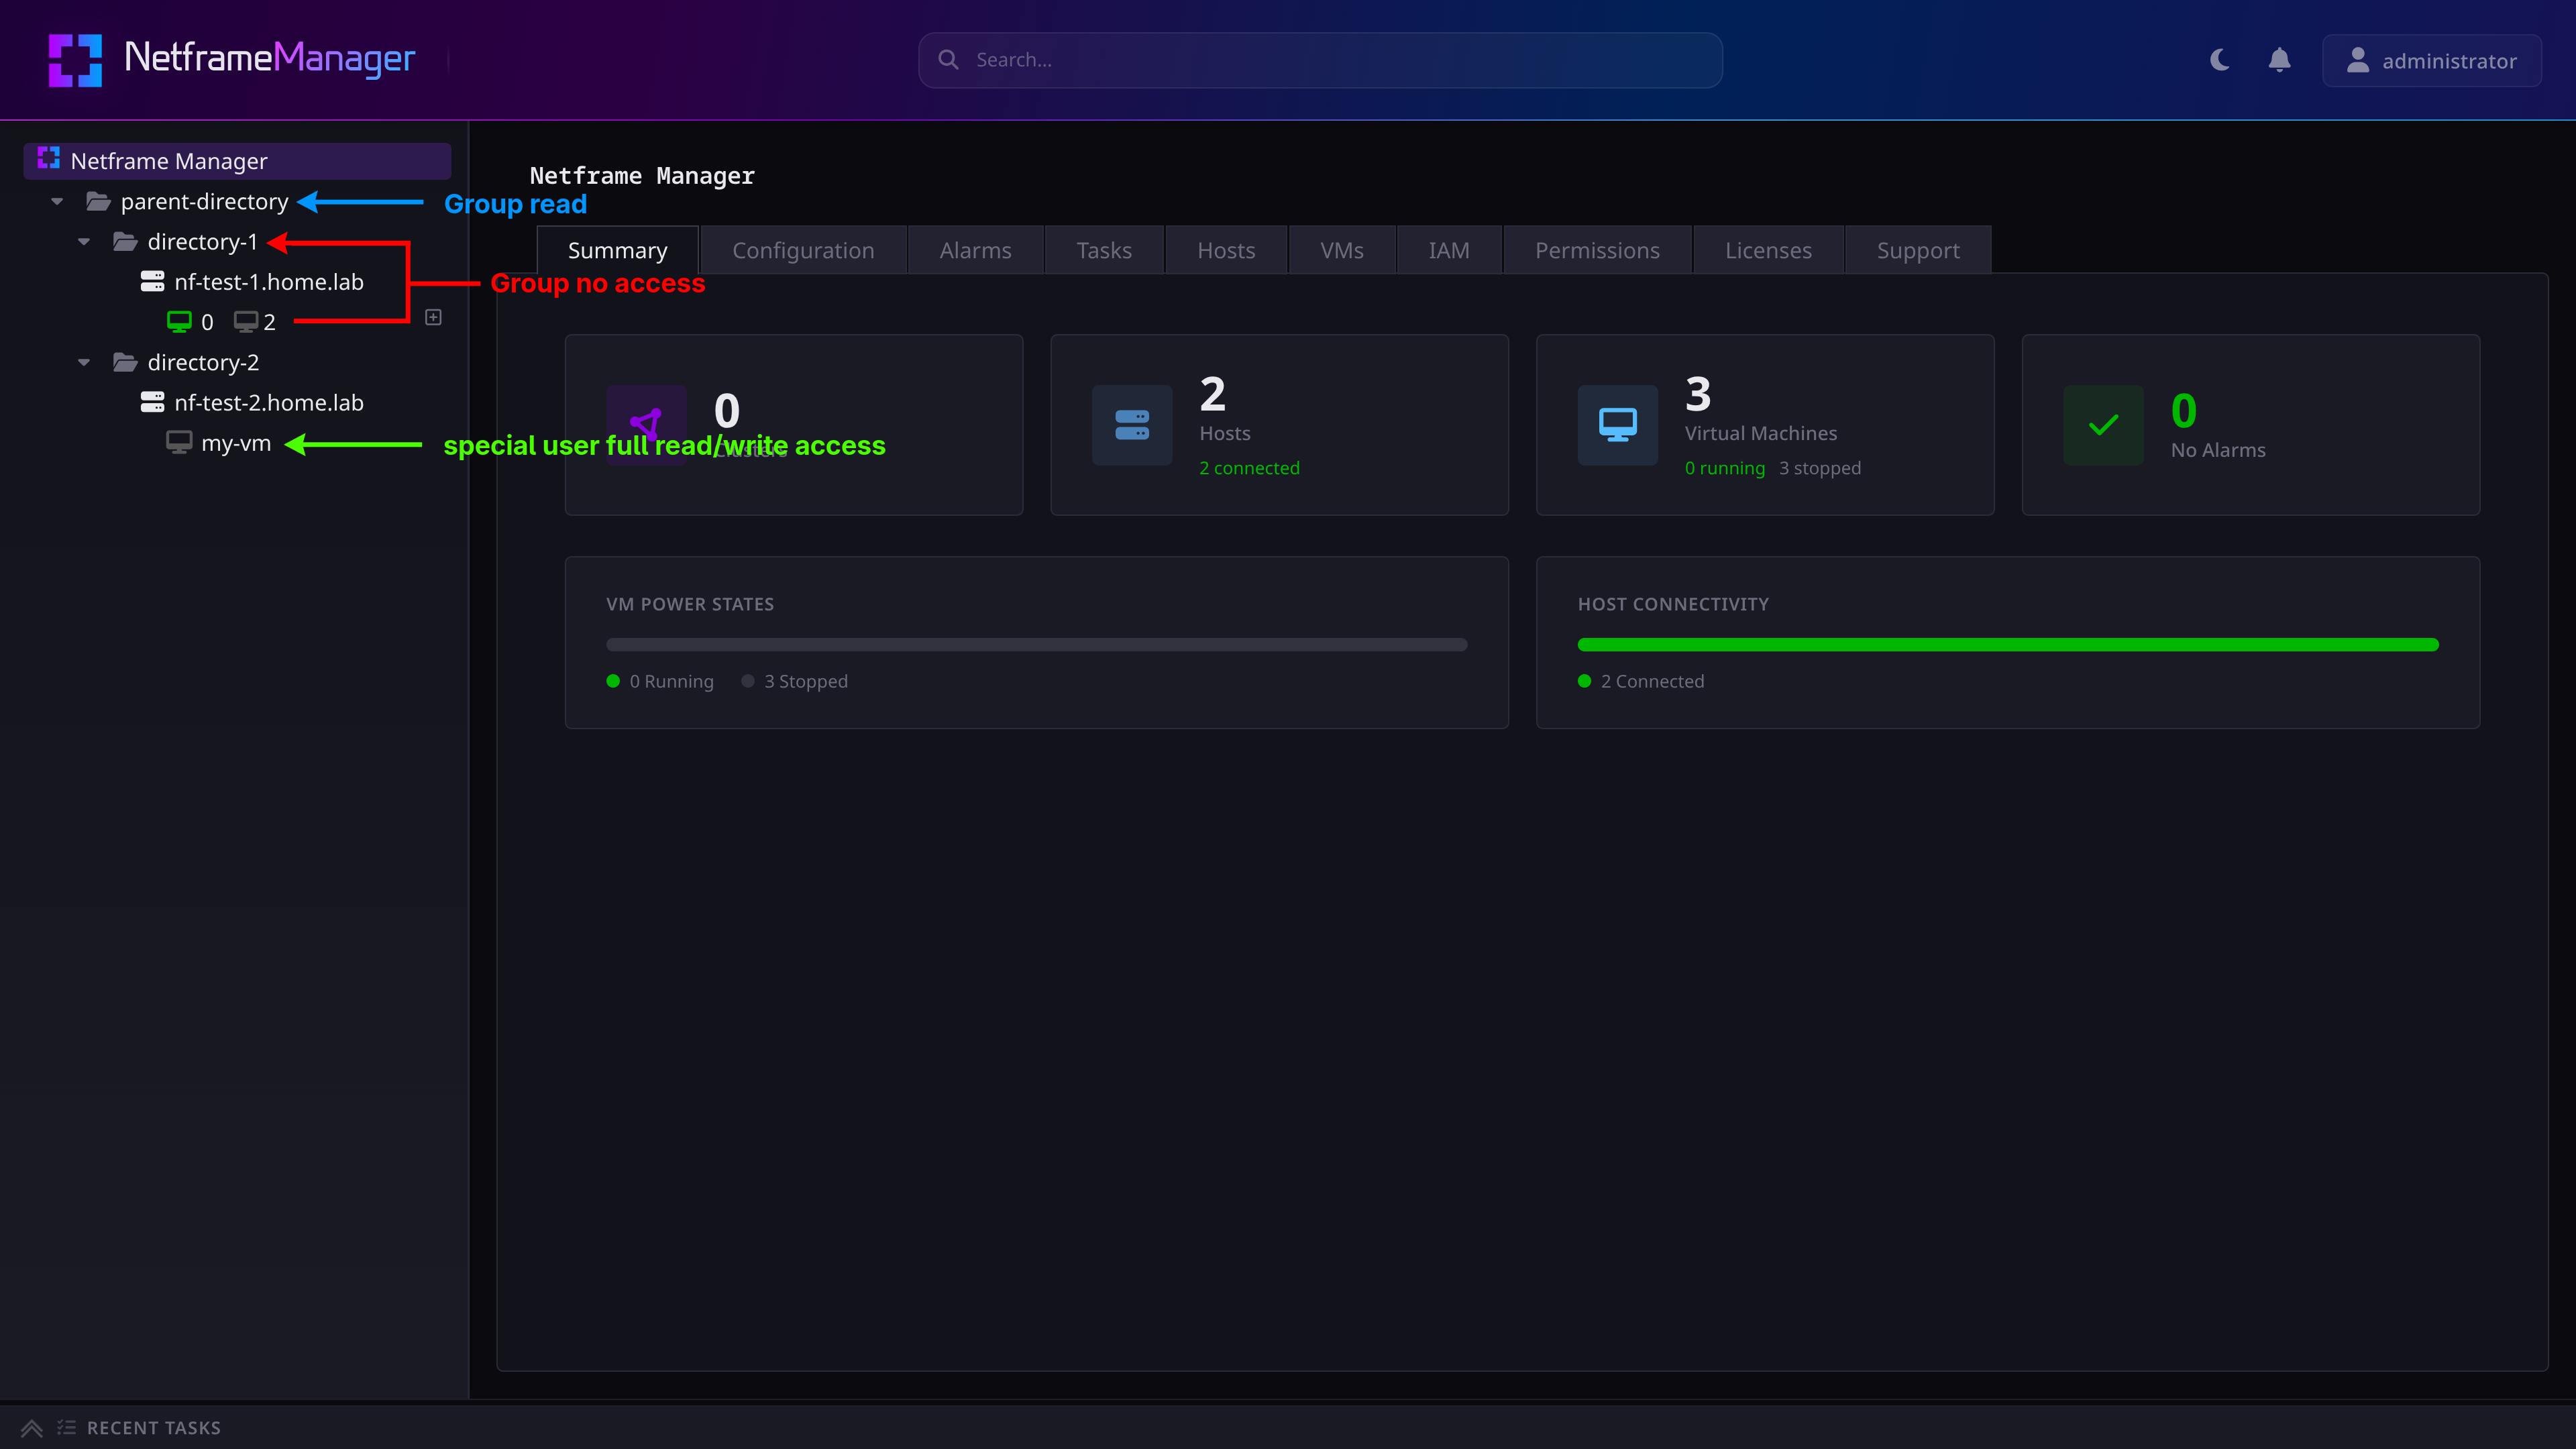
This can be achieved by:
- Creating a read-only role, that only has
*.readprivileges - Creating a role for full VM access, that has the
vm.configprivilege - On
parent-directory, create a permission formy-groupusing your read-only role - On
directory-1, create a permission formy-groupusing the default system'sNo Accessrole - On
my-vm, create a permission formyspecialuserusing your full VM access role
After doing this, myspecialuser's view will appear as follows:
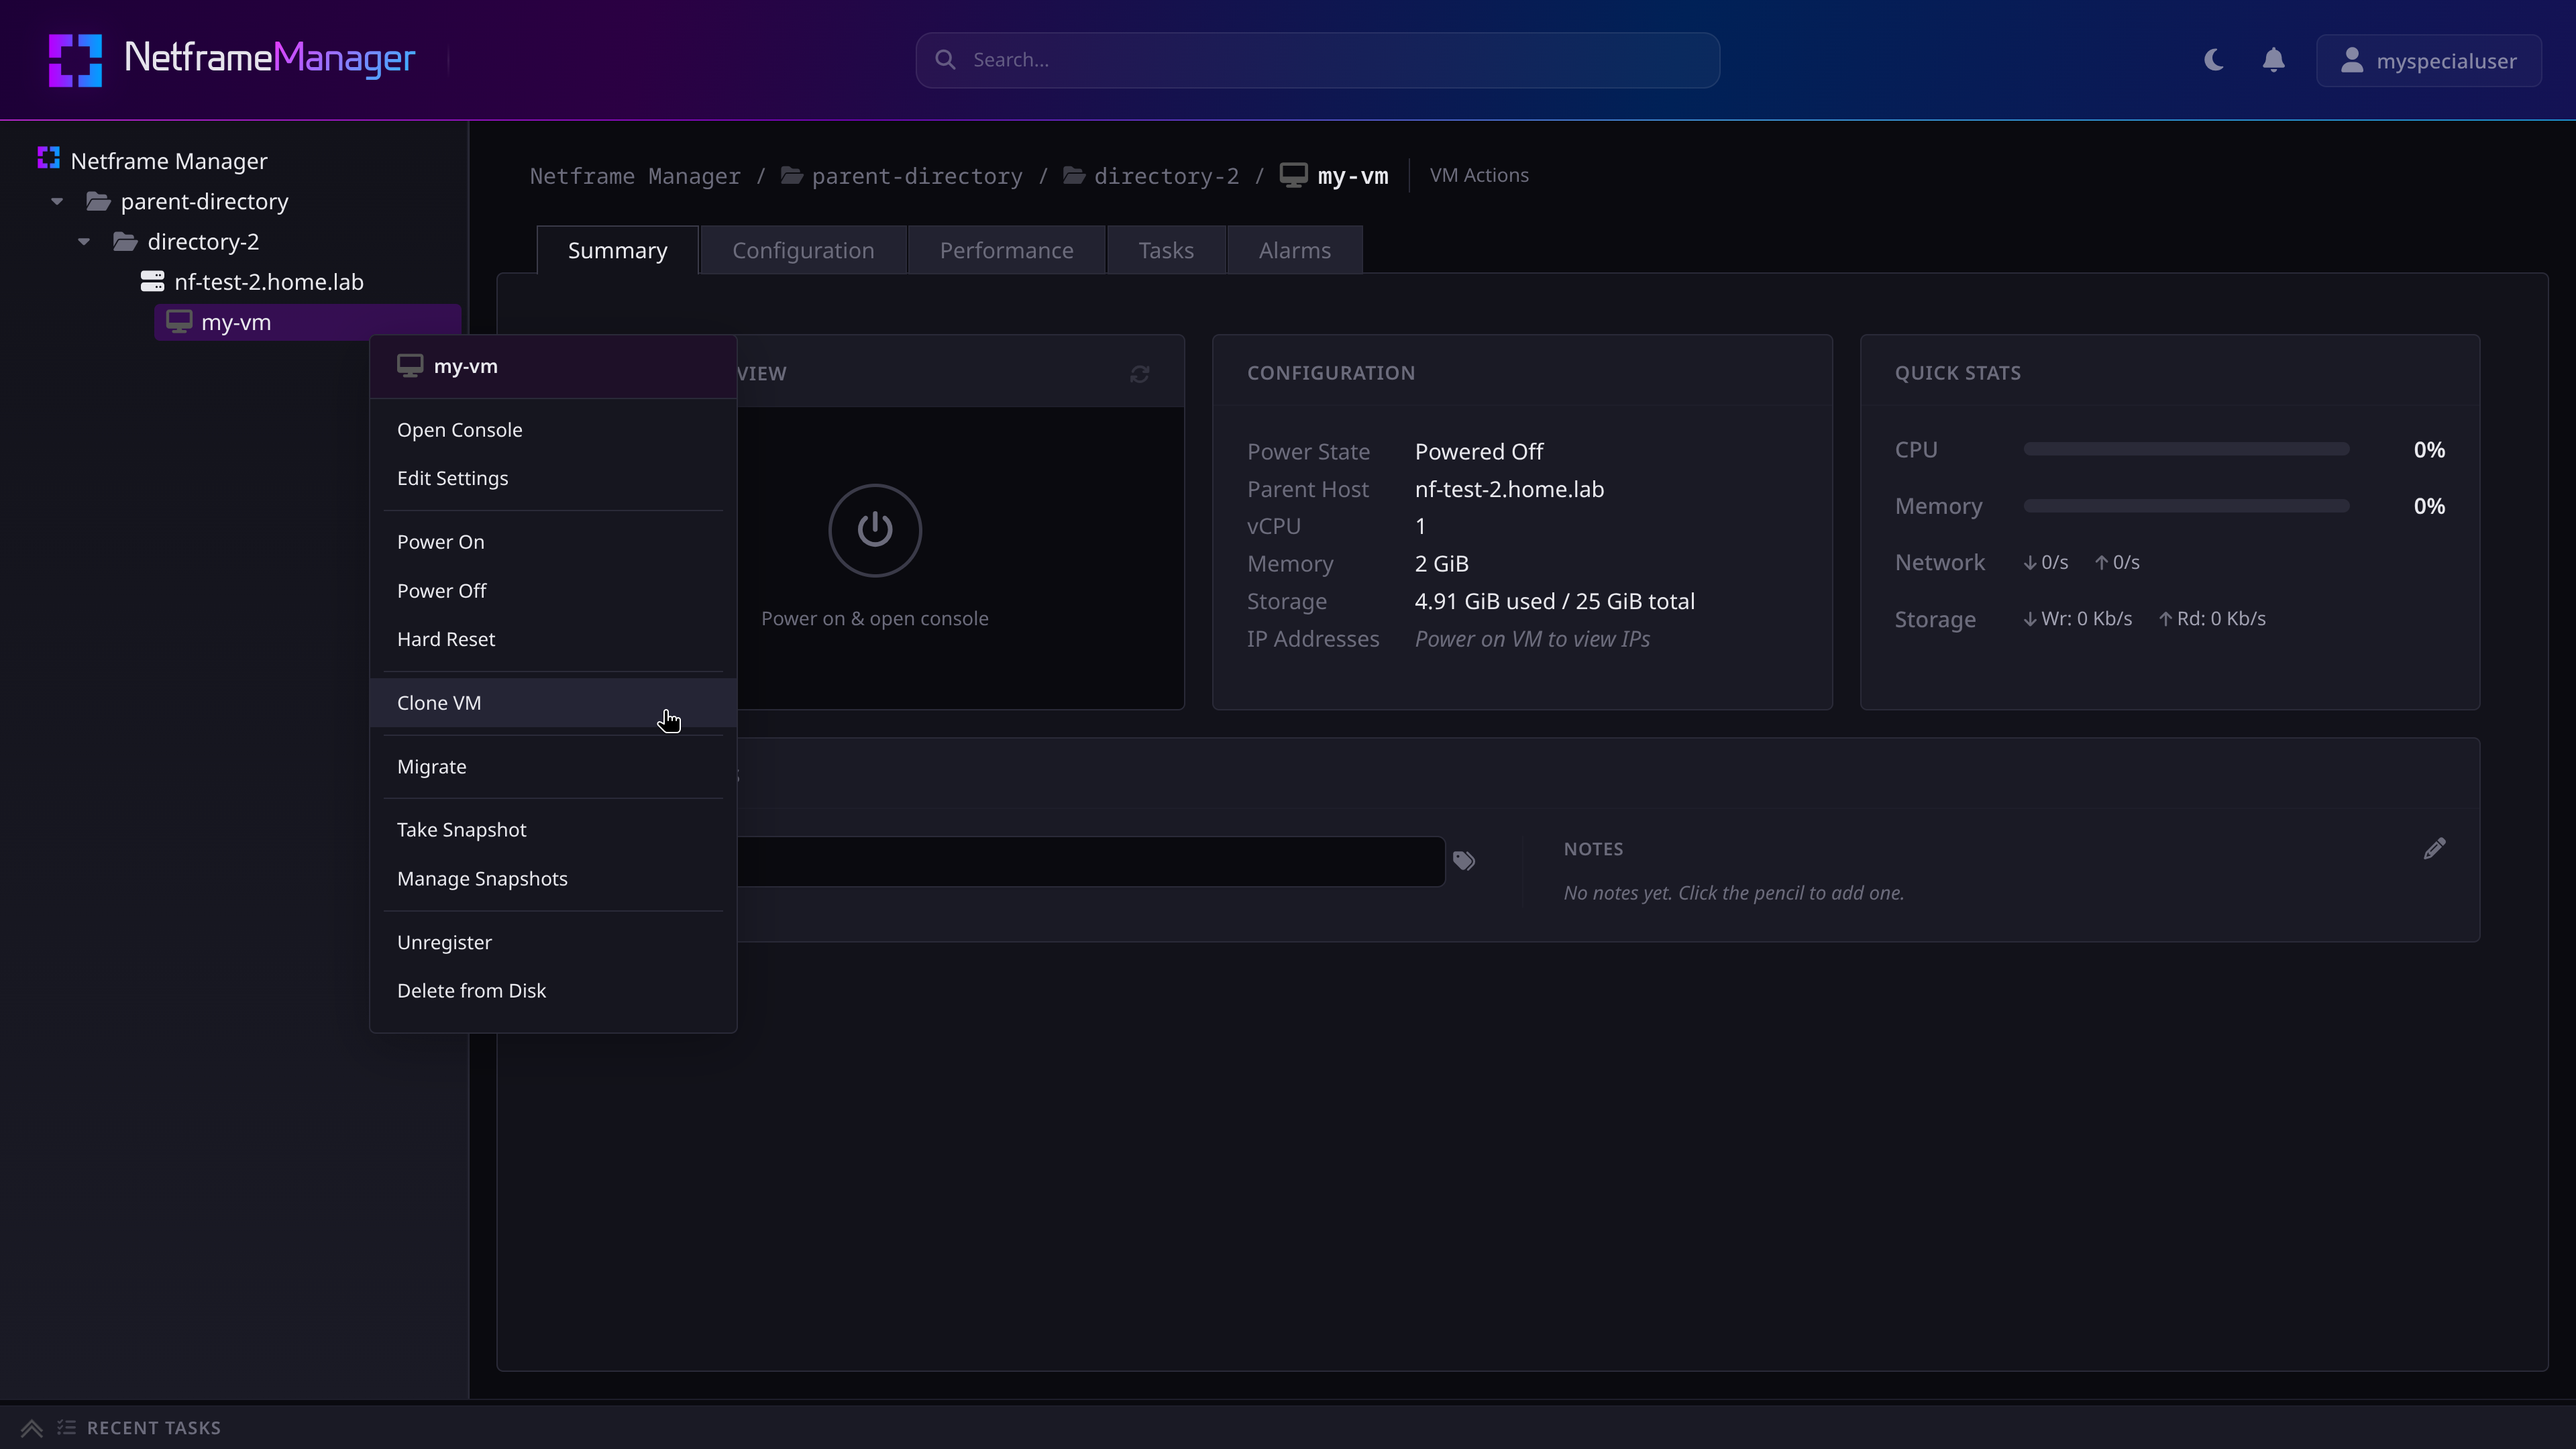
While other users in the group will still have read-only access to my-vm: