This quick start guide goes through the process of:
- Deploying a Netframe Core Host
- Deploying your first VM, using the Host's local storage and out-of-the-box network configuration
¶ Installing Netframe
¶ Confirm system requirements
More information: System Requirements
- Make sure your CPU supports virtualization, and that it is enabled in BIOS
- Have a bare minimum spec of:
- 4 CPU cores
- 16GB memory
- More than 50GB storage
- Netframe Core as a standalone requires a minimum of 50GB storage
- You will however need extra storage space for any VMs you want to store on the system
- If you intend to deploy Netframe Manager on your host, you will require an additional 100GB storage (i.e. a more than 150GB required on your Host)
- Ensure that your target installation disk is not already encrypted (can cause problems during the install process)
¶ Prepare installation media
More information: Download Netframe
- Go to the download portal to download the Netframe Core installation image –
netframe-core-X.X.X.iso - Create a bootable USB flash drive, and write your installation image to it
- You can use a tool like balenaEtcher to prepare the installation media
- Mount your installation image and boot from it
¶ Install Netframe Core
- Booting from your installation media should start a Clonezilla boot installer
- Select the default installation option
- The installer will load, and you will be prompted to select a block storage device to install Netframe on
- Important: This step will erase the selected device and install Netframe on it
- You will be prompted a couple times for confirmation throughout the install process
- Type
yand press enter to proceed
- Type
- At the end of the installation process, you will be prompted to create a user account for administration
- Enter the username and password
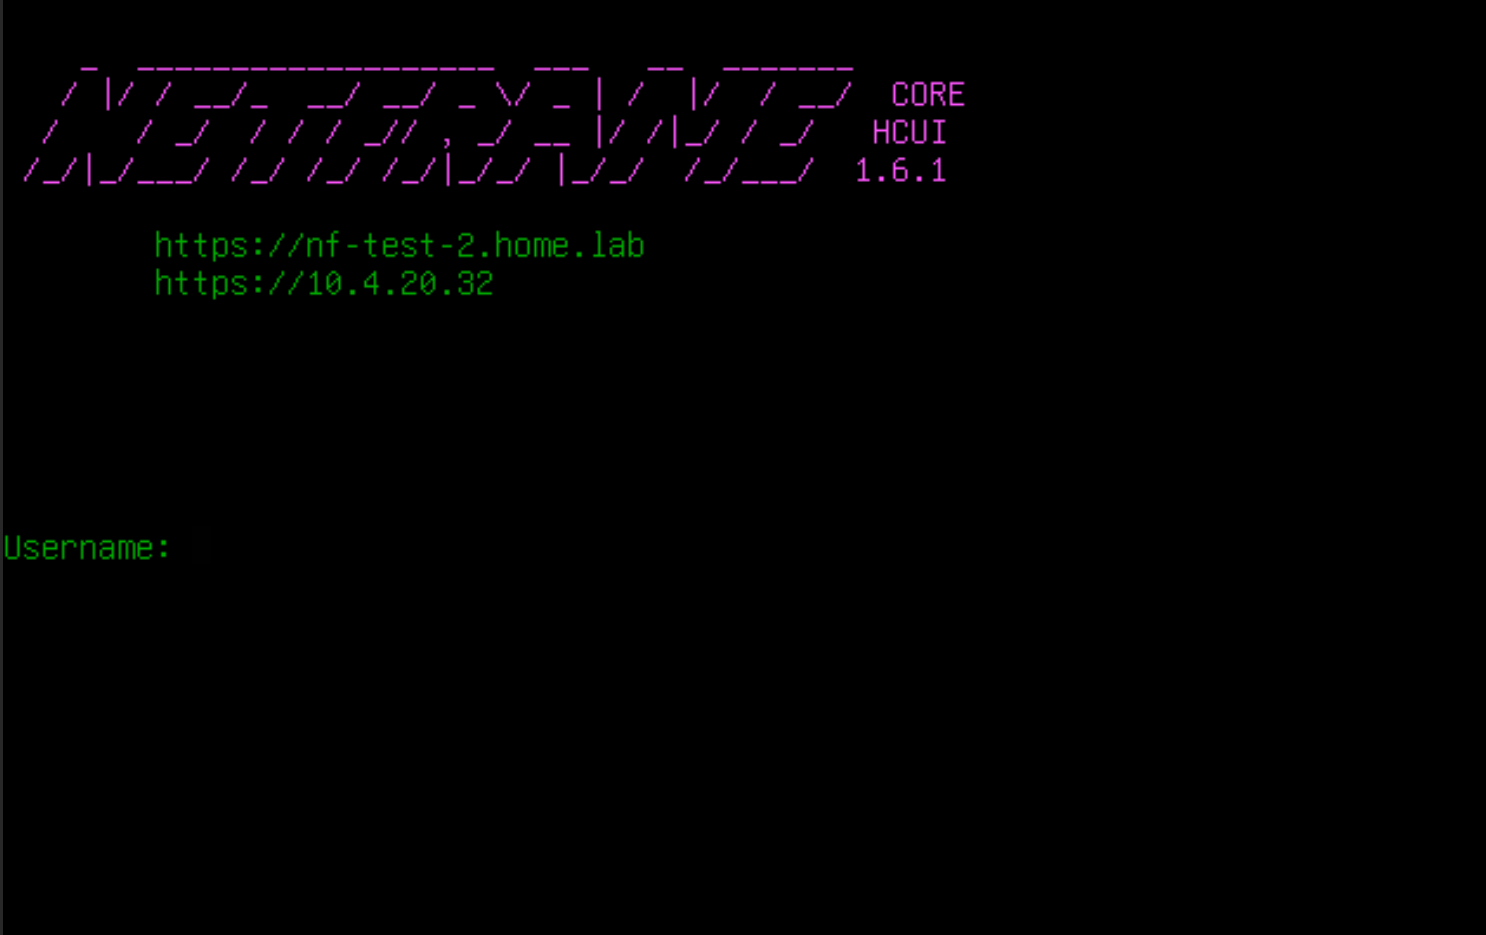
You should now see a screen that looks similar to the following, and are ready to begin using Netframe.
¶ Deploying your first VM
¶ Login
On the HCUI (pictured above), you will see an IP address and URL. If you open one of them in an internet browser on a different computer connected to your network, you will connect to the Netframe GUI and be able to use it.
Login using the username and password created during installation.
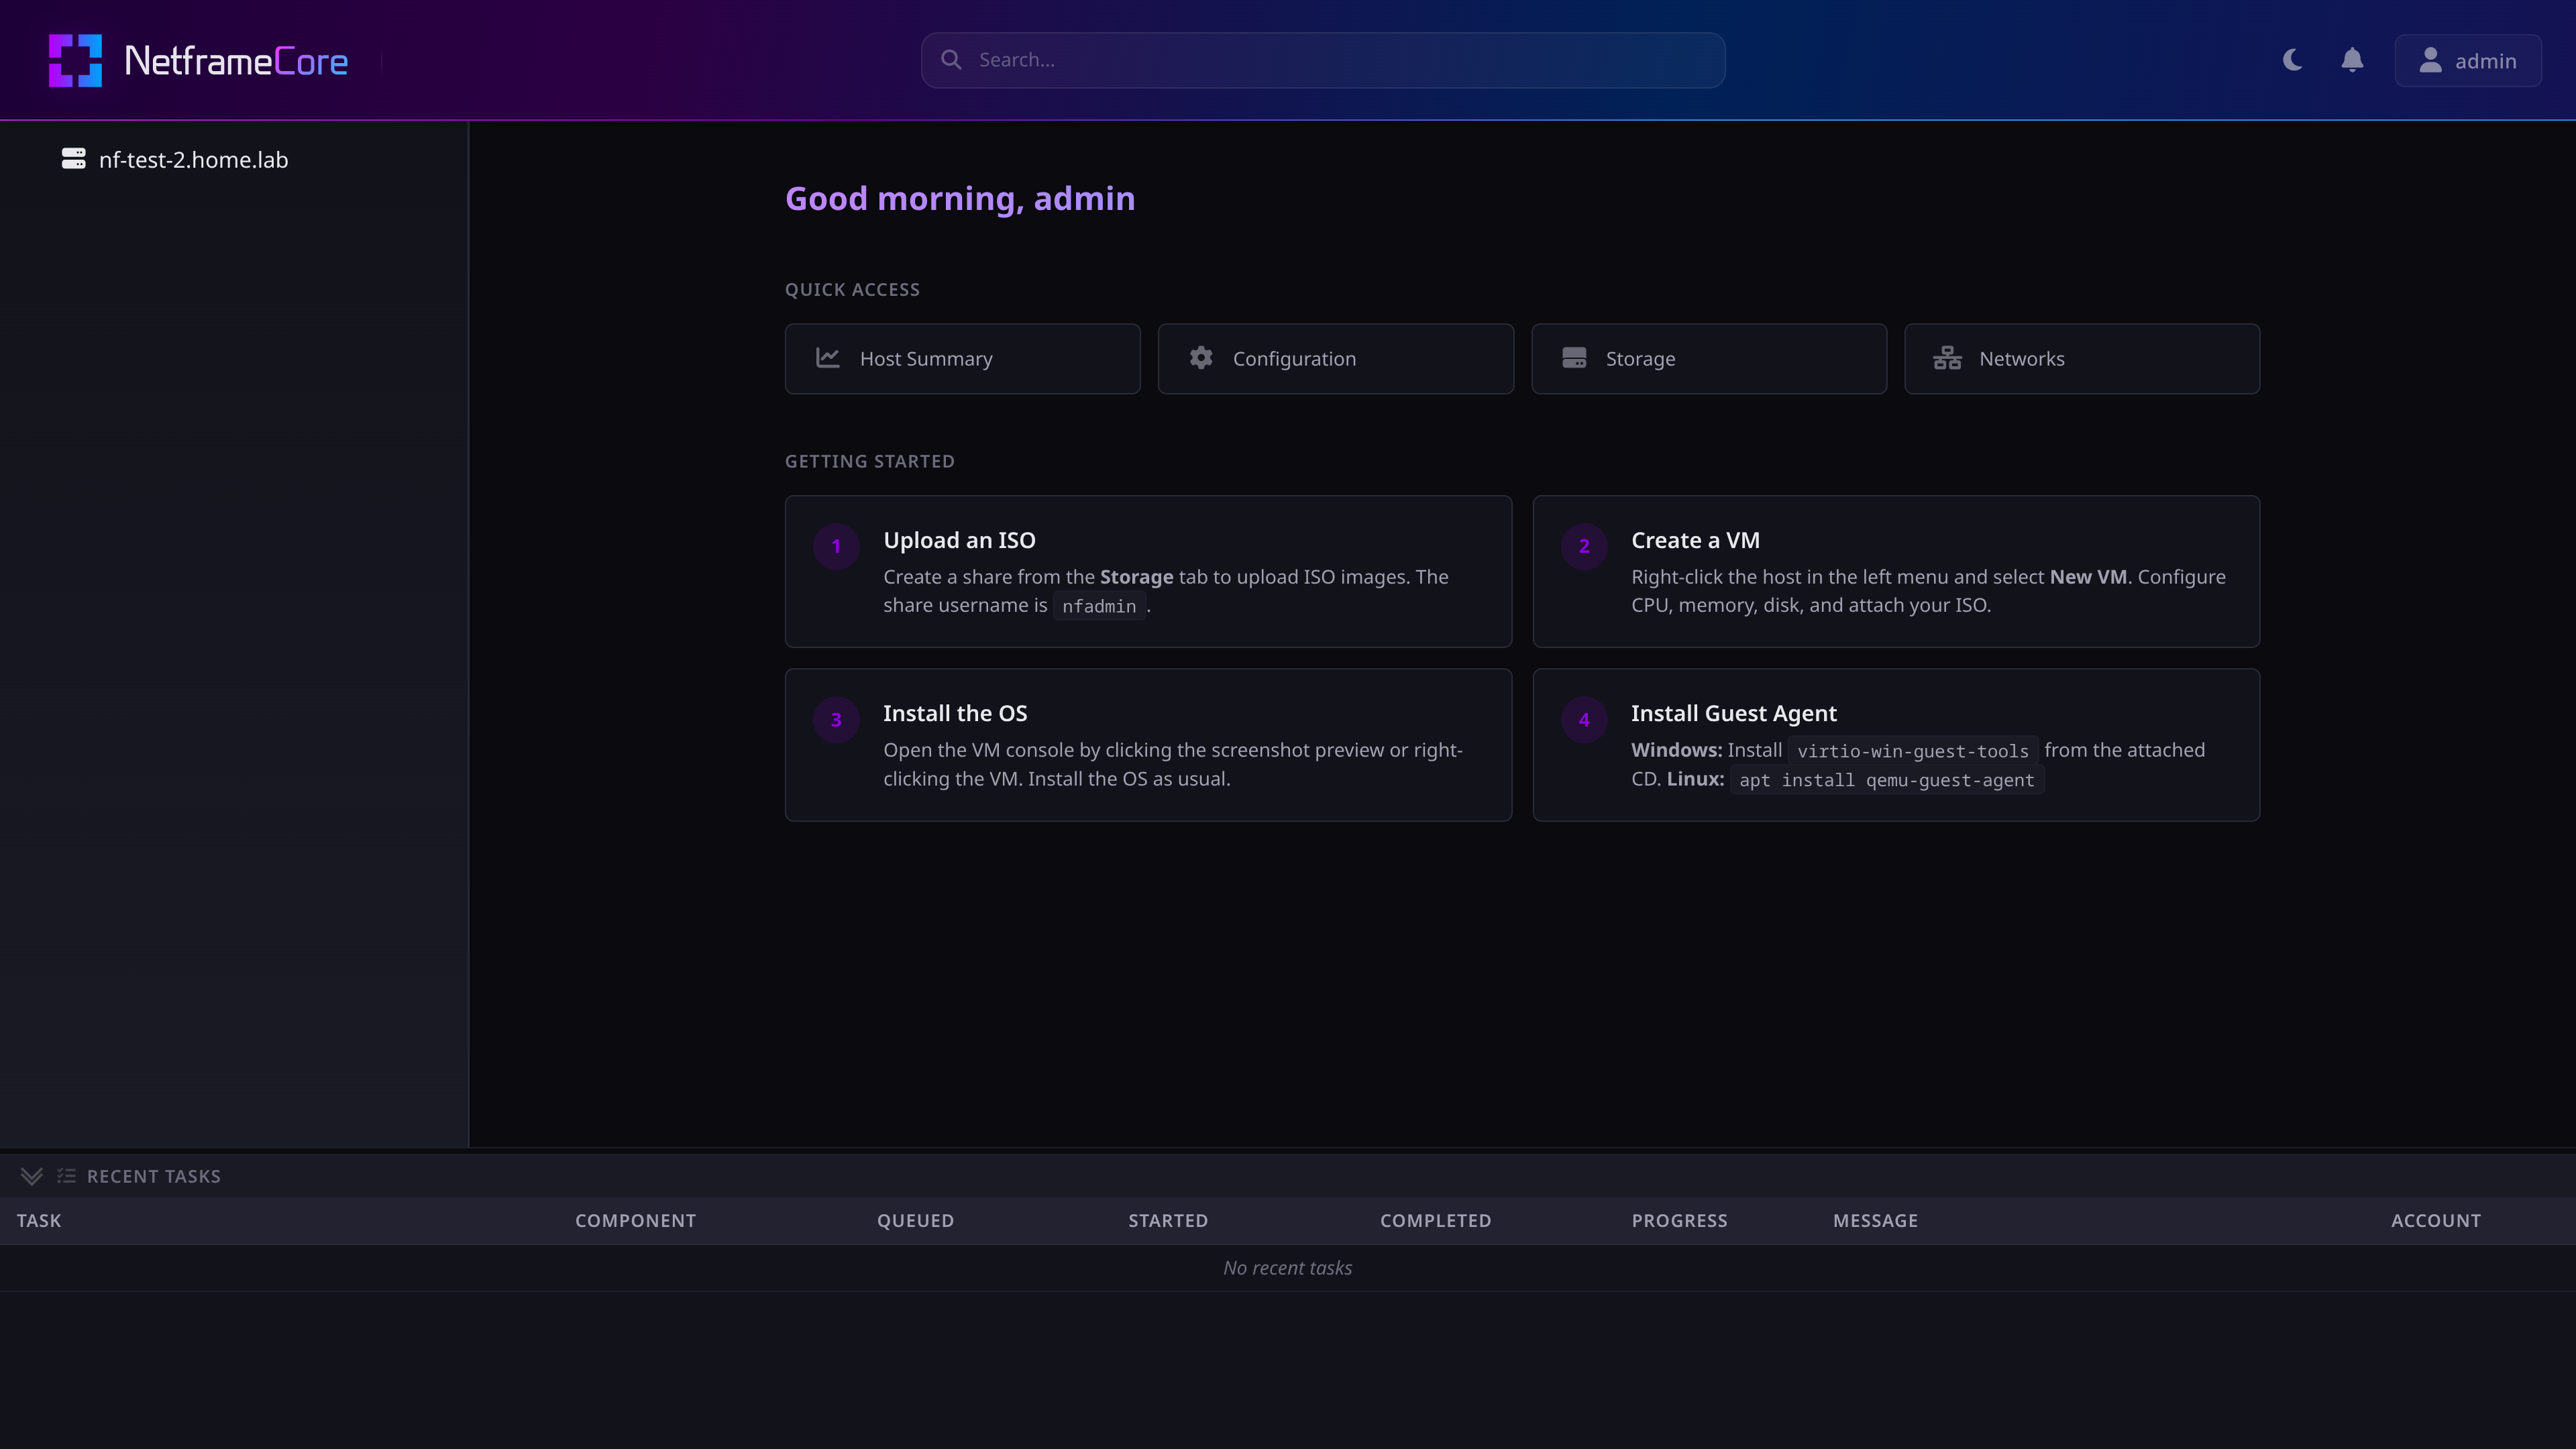
After logging in, you should see a screen that looks like the following.
¶ Upload an Operating System ISO
More information: Storage
Before you can create a VM, you need to upload an OS ISO file to Netframe. Download the ISO of your choice, and then:
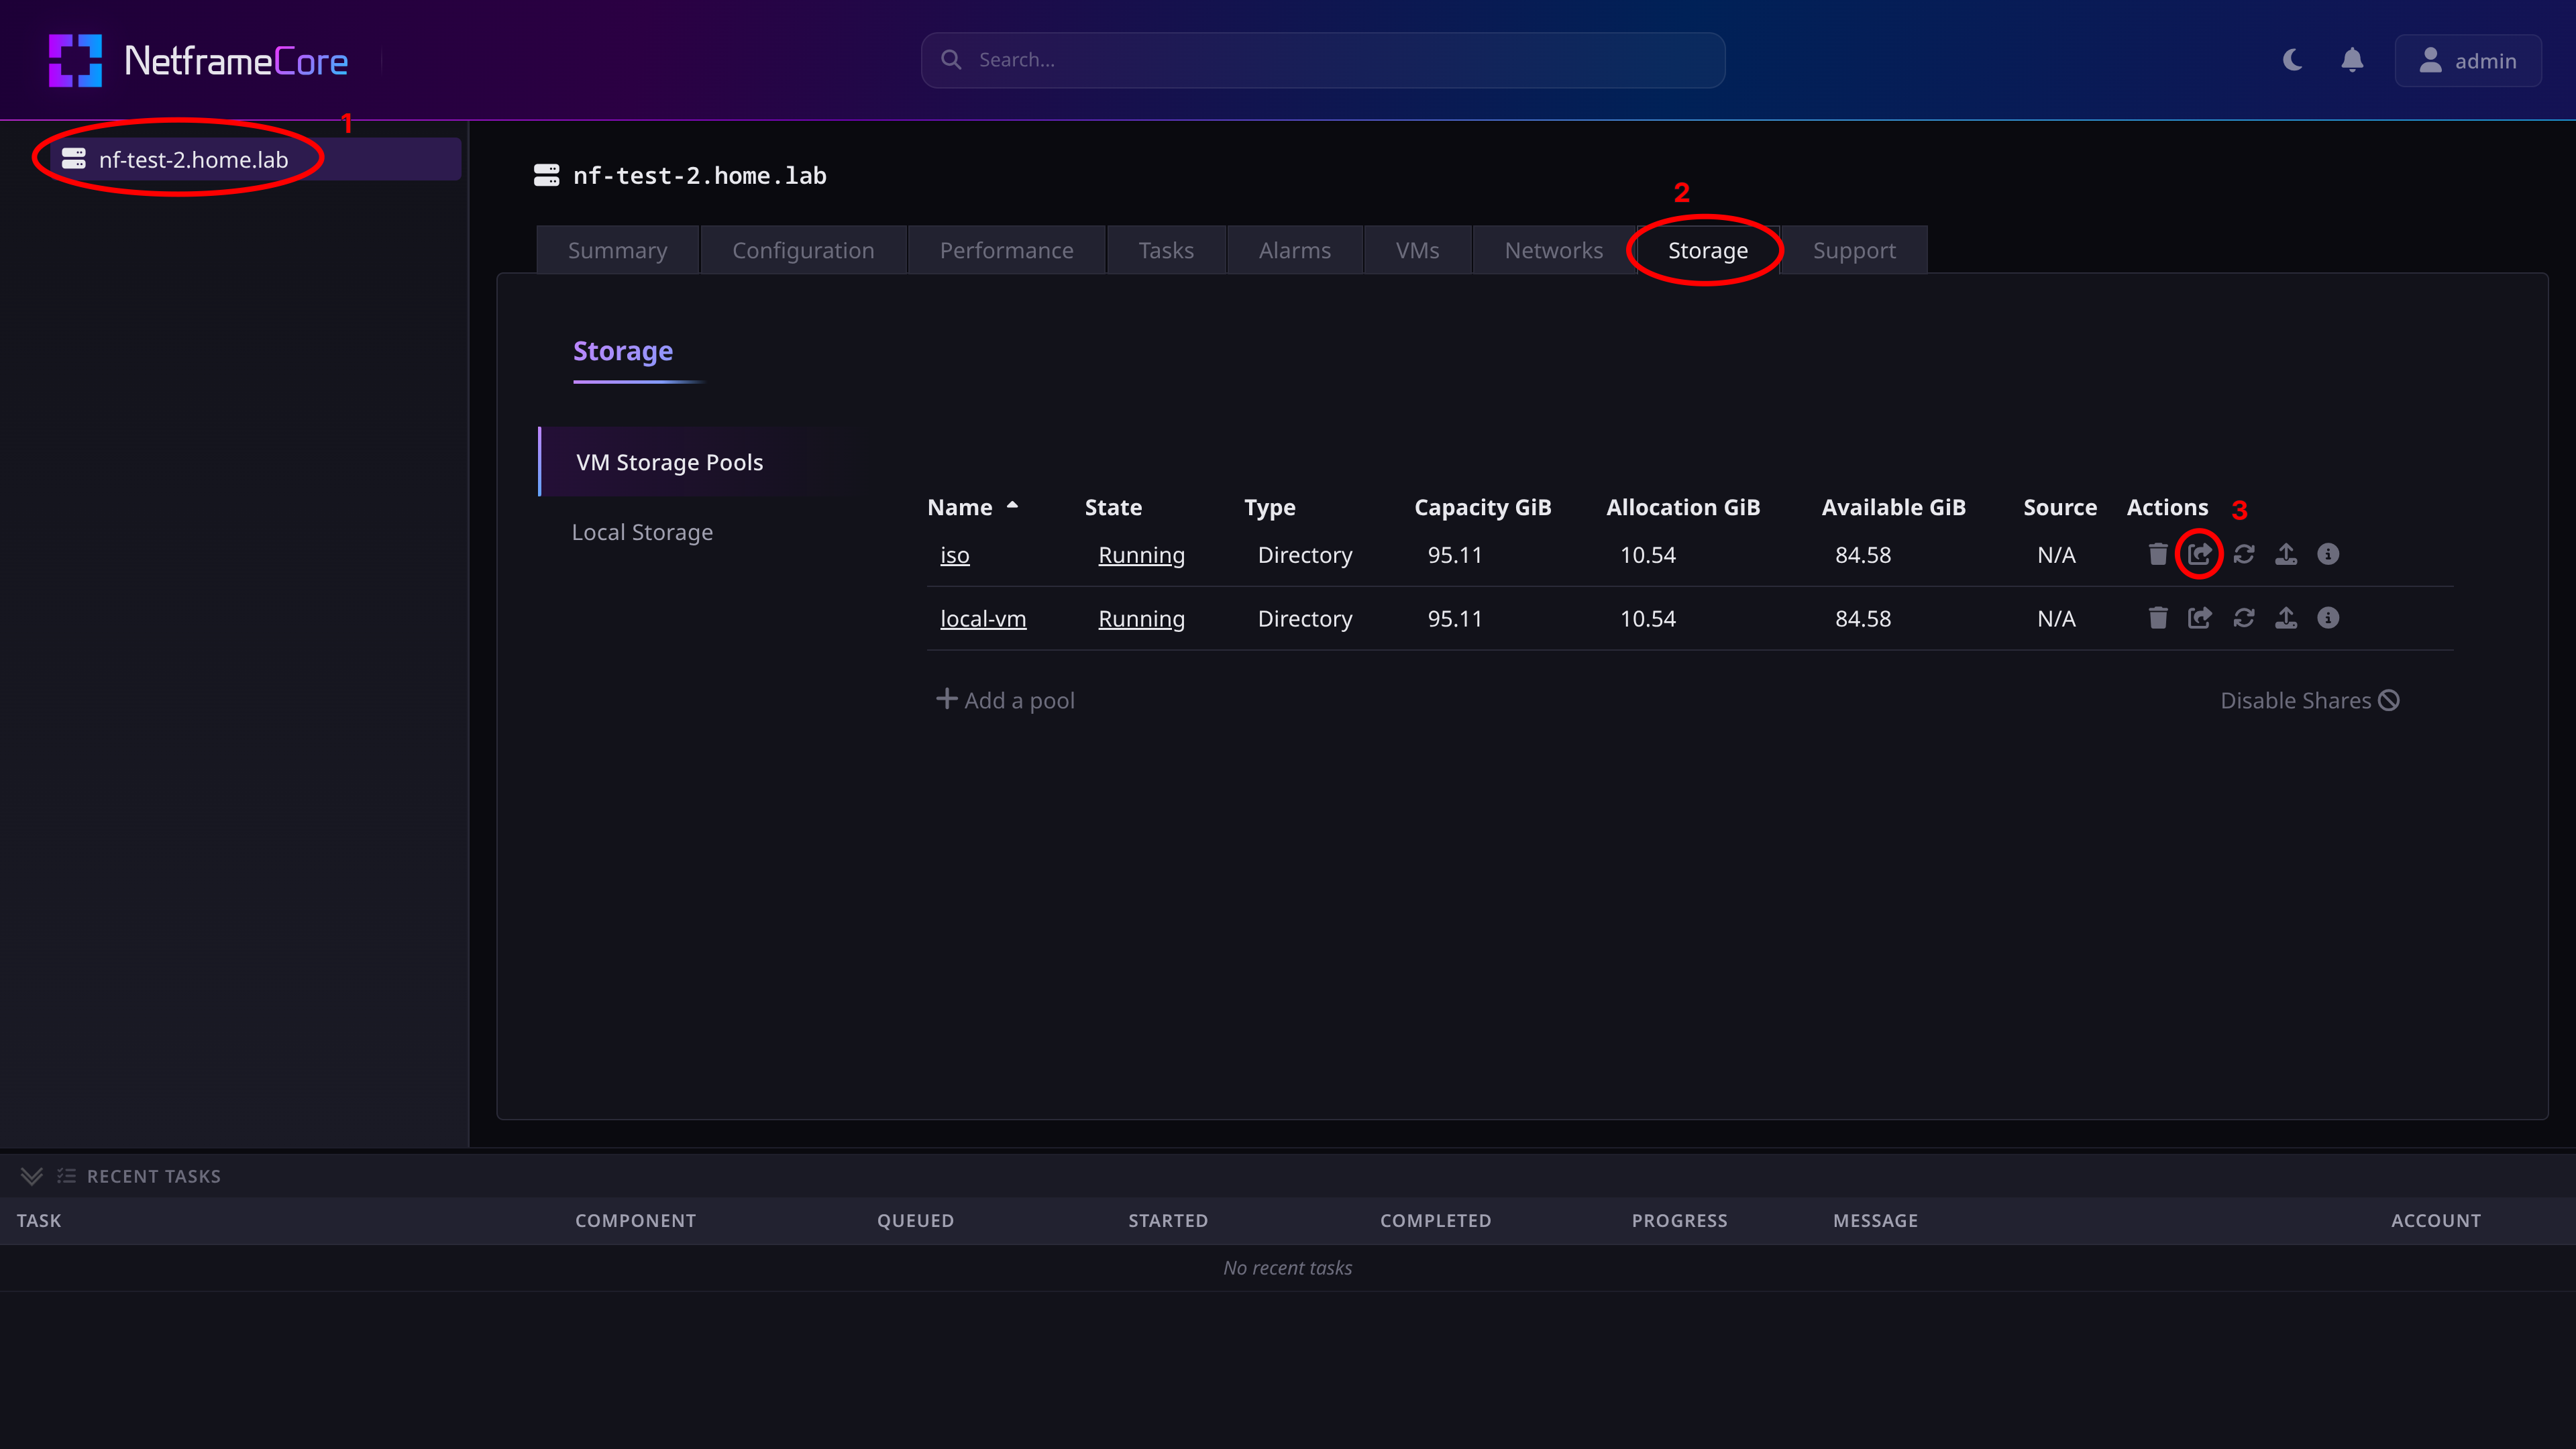
- Click on the Host object, and navigate to the Storage tab
- The Host object's name will be the same as the address you used to access Netframe in your browser (without the
https://)
- The Host object's name will be the same as the address you used to access Netframe in your browser (without the
- Find the VM Storage Pool called
iso, and click the share button - In the popup dialogue, enter a password of your choosing and press Confirm
- This password does not need to be the same as your Netframe password
This will create an SMB/samba server that you can upload files to directly.
Now outside of Netframe:
- Open your computer's file explorer, and add a new network location
- Windows: Go to This PC, right-click, and select “Add network location"
- Ubuntu/Gnome: Click the “Other Locations” tab
- When prompted, enter the server address as
smb://<netframe host's name>- The hostname you enter will be the same as the one you clicked in the Netframe GUI
- In the case of the above image for example, the server address should be
smb://192.168.0.207
- After connecting, you will be able to see the iso directory
- Opening the directory will prompt you to input your authentication details
- Connect as a “registered user”, with username
nfadminand the password that you chose after pressing the Share button in Netframe - You can keep the default domain
- Connect as a “registered user”, with username
- After successfully connecting, you can now copy your local iso file/s from your computer into the shared iso directory
Alternatively, you can upload files via ssh using
scp. The destination directory will be/nfpool/pools/iso.
Once the file has finished copying, you can confirm that it worked in Netframe by clicking on the iso storage pool's name, which will list its contents.
¶ Deploy the VM!
To deploy a new VM:
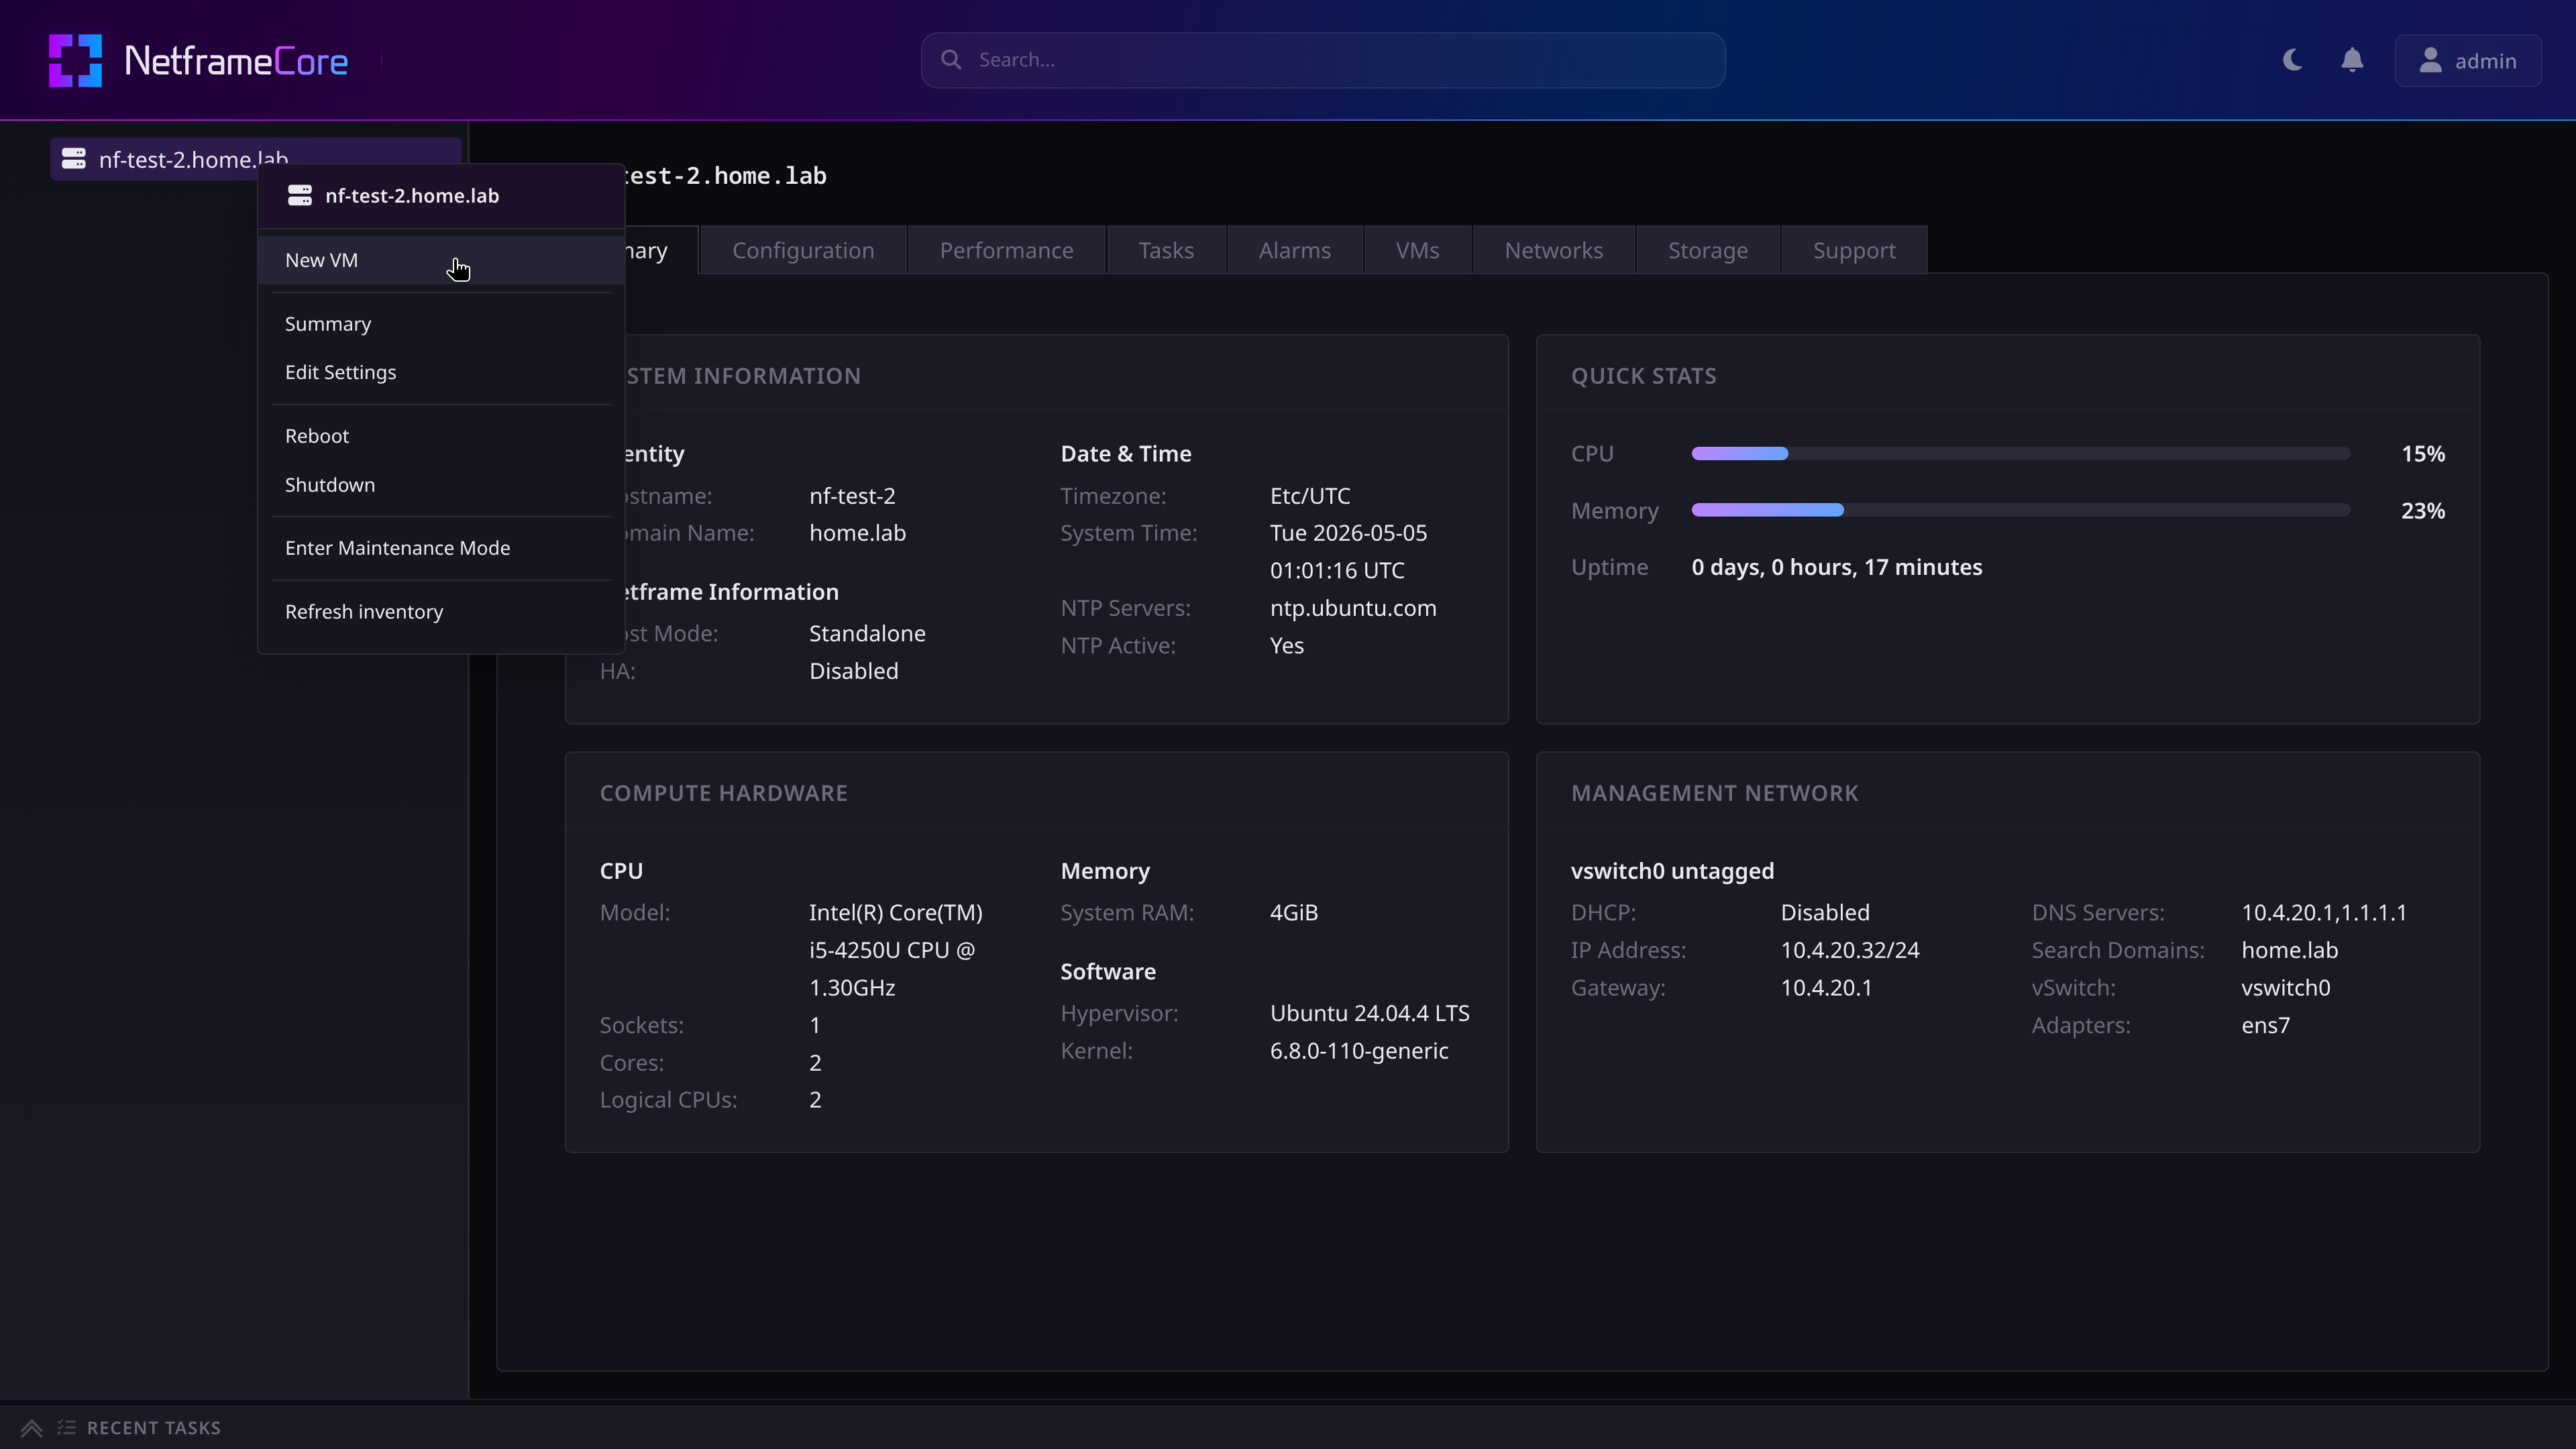
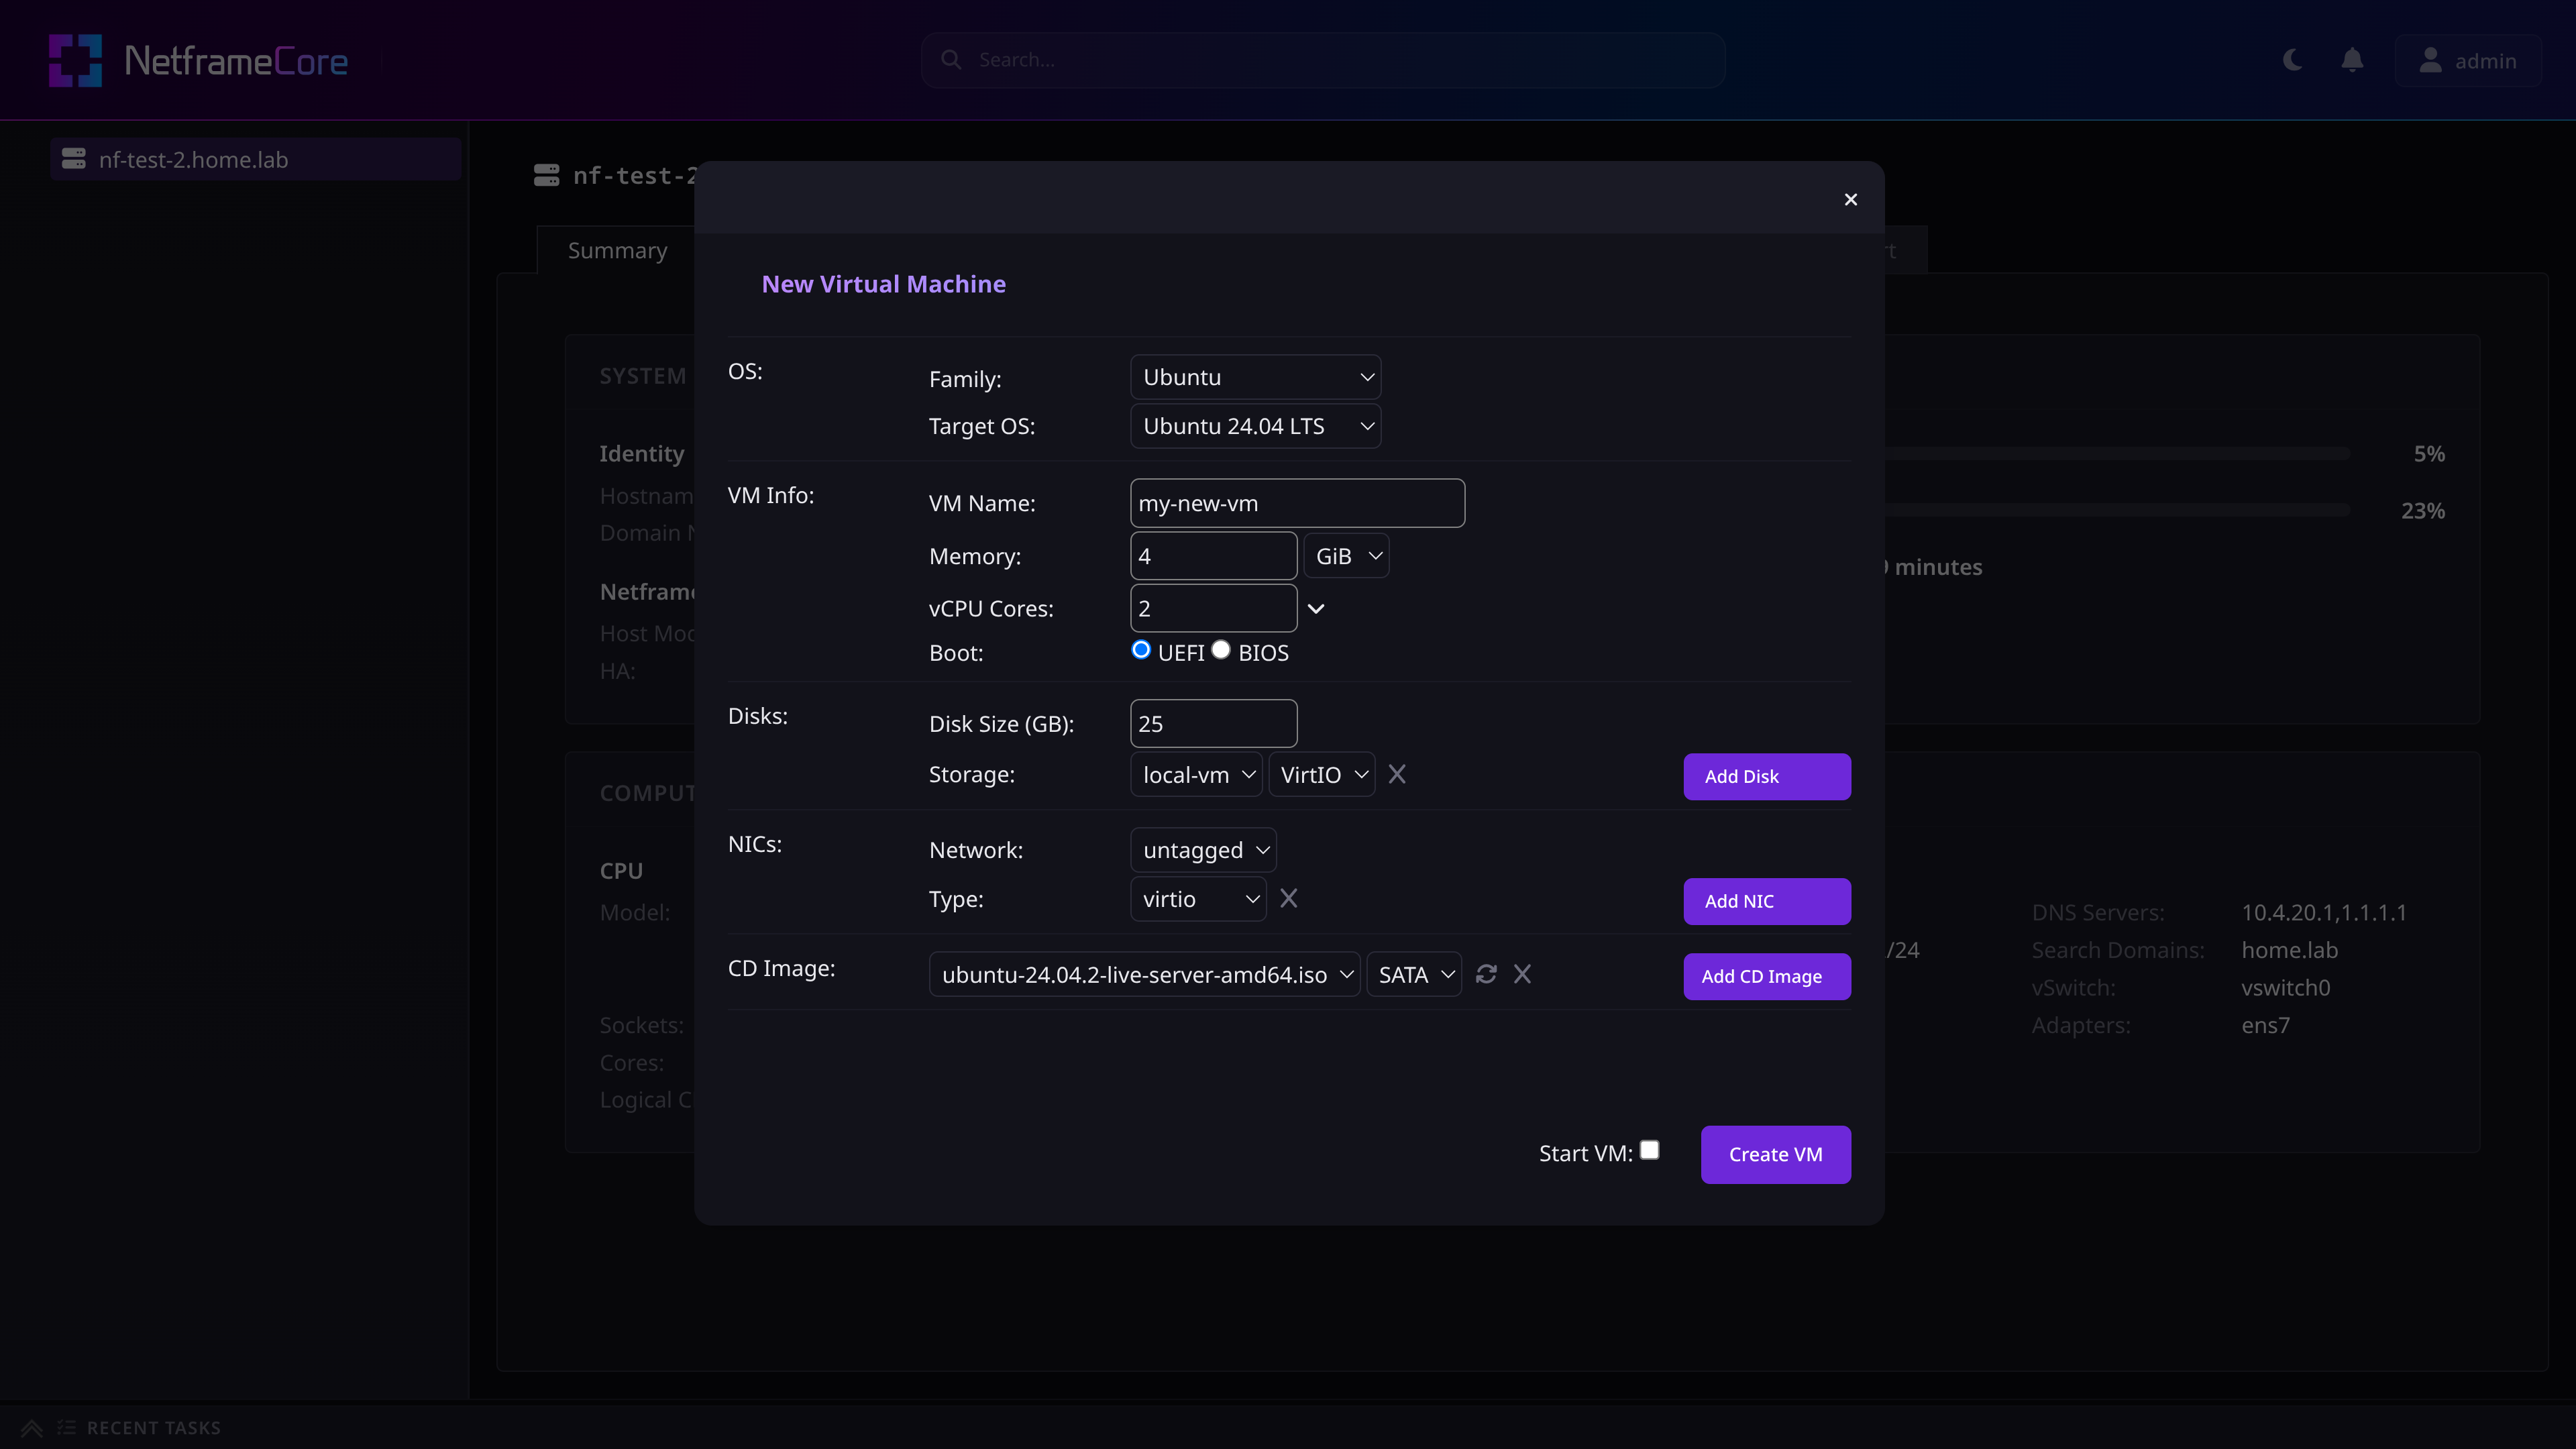
- Right-click the Host object, and select “New VM” from the context menu
- Enter the details of the OS you intend to install
- IMPORTANT: If you are planning to create a Windows VM, make sure you say so here. Windows VMs require some special handling that this enables
- If you are using a Linux distro not listed under “other”, you can set this to
other→Unknown→Unknown
- Name your VM, and choose how much memory and CPU cores you wish to allocate
- Be careful to not allocate more memory than your Host system has, as this can cause issues
- Leave the Boot option as UEFI
- Press the “Add Disk”, “Add NIC”, and “Add CD Image” buttons
- Set how much storage to allocate the VM under “Disk Size”
- Be careful to not allocate more storage than your Host system has
- Set the storage volume to
local-vm, and leave the storage type as the default option
- Set the network as
untagged- Leave the network type as the default option
- Under CD Image, select the iso file you uploaded earlier
- Leave the connection type as the default option
The new VM's finished configuration should look similar to the following:
After pressing “Create VM”, you should see your new VM in the navigation bar. Right-click it, and select “Power On” from the context menu.
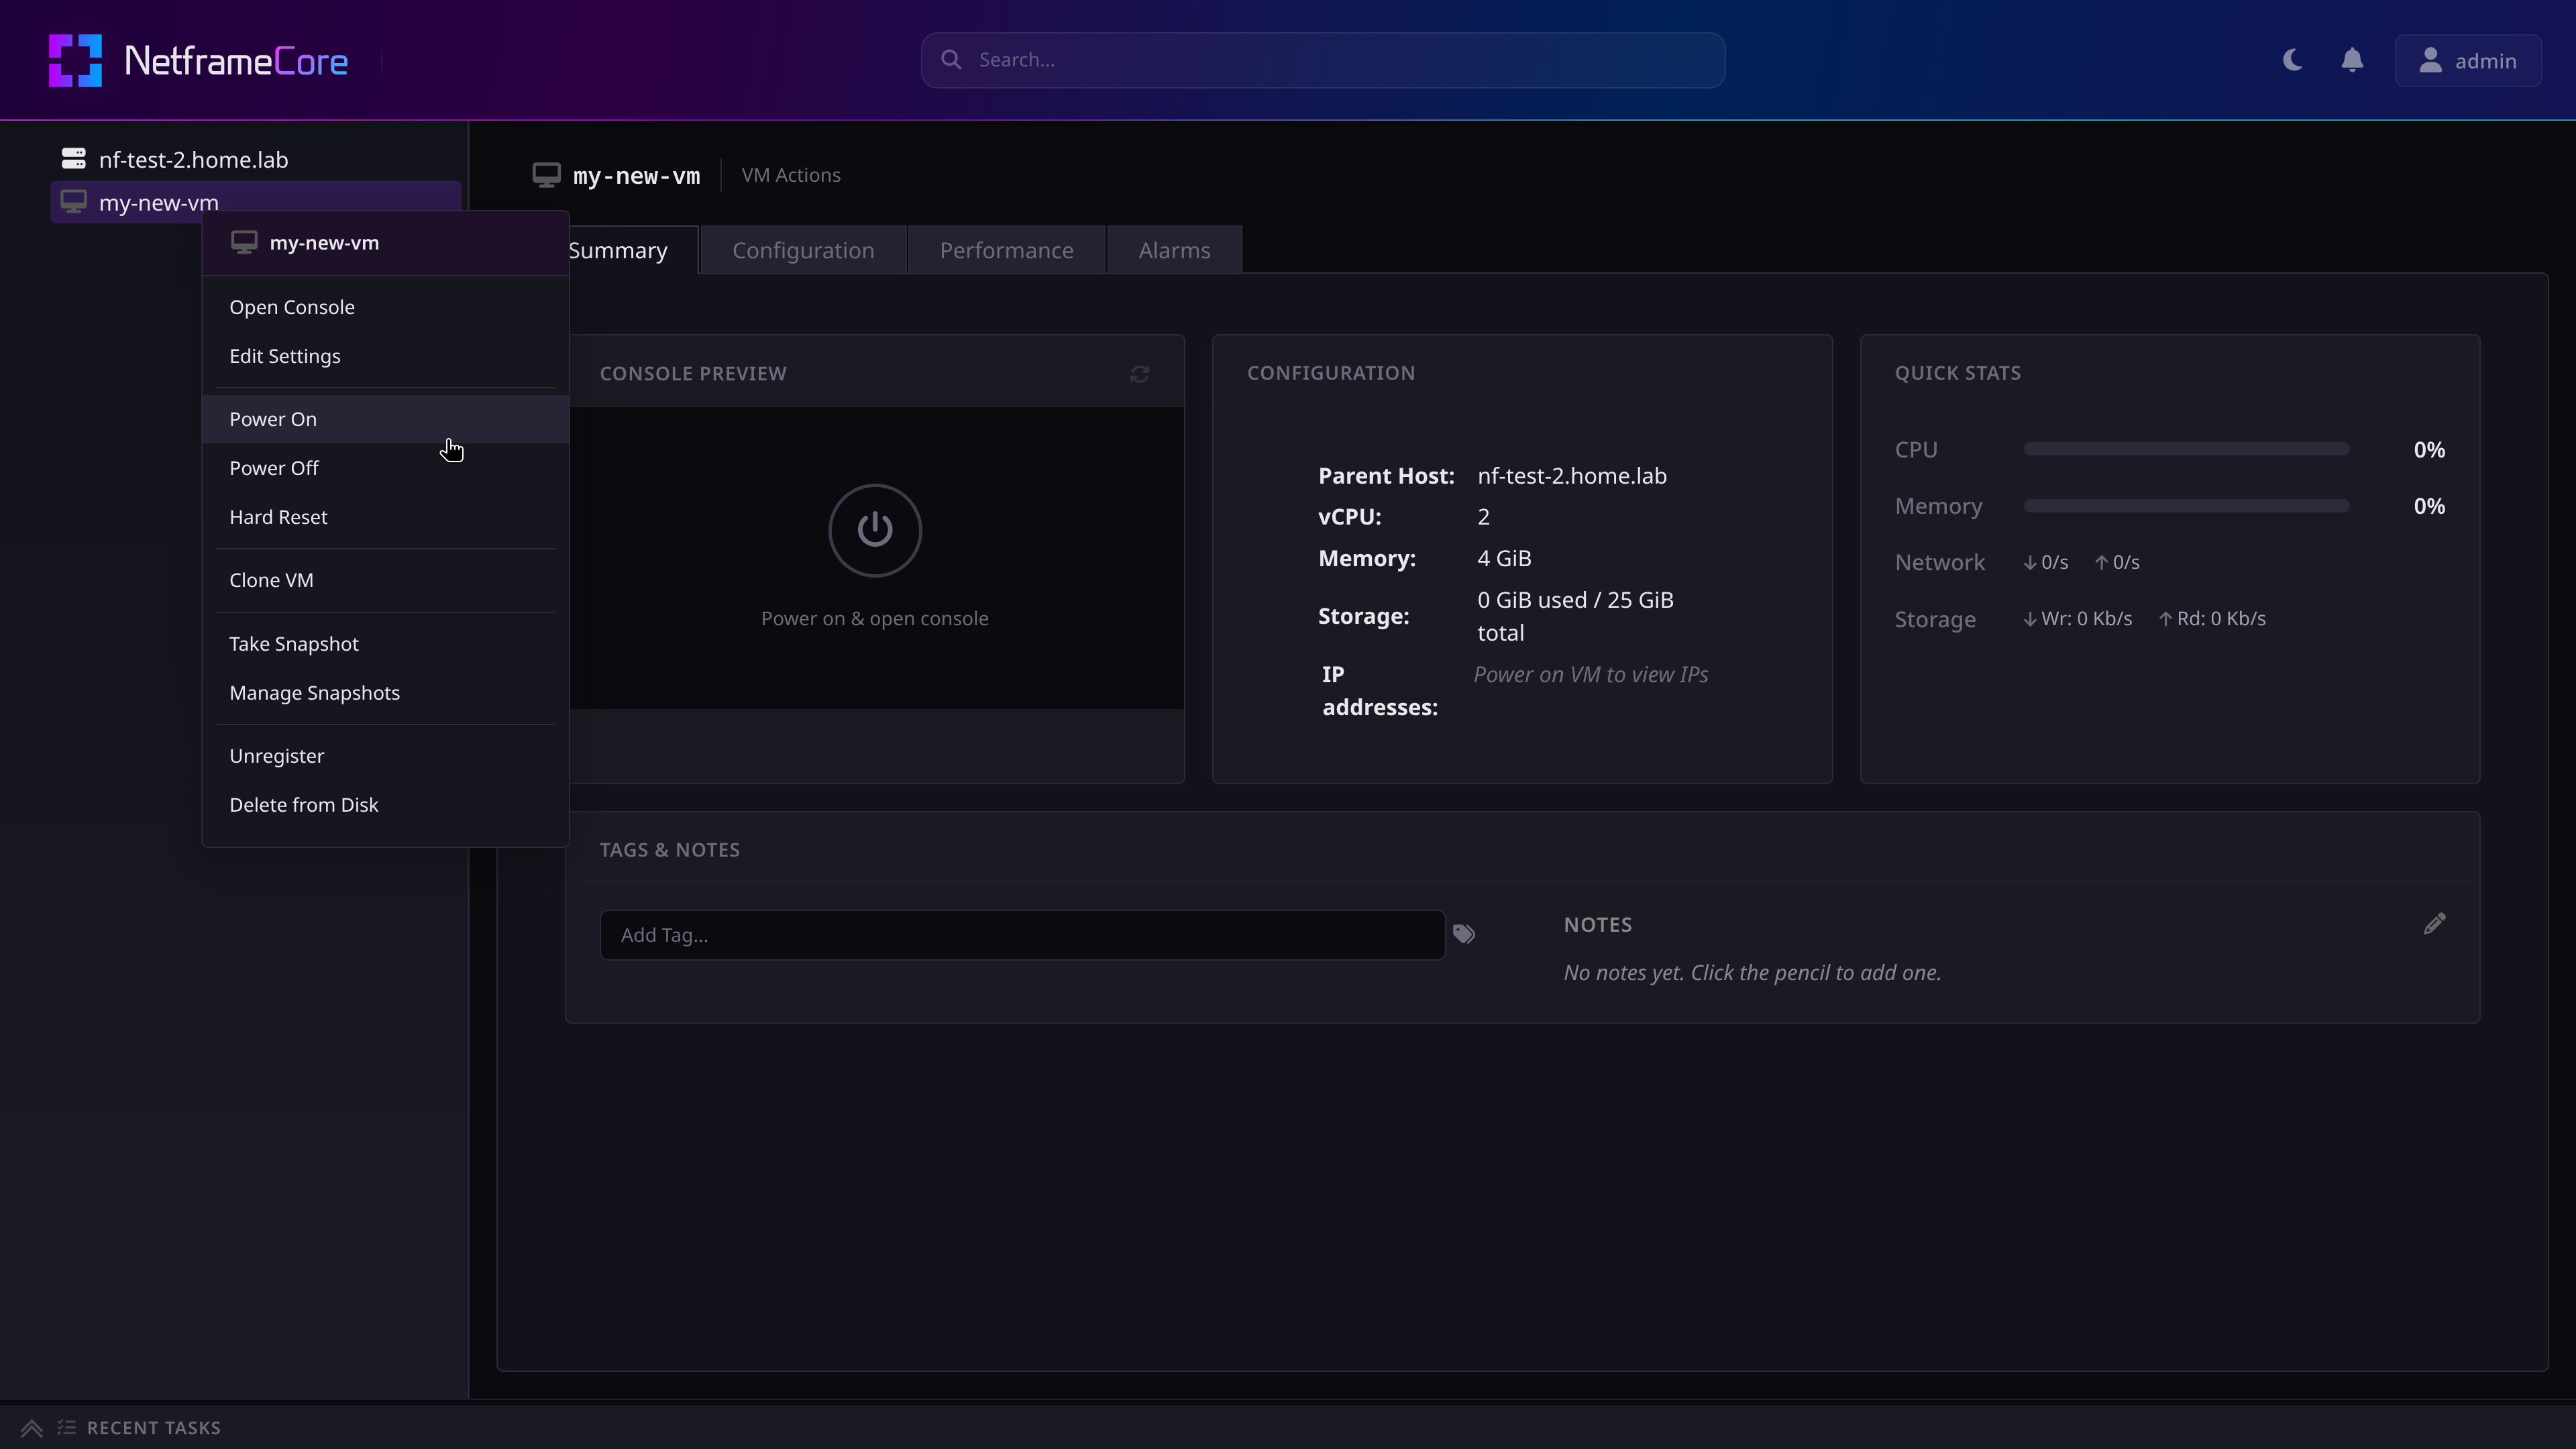
The VM's icon should now turn green, and there will be an image reflecting the VM console's current contents. Clicking on the image will open the console in a new window.
image widget
You can now proceed to install the OS on your VM as you would on a physical computer.
Congratulations! You have just deployed your first VM.
¶ Recommended Next Steps
After deploying your VM and installing its OS, we recommend that you perform the following actions:
- Give your Netframe Host a static IP address, which will make it easier to access long term
- Deploy Netframe Manager to manage your Netframe Core infrastructure.
- Install the guest agent tool on your VM to allow the Host to communicate with it and receive IP information, metrics, and metadata